


Do you think of egg crates as useless junk that only a hoarder would save? Surprisingly enough, both Styrofoam and cardboard versions can be of immense value to preppers.
While you may not need to store away thousands of egg crates, they should definitely be part of your stockpile. You can also use them now as you test out different parts of your survival plans rather than buy more expensive items that are usually marketed for certain purposes.
Why Sterilizing Egg Crates?
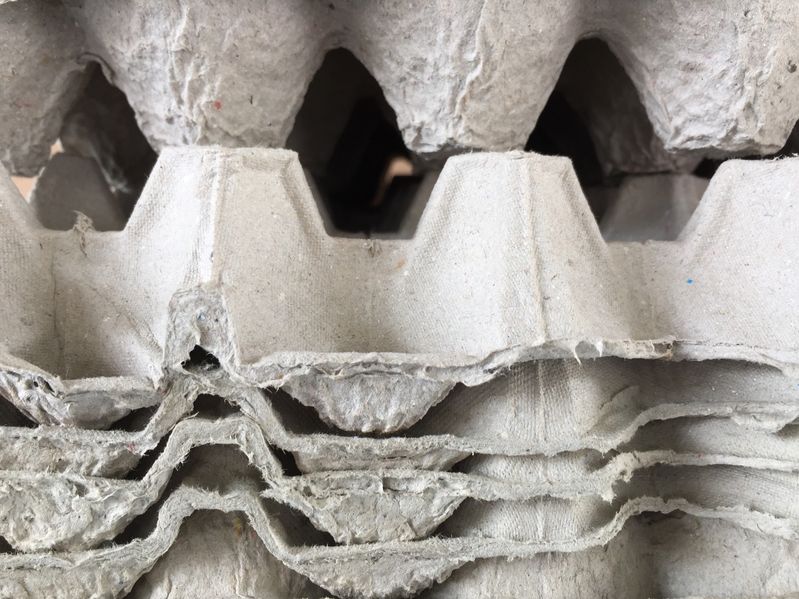
Before you set egg crates away in your stockpile, make sure that you only keep ones that are already as clean as possible. Do not use crates that show signs of dirt, fluid from cracked eggs, or moisture that leaves a ring around the bottom of the carton. Each of these issues can spell an increased risk for coming into contact with salmonella and several other dangerous bacteria.
Once you have a set of what appear to be clean egg crates, your next step should be to sterilize them. Since commercial eggs in the United States are notorious for carrying salmonella and other diseases, you need to sterilize the crates before using them.
Here are some methods you can try:
- quickly dip the tray (use this for cardboard only, NOT Styrofoam) into bleach and then hang it up to dry. When the smell of bleach is gone, then you know it is no longer active. For Styrofoam, use a weak solution of bleach and wipe down the trays with a very small amount, then let them air dry. Never use full strength bleach or other solvents directly on Styrofoam, or it can result in melting, or worse.
- Try using hot (near boiling) water and soap to clean styrofoam egg crates.
- In small amounts, can also burn cardboard egg crates and then add the ashes to the compost pile.
- It should be noted that, unlike water (which offers no place for germs to hide), egg crates cannot be sterilized by placing them in the sunlight. This includes Styrofoam crates, since they will more than likely melt in the temperatures required to kill off bacteria commonly found in egg crates.
1. Seed Starting
 Styrofoam and cardboard egg crates can both be used as seed starting trays, just make sure that they are clean and dry before planting.
To prepare each cell in the egg crate, punch one or two holes in the bottom so that water can escape.
Since Styrofoam tends to insulate better than cardboard, it may work better during colder months.
Usually, you will add just one seed to each cell. If the seeds tend to be poor germinators or the species is known to produce poor seedlings, then you may want to plant as many as 4 seeds to each tray.
Just remember that you will have to thin the seedlings to one per cup in order to avoid overcrowding. Alternatively, you can use thin cardboard strips or hard plastic to make a four mini-cells that will make separating the plants a bit easier later on.
When soil, time, and/or seeds are at a premium, this solution requires some extra work, but may still be well worth exploring.
Egg crates make even better seed starting trays when you add an egg shell to each cell. Without the egg shell, you would have to pull the cardboard or Styrofoam away from the soil before planting. When you use eggshells, all you need to do is crack the shell a bit and set it and the seedling into the ground. As the roots grow, they will get extra calcium from the shell, and also some protection from burrowing insects that will get cut apart by the sharp edges of the shells.
2. Mini-buoys
If you plan to fish, monitor pond or river water levels, or keep track of nets and fish traps, then you will always need buoys to help mark locations. Styrofoam egg crates offer a perfect way to make inexpensive buoys that can be used for this and other purposes. To use the egg crates as mini-buoys:
- Start by cutting each cell away from the others. In a dozen egg crate, you should have 12 cells when you are done. If you happen to have two Styrofoam egg crates, then you can also use the tops for larger buoys.
- Poke one hole in the bottom of each cell. The hole should only be large enough to allow the string or rope to pass through. (if you are planning to make larger buoys, you can poke holes in the sides of lid if those orientations will work better for your needs.
- Run the string or other material through the two cells so that the open end of each cell faces the other cell. (For making larger buoys with the cover of the egg crates, the open ends would still be facing each other.)
- Position the two cells so that they will be where you want them on the string or net.
- Use pine pitch or some other glue to seal the two halves together, and then make sure that the area around the strings is also sealed. This should keep the buoy in the desired location and also prevent it from becoming water logged.
3. Compost
Since cardboard egg crates come from trees, they are the perfect organic material addition to the compost pile. To use them for this purpose, tear them up into small pieces and mix them in with other contents of the pile. Try not to put inked outer casings into the compost pile as these dyes can be toxic.
Most people do not sterilize egg cartons before adding them to the compost pile. Even though you will not be using these egg crates directly for food or raising food, it is my contention they should still be sterilized so that you do not risk contaminating your compost pile with dangerous bacteria.
Remember that bacteria arriving on the crates from commercial farms have already been exposed to many kinds of antibiotics. As such, they may well survive in places where you would not expect them to, such as in your compost pile and garden. This is especially important if you are planning to grow raw edibles such as spinach, lettuce, or anything else that will not be well cooked before consumption.
4. Nesting and Shelter for Edible Insects
In many parts of the world edible insects are considered as much a delicacy as they are staple food filled with important nutrients. When you are stuck in one room, or you must rely on prolific, compact food sources, edible insects may wind up on your survival menu.
Unfortunately, if you were thinking about hunting for edible insects on an “as needed” basis, you could wind up getting very sick because of all the pesticides and toxins that may be found in them. Even if you are in the woods or other natural settings, normally edible insects may be contaminated with poisons. Growing your own insects for survival is practical, and can also help you improve your health while lowering your food bills well before a major food shortage occurs.
Crickets and many other edible insects can be housed in cardboard egg crates, or used as food for them. For example, even one egg crate can sustain several hundred crickets, and offer plenty of nutrient rich food. Since you will be consuming the insects, remember to avoid using the dyed or inked parts of the crates. These chemicals can easily build up in an insect’s body just as easily as pesticides and other toxins.
5. Fire Starters
You can pack just about anything into cardboard egg creates to make fire starters that will work in most situations. In general, you should choose materials that will act as tinder and last long enough to dry out secondary tinder materials before igniting them.
Video first seen on Loon Island Outdoors.
After separating the cells, consider the following packing materials:
- cotton balls soaked in Vaseline
- a tea light surrounded by appropriate tinder material (remove the tea light from the metal shell)
- tinder cloth that will be ignited using a mirror or other means
- drier lint soaked in wax (for this one, leave the carton intact until you have filled each cell.)
- sawdust saturated in wax
- instead of using wax, you can also try using vegetable shortening or animal fat.
6. Candle Molds
If you decide to use egg crates as candle molds, you will produce a candle that is about twice the size of a regular tea light. It is best to use Styrofoam egg crates for this purpose because there is less chance of the wax absorbing into the pores of the mold. Since Styrofoam may be melted by hot wax, you should position the wick, and then repeatedly fill and pour out the wax until the mold is filled.
As with other DIY candle molds, you should also put a hole in the bottom of each egg crate cell and then allow the “bottom” of the cell to be the top of the candle. This method also gives you a narrower top and wider base, which reduces the risk of the candle tipping over as it burns.
7. Sort and Store Small Objects
There are literally hundreds of ways to use egg crates to sort and store small objects. You can arrange the trays in platforms and label each cell, or simply spread them out to suit your needs. Depending on the size of the items, you may be able to simply close the lid and store the box away until you need the items in it. If the items inside are very small, you will have to seal off each cell so that they do not got jumbled up again when the box is shaken or moved. To seal off the cells, attach clear plastic to the edges of each cell using tape or glue.
8. Ice Cube Trays
Styrofoam trays make good sized ice cubes that can be used for many purposes other than adding to drinks. For example, if you do not have a freezer, simply add some ice to the salt in a chest and then bury anything that needs to be remain frozen in the mixture. Make sure that all items placed in the chest are double wrapped so there is no risk of contamination.
9. Packing Material
You can use egg crates in the bottom and sides of boxes to take up extra space, or cut up the cells to create more shock absorbers within the box. Remember that even though you may not be packing away food supplies or other sensitive items, it is still best to sterilize the crates before use. You could also seal the objects in airtight plastic so that you can avoid bacterial contamination as much as possible.
10. Yarn Organizers
When it comes to durable, stylish, comfortable clothing, garments made from yarn are some of the best you can find. In a similar way, rugs, wall hangings that act as insulators, blankets, and many other staples are best made from yarn. No matter whether you are in a crisis situation or not, there is always a desire to create patterns using multi-colored yarns or multiple strands to produce different textures and patterns.
As someone that has spent many hours weaving, knitting, crocheting, and braiding, I can tell you that keeping yarn organized can be a difficult task. Egg crates are ideal for this purpose because you can easily keep up to twelve strands of yarn sorted out using just one carton.
All you need to do is poke holes in the bottom of each cell in the egg crate. Do not separate the cells. Next, position the ball or skein of yarn so that the yarn feeds into the cup part of each cell. Use one strand of yarn per cell. Now all you have to do is start working on your project. The egg crate will keep the strands sorted out so that they do not get knotted up.
More than a few people feel that egg crates can only be used for disposable craft products or other projects that have little tangible survival. Others only see egg crates as a disease vector that should be discarded as quickly as possible.
Even if you do not want to use egg crates for prepping at this time, keep the suggestions listed in this article in mind. You will know a little bit about how to reduce the risk of having problems with them, and how best to use them.
Do you know other uses for egg crates? Share them into comment section below!

This article has been written by Carmela Tyrell for Survivopedia.


 SVP POP UP Desktop (931 x 476 px)")
How would you make ice cubes if you don’t have a freezer?
I believe the comment was misleading. This is what I figure,was meant by the no freezer suggestion. If you don’t have a freezer and need to keep something frozen. Then add salt to the cooler, and add the frozen item. Which in turn will keep it frozen. Providing there’s plenty of ice and salt. I could be wrong. But that was my understanding of what I read. Hope this clears it up for you, Cindy
Ron – yes – this is what I meant. You can use the egg crates to make smaller cubes that can be arranged more easily.
Thanks.
Burning polystyrene is supposed to produce toxic fumes.
http://www.ehow.com/info_8313527_dangers-accidentally-burning-styrofoam.html
I use egg cartons for to store my earrings, of which I have at least 100 pairs. Styrofoam cartons are best for this, since they don’t have openings in the bottoms for small parts to fall through (I don’t know if all cardboard cartons have holes in the sides near the bottom, but the ones I have do). Since I’m allergic to egg whites and can’t eat them, I had no cartons, so I asked fellow freecyclers for them. I got plenty.
I have made fire starter mini logs out of the cardboard toilet roll centers. I don’t throw any cooking oil away or fat drippings. I drip it over old newspapers and when soaked, I stuff the paper inside the cardboard rolls. The next step is to make two holes on both ends of the roll and then thread a small length of string through the holes and tie. This works as a wick on both ends and keeps the newspaper from falling out of the fire log.
cardboard style egg cartons make some great sinker molds for fishing. Set the carton on the ground, melt the lead and pour it in, before it hardens place a loop of wire held with pliers into the hot lead and hold until it starts to harden. The amount of lead determines the size of sinker. Will make many sinkers before burning up.
I used to use a piece of what’s called ripple iron ( 1/2″ corrugated iron ) used inside old buildings ( ceilings ) as a sinker mold & paper clips cut in 1/2 with the legs bent a little so they stay put . also tea spoons are good ( who doesn’t have a few spare ) of them in the draw
I have made the fire startes using dryer lint and wax. Fill the cup with lint and add melted wax. These light easy and testing has shown the flame to last for over ten minutes. I try to make these in a batch filling at least 6 – 18 count cartons at a time.