


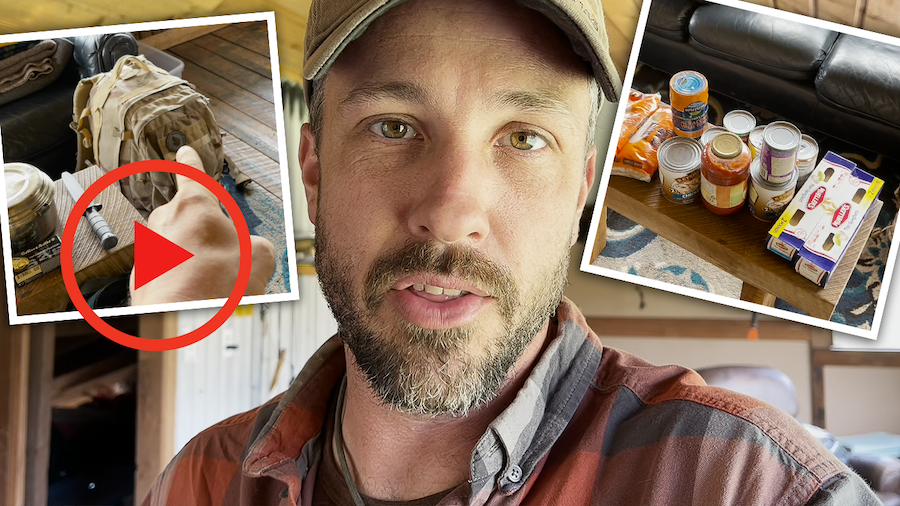
In this video, you’ll meet our new video contributor, Jason Salyer. Jason has years of experience as a professional strength and conditioning coach, working with everyone from college athletes to Naval Special Operations. He’s also an avid camper, hunter, fisherman, and general outdoorsman. If that isn’t enough, he also frequently heads out for long-distance dual-sport motorcycle trips, where his improvisation and survival skills are honed.
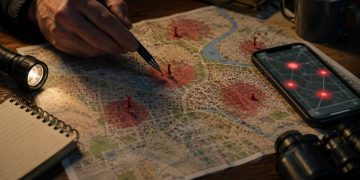
We’ve shared other content that talks about layering your everyday carry gear, but in this video, Jason discusses the importance of having other supplies spread out over multiple locations. While having equipment and provisions spread out over your property is a great idea, storing something off-site is a great way to ensure you’ll have something to fall back on if disaster strikes.
Here he covers everything from survival equipment to clothing and offers some suggestions for what to pack and how to pack it. If a disaster struck and your property was totally destroyed, a cache like this could make a huge difference. After you watch the video, let us know what you think about this style of layering your supplies across multiple locations.


I really don’t have a comment right now. But want to keep up to date.
If you have them you might consider taking what I call wet-boots with tops that are up to mid calf area. They will allow you to walk in shallow water, or possibly even snow, if you have to bogie out in winter. Another useful item is similar to a chain saw’s chain, but has grips of some sort that are on either end of this chain. It doesn’t take up much space and you might want a slightly bigger branch than the kids bring back. You likely will make a fire, but don’t make it too large so as to bring in too many people, unless you don’t mind sharing your food (they might not have planned as well as you). The saw can be used to cut branches that can be split with a good knife. There are a number of items that are common items to get a fire started with just a spark. The easiest one to bring along is some OOO or OOOO steel wool. (I have some that is 20 years old in a baggie that will still light up.) Just pull off a small amount and fluff it up a little. Others items could be a small amount of chap stick, or Vaseline (Petroleum Jelly).
To make a near smokeless fire pit… Find a flat-ish stone, or use a non-flammable material, which is set up at the head of the fire in a vertical position. Next use smaller stones stacked up much shorter than the head-stone. If you think of the fire pit as a clock with the head stone at 12:00, then leave a small gap at 3:00 and 9:00, but cover the gaps with a longer stone on layer 2 or 3 and above, if the pit is to be that high. Leave the 6:00 area clear of stones, but not too large of a gap. What this does is makes the fire draw oxygen through the low gaps and the 6:00 opening, which forces the fire to burn towards the headstone. The more complete the burn, the less smoke you should have. I suggest that such a fire would be best not to be burning at night unless you don’t mind company. At the end of the fire burn there should be coals of the larger pieces of wood. Gather these into a corner of the pit together and lightly cover them with some of the remaining ash. If done right, you should be able to restart the fire the next morning using the coals that remained hot enough during the night, hopefully.
Jason, this video you did on how & what to store in a “ cashe “ was very informative. You didn’t mention how big a family you were prepping for! I thought that you were very considerate for thinking of your buddy & his family as well as your own by having supplies ready to be utilized at a moment’s notice!
Would like to know what you put in your “truck bug out pack”? Thanks.
At 82 I hope I know what to have ready, but sure I’ve forgotten much. I noted there
was no dental floss, tooth brushes or paste. A sharp knife, twig and thread will work.,
if needed.
Having items stored outside and away from the house in separate places was some-
thing I hadn’t considered.
Pretty good for your first video.
I really liked your idea of having multiple caches and burying a duplication of items to survive. The hard part is to remember exactly where you hid the items. If I might add a small suggestion to this idea…Bury the cache under a live tree if possible. If you can spare a metal soup spoon to dig with, the dig will go faster. Once the items are ready to bury (but not too deep as you likely have to re-open the hole eventually) tie a piece of 550 parachute cord to the treasure and then add the dirt slowly to cover the hole. Hold the cord with a little tension above as you fill the hole in with dirt to help you relocate the treasure. Be sure to coil a foot or so of the cord and place it just below the surface with the spoon. This will help to relocate exactly where you need to dig. If you have excess dirt create a small mound over your treasure as the dirt to the cache should compact some over time. Toss the remaining dirt out of sight and maybe place a stone over this location. Spread something like leaves or needles to cover your dig spot. You don’t want to be digging later in the wrong spot that might be a foot away, or just even inches away. When you return to do the actual digging, all you need do is remove the top surface of the area you suspect is correct and locate the buried cord and spoon again. If you don’t find it quickly, then widen your search area until you find the cord. Try to avoid anything in the cache that might have a potential odor as an animal might smell it and want to see what is buried. This is not a foolproof way to bury something, but it should help.
Your emergency bag should have a plastic whistle, not metal. (Sometimes people wander too far from camp and need to be found. A whistle saves lungs, uses less energy, and the sound carries farther.) If the weather gets really cold a metal whistle could freeze to your lips.
Emergency space blankets are light weight and wind proof. They use your body heat and reflect it back to you to help keep you warm. They once cost a couple of bucks, but now days with inflation…Yet, isn’t a life worth a good deal more?
Have a good solid-blade knife that is sharp and has a sheath.
These are only suggestions, not intended to do anything else. To survive is the only goal I want to provide. I’m sure everyone has some great helpful hints/tips.
I found that if you think of every scenario, you start layering automatically.
Medical supplies. I have a 30 day supply of extra meds i take daily in my bug out bags. I rotate them each time i get a refill. Other medical supplies for emergencies are a goid idea also. I even keep a suture kit and alcohol in case someone needs sewn up.