


The only thing worse than being cold is being WET and cold. In a survival situation, getting wet can literally kill you because the water acts as a coolant that lets the cold seep right through your clothes and decrease your body temperature. Your clothes won’t hold your body heat in; instead, the water will carry it out.
You need to find a way to waterproof your clothes and shoes, and that’s what we’re going to talk about today.
You can always go out and buy waterproofing products but we figured we’d skip recommending any of those for three reasons: first, you’re not going to be able to run to Wal-Mart if you’re stuck in a SHTF scenario. Second, they’re full of chemicals and frankly aren’t always as effective as just making it yourself at home.
Finally, many of them are crazy expensive. We can think of about 100 better ways to spend money.
We found several different methods using turpentine, mineral spirits and even used motor oil but we sidestepped those because of flammability issues and the smell. Since you may use these near a campfire or wear them in a situation where you’ll be exposed to heat, we thought it best not to make you a walking fire hazard!
How to Waterproof Your Clothes
This was the best recipe that we could find and when we tried it at home, it was extremely effective. Known as making tincloth, the result of this process is cloth that’s still flexible but is totally waterproof and even fireproof. It’s also pretty cheap considering how much you can coat with just one batch.
Also, this method seems like it’s going to last for quite a while because the fabric seems to be almost altered. Of course, that will likely depend upon how often you wash the item.
According to the instructions, it doesn’t matter much what ratio you use but it seems to us like if you use too much beeswax, the cloth would be cakey and crusty, whereas if you used more linseed oil, you’ll get less waterproofing but more flexibility.
The combo we used was perfect: no caking and absolute waterproofing, so start there if you’d like.
As an aside, we’re adding two more ingredients that are optional. Pine tar will help keep the beeswax flexible and will also help eliminate molding. Substituting some orange oil for the linseed oil will help it smell good. It’s up to you.
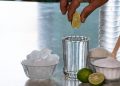
Ingredients:
- 1 lb beeswax – don’t get food grade because it’ll cost you much more. Get the beekeeper’s quality or go to your local hardware store and buy the wax toilet rings – they’re pure beeswax, too and way cheap.
- 2 quarts linseed oil
- 1/2 cup 1 cup pine tar (optional)
- 1/2 cup orange oil (optional)
The pine tar may darken the appearance of the fabric, so just know that in advance.
Instructions
Heat the linseed oil and beeswax in an old stock pot over medium heat. You can also use a double broiler if you want. It’ll take a while for the beeswax to melt completely. If you’re using block beeswax, shave it into slivers to reduce your melting time exponentially.
Once the beeswax is melted, add the pine tar and orange oil if you’re using them. Stir to completely combine.
How to Waterproof Your Shoes
Though we’re listing tinclothing as a way to waterproof clothes, it works great on leather and canvas boots, tarps and backpacks, too. Start with a good quality, tightly woven cloth. Canvas-type material works great. If the weave is loose, the waterproofing won’t be able to close the gaps enough to ensure that you stay dry.
If you’re waterproofing cloth, just let the mixture cool a bit so that it doesn’t shrink your cloth then paint the directly onto the garment just until it’s saturated. Let it dry some then hit it with a heat gun or hairdryer to smooth in or remove any excess. Hang it up and let it dry for a couple of days. Feel free to use this on canvas that you’ll be using as a tent or to roll up your camping goods in; it’ll waterproof them wonderfully.
To waterproof your shoes with this mixture, just rub it directly onto your shoe until you get a good saturation then use the hairdryer to warm it up to get the excess. Make sure you get the seams. Allow to dry for a couple of days and voila! If the mix seems too waxy, add a bit more linseed oil. Some people also add turpentine or mineral spirits to promote drying but the smell will be harsh and you’ll be flammable, at least until it completely evaporates.
How to Waterproof Your Shoes with Beeswax
If the method above sounds a bit labor-intensive, you can always just use beeswax. Rub it onto your shoes then use a hair dryer to heat the wax so that it soaks into the fabric. Rub it in evenly and you’re done!
How to Make Bear Grease
We also have another method of waterproofing that makes use of animal fat. Since you’d typically throw away much of this, it’s a great way to get more use from different parts of animals and it’s an effective waterproofer, though you’ll need to use it frequently.
Bear grease (or bear oil as some folks prefer) has many uses. In addition to being a great natural waterproofer and conditioner for your leather, wood and gun steel, it’s also great to cook with, fry with and bake with. It makes great pastry dough and when it’s rendered properly, it’s pretty much flavorless.
If you’re not a hunter, you still have some options. Talk to local meat processors or hunters. They’re usually more than happy to give away the excess fat because then they don’t have to dispose of it. 10 or 15 pounds will last up to a year, even if you use it frequently.
Video first seen on Kathmandu
Tips for Successful Rendering of Bear Fat
Though this is an easy process that I’ve done a dozen times, I did mess it up a bit in the beginning because I wasn’t careful enough about getting all of the meat out, and I let it get a bit too hot. Fortunately, I experimented with small batches so I didn’t waste much, and I’d recommend that you do the same the first couple of times. Here’s what you do:
- Remove ALL the meat from the fat. Don’t even leave any little pieces because it will cause the fat to taste weird and it will go rancid faster.
- Cut the fat into little pieces because what you’re going to do is essentially melt it in order to separate the fat from the solids. When I say little, I mean TINY. Shred it. I use a cheese grater with cold fat. Otherwise, you’re going to be there for days instead of a couple of hours.
- Get your pan or pot very warm but not hot. You’re not cooking the fat – you just want to melt it, so medium to medium low is about right. At no time should it smoke because this will give it a really strong flavor. Use a heavy-bottomed pan or pot in order to distribute the heat evenly and avoid hot spots.
- Stir it frequently so that it doesn’t singe on the bottom.
There are three ways that you can render the fat: dry, partially wet or wet. There are advantages and disadvantages to both; dry rendering requires a bit more love and attention but if you wet-render, you have to get all of the water out or else your grease will go rancid faster.
Dry Rendering Bear Fat
Follow the directions above and just keep it hot until you’re left with grease and cracklings, with a few spare pieces of fat left. Strain it and you’re done! Stir it frequently. It may have a stronger flavor but this is how I like to do it.
Partially Wet Rendering
Just add a tiny bit of water to the bottom of your pan – 1/4 inch or so – just enough to protect the fat on the bottom of the skillet while it comes up to temp. It will evaporate out quickly, which is good. Stir frequently til you get to the point described above, strain and store.
Wet Rendering
Use 1 part water to one part fat. When your fat is rendered, strain it off the top of the water. You want to get as much of the water out as possible.
Regardless of how you render the fat, it’s best to can it or freeze it to preserve it for as long as possible.
To use it to waterproof your shoes or other items, simply rub it into the leather!
We hope that these methods for waterproofing your clothes and shoes helped. If you have any other ideas, please feel free to share them in the comments section below.

This article has been written by Theresa Crouse for Survivopedia.


How good or bad would using “Crisco” (solidified vegetable oil) work? It comes sealed with good shelf life and is useful for many other uses. Doesn’t cost very much either.
Vegetable oil and beeswax are NOT interchangeable! However, ‘toilet bowl rings’ are NOT beeswax today. Since the death of millions of beehives reduced the availability of wax, the toilet bowl rings have been made of petroleum which is SMELLY and OILY and not at all user friendly.
Paraffin would be much closer but isn’t flexible so it wouldn’t work either.
On the first recipe, you wrote 1/2 cup 1 cup pine tar, is it half, one or may be either way?