


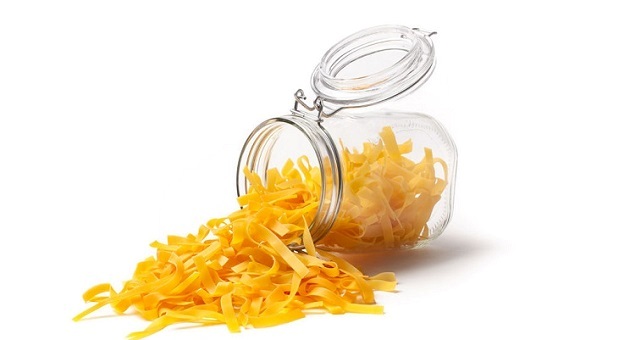
Wouldn’t it be great to just reach for a jar and know that all you had to do was add water, juice or broth and everything would be ready to cook?
Dry canning is also a good way to extend the life of some dehydrated foods and to keep your dried goods fresh and bug-free. I have some great tips and instructions to help you get started with your own dry canning projects.
What is Dry Canning?
Dry canning, also referred to as dry packing, has essentially the same purpose as traditional water bath canning: you want to extend the life of the food by storing it in sealed jars so that bacteria that can cause illness or spoilage can’t get in. Dry-canned foods can be good for 30 years or more as long as the seal remains intact.
The difference, as the name suggests, is that you’re not going to be using any type moisture; not in the food or in the process. In fact, the idea of dry canning is to keep moisture OUT. There are a couple of different methods that you can use to dry can your dried goods.
Note to Keep You from Drying Painfully
Yeah, the heading got your attention, didn’t it? Because we’re dealing with canning dried goods, we have to talk about botulism. I’ve talked about it in other articles, including my one on canning meat, but it bears repeating. Botulism spores thrive in high-moisture, low-salt, low-acid environments.
Any food with a pH lower than 4.6 is considered low-acid. This includes most vegetables, some fruits such as pears and bananas, and all meats. Drastically reducing the risk of botulism is one of the main reasons that most water traditional canning recipes call for adding lemon juice, vinegar, or citric acid to the food when you can it.
Dehydrating is a good way to preserve low-acid foods too. The key to doing it safely is to dry it until it has less than 10 percent moisture; a good rule of thumb is that the food snaps in half when it’s done. Grains will be hard and unable to bite.
Dry Canning Using Oxygen Absorbers
This is the preferred method for a lot of preppers because it’s easy and it’s thorough. Basically, you have two options.
First, you can use standard mason jars. Sterilize your jars and seals, add the dried food, then toss in an oxygen absorber before you put the seals and lids on. Make sure that your jars and seals are dried well after you sterilize them. You don’t need the seal to be hot when you put it on the jar; the oxygen absorber will seal it cold.
You can also use Mylar bags and food-grade buckets. Put your food and oxygen absorbers into the bags, seal them, then store them in the bucket.
The oxygen absorber isn’t edible but it’s not toxic, either. The active ingredient is iron oxide, so it doesn’t release any type of harmful gas and doesn’t affect the taste or smell of the food. It’s a great way to preserve any type of dried food from flour to cold cereal. You can use these to preserve your dried meats, too.
Just remember that if you’re dry-canning dehydrated meat, your shelf life still isn’t going to be as long as other foods because usually meat still contains enough moisture or fat to spoil or go rancid eventually. Trimming as much fat and tendon off the meat and dehydrating it after soaking it for 24 hours in a high-salt, high-acidic marinade helps extend the shelf life of your meat, too.
Some sites will tell you that it’s OK to use hand warmers to dry-can your food, but it’s not. That’s fine to use with your guns, ammo, and other non-food items that need to stay dry, but it’s not food-safe.
You can also store foods in PETE plastic bottles using oxygen absorbers. They’re lighter and less bulky than mason jars. Make sure that the bottles have screw on lids with plastic or rubber seals in them. To test to see if your bottle will seal, screw the lid on and submerse it in water. Squeeze. If air rushes out of the bottle and you get bubbles, the bottle won’t work. Just make sure that the bottles and lids are sterile before you pack them.
Dry Canning Using Vacuum Sealers
Did you know that you can use your vacuum sealer to seal dried foods in mason jars? Well, now you do. You can get a jar sealer for your vacuum sealer and suck all of the air right out. The jar will seal and you’ll be good to go. This isn’t great for powdery substances but is OK for foods such as beans, pasta, etc. The powdery stuff gunks up your machine.
One word of warning here: this is a good method if you’re just shooting for storage of foods such as flour that you don’t really have to worry about spoiling, but it doesn’t necessarily get enough air out to prevent the growth of mold. You need less than .02% oxygen for that and there’s not really any way to know how much oxygen is left in the jar with vacuum sealers.
Many people assume that as long as the jar is sealed, the food is safe, and usually that’s correct but there’s always that one-in-a-thousand chance that it’s not. Oxygen absorbers, when used as directed, take oxygens levels down to about .01 percent.
Dry Canning in the Oven
This is one of those topics where people stand on either side of the creek and throw rocks at each other. There are those who swear that they’ve safely preserved their dried goods using this method for years without a problem. On the other side, there are those who say it’s dangerous and should never be done.
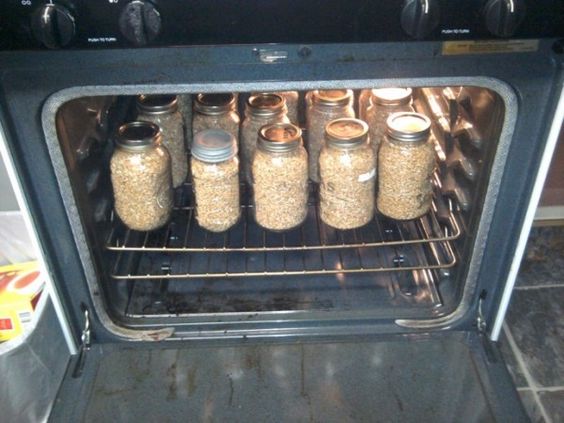
As with everything, both sides are right. You can dry can in the oven for years with no problems, but there’s always the chance that the jars are going to explode in the heat.
Now I will lean slightly in the direction of the naysayers in one area: foods that have more than 10% moisture or have any significant fat content (including nuts) shouldn’t be dry-canned because the chance of bacterial growth or rancidity. You also can’t dry-can brown sugar and you absolutely CAN NOT replace water bath or pressure canning wet foods with oven canning.
Personally, I’ve dry-canned flour and some blended recipes in the oven and haven’t had a problem. Of course, I’m super cautious and use common sense. Besides the whole fat and moisture thing, I also never let my jars heat or cool too quickly, but then again, I do the same thing when I’m canning wet foods.
The theory that the jars will explode because of the heat bemuses me a bit because I put them in a pressure canner and expose them to an environment that, to me, is much more severe than a 200-degree oven. However, you’re on your own here. Do it at your own risk, as you do everything.
If you decide to dry can using your oven, here’s how to do it:
- I’m weird about bacteria and you should be, too. I always sterilize my jars before I do anything with them; even dry-can. Just let them dry for several hours because they need to be thoroughly dry.
- One of the biggest issues that many naysayers have about dry canning is that oven temps vary so the food may not reach a temperature high enough to kill bacteria. I’m pretty sure this one’s covered by using my oven thermometer. You should probably do the same.
- Place your clean jars on the counter with a cookie sheet at the ready. Using a funnel if you’d like, fill them with your dry food of choice (beans, flour, brownie mix, pasta, whatever), leaving about 1/2 inch of head space.
- GENTLY tap the jar on the counter when you think that it’s full to help the product settle so that you can pack them as tightly as possible. This also helps remove air pockets.
- Wipe the rim with a dry (or SLIGHTLY damp) cloth to get any crumbs or dust off of the rim and set the jar on the cookie sheet.
- Repeat until all jars are full.
- Place in the oven and set it at 200 degrees. Note that I didn’t say to preheat the oven – you want the jars to heat gradually, remember?
- Watch your oven thermometer. When it reaches 200 degrees, set your timer for 1 hour.
- At the end of the hour, remove the first jar. Don’t take them all out at once for 2 reasons. First, if you’re like me, you’ll drop the sheet and waste all of your work. Plus, you’ll likely end up with all of that broken glass that you’re trying to avoid. Second, you want each jar to remain hot until you’re ready to put the seal on it.
- Lay a dish towel out where you’re going to be cooling the jars. Wipe the rim of the jar again, gently, and place the seal on it. Put the band on securely but not overly tight. Set it on the dish towel.
- Repeat with each jar, then turn off the oven.
- Cover the jars with a lightweight towel and let them cool for several hours or overnight. (I use the same method with my water-canned foods. It was just the way I was taught in order to prevent the glass from cooling too quickly. Again, this may be overkill on my part, but I do it anyway.)
- If you made a mix, such as biscuit mix or soup mix, attach a recipe to the jar. Otherwise, just label and date it like you do your other canned goods.
Test your jars to make sure that they’ve sealed. Just as with water canning, you may hear the ping or you may not. Touch the top to see if the seal is pulled in and can’t be pushed in with your finger. Store jars that don’t seal in the pantry and use them first.
If you have a problem with the seal, you likely didn’t get the rims clean enough.
Storing our food long-term is critical to our survival if SHTF and we lose our modern sources of food. Dry canning food is also a good way to save money because food is almost always cheaper when you buy it in bulk. Oh, and don’t forget bugs. Maybe it’s just me, but weevil pancakes are gross even though they are a source of protein.
If you’ve dry canned using any of the methods above or have any other ideas or questions about dry canning, please share it in the comments section below! And click on the banner to get more about ancient ways to preserve food and water!


I also like the (Thrifty vac) system ,which requires no electricity. Its a manual vac pump,and with a piece of hose and a pack of their check valves and a little rigging you can use it on the (Food Saver) bell jar sealer caps….Ive also read freezing dry goods over night before dry sealing will also kill all the critter larva ,is this correct?
I use a very similar vacuum pump that uses small patches that look like band aids you poke a small hole in the lid place one of these on top and hand pump the jar or container to a vacuum, I have vegetables I dehydrated and sealed almost 3 years ago and they’re still fresh, to open them you lift the patch, use what you need and reseal, I bought my first one back in the mid 90’s and you can still buy them online.
No way I would poke a hole in the metal lid and then depend on 3rd party adhesive for a seal.
like I said I’ve jars that are almost 3 years old and they’re still under vacuum, I use them for dry goods and would never use them in place of proper canning for perishable items like fresh vegetables or meat, I bought my first one of these back in the mid 90’s they’re called pump n seal, the patch is made of vinyl and rubber and holds really well, they are inexpensive and will seal jars or plain zip bags although the zip bags tend to lose their seal after a short while the jars are great, I like the bags for short term and have used them to store things like matches and lighters while camping and white water rafting, you should check them out you may change your mind.
I guess I wouldn’t worry because they use rubber patches to fix a hole in a tire and that holds with the weight of a car on it. I have been looking at this system and think I will try it. The food saver jar sealer won’t work for me so I need a solution. this might be it.
Foodsaver as of recently, today is October 2020, has apparently been unable to get delivery on jar sealers from china. My solution was to buy a “degassing cannister” used for curing epoxy. The 5 gallon can holds 4 one half gallon Mason jars and I can pull a vacuum down to -26 to -28 inches Hg. Jars deal up nicely and if I’m concerned about residual o2, I put in a 100cc absorber.
The 5th or 6th paragraph has the definition of low acid wrong. Anything with a pH LOWER than 4.6 is considered HIGH acid. The lower the pH, the higher the acidity. The higher the pH, the higher the alkalinity. Speaking as a chemist…!
You’re right, Ruth. I was going to say something but you beat me to it. To make it a little more clear for people, a PH of 7 is neutral. At the extreme ends, PH of 14 is totally alkaline like drain cleaner and a PH of 0 is totally acidic like battery acid. So the LOWER the PH number the more acidic something is.
Whew! I just read this article and THANK YOU for catching that! Most people have NO IDEA what pH means or what is acid and what is base. This is stuff we learned in GRADE school science! Ruth, thank you for saying this…I am unable to find a way to comment and now I can relax!
Thanks for your comprehensive insight. You only mentioned “bugs” in passing (not the subject of your article). I’ve read that freezing dry goods (flour, pasta and such) for 3 days prior to storage will kill any bugs. Do you know if this is true?
This is often a problem with parrot seed. I always freeze my bags of seed to prevent anything unpleasant
From hatching. The bird store I buy this from also freezes… they learned this was a good idea after they had some larva hatch
“a pH lower than 4.6 is considered low-acid.”
You might want to recheck this!
Water is neither alkaline no acidic..pH 7.0..,above this is alkaline …non acidic.beliw this begins low acid ..pH 6.9 or less.the lower the number, the HIGHER the acid content..,,as a chemist, a nurse, and a mom and woman with a severely acidic stomach.
I have those small 1 pound bags of peas, beans etc that you buy already bagged in the store are these ok to keep for a long period of time? they haven’t been opened will they go bad?
No and Yes. Those bags are not air tight and there is still air in them. The contents will go stale in a few months to a year. BUT, you can keep them in a refrigerator or freezer to extend their storage time much longer, OR use a vacuum sealer. Even better, pour the contents into a canning jar (fill nearly to the top), and use a vacuum sealer attachment for jars to seal the jar. Then put the jar in the freezer for a week to kill any possible insect eggs/larvae.
We always so much enjoy these very informative articles! Thanks so much for doing “Survivopedia”.
We have dry canned brow rice, although we did it in the pressure canner. We heated the rice in the oven on cookie sheets, let it cool completely and put it the the canning jars just like we all our low acid foods. One batch we had to re do due to water getting in jars. The instructions came from on of Jackie Clay’s books.
When you dry-can flour, how long is the shelf-life if kept in a no-light, cool, dry room??
This idea comes from Lynn Pardey (Care and Feeding of Sailing Crew), who, with her husband sailed their whole lives often spending months at sea, without refrigeration. I’ve tried several of their ideas and they work.
Butter: canning ghee is nice, but not absolutely necessary. Put butter sticks into jar with (completely cooled) boiled saturated salt water. Boiling removes air (oxygen) in the water that allows butter to go rancid by oxidation. The salt prevents all bacteria and other critters from growing. I stored sticks for a year at room temp as test: still good! I used unsalted butter, and only 1/8 inch outside rind took on a bit of salt, rest stayed unsalted and no taste of rancidity. Make sure salt water fills jar totally, add more salt water when taking a stick out, and use something to shield metal lid from the salt water, like 4 layers of “Saran Wrap” or equivalent.
Dry goods: These things often contain the eggs of insects, that hatch and we then see “worms” i.e. larvae. Additionally, oxygen allows oxidation which produces rancidity. Simple solution we might try: when packing jars or plastic pails with well sealing lids, add a chunk of dry ice (carbon dioxide) near bottom of container immediately before filling. This soon evaporates and displaces air up and out of container. Carbon dioxide is heavier than air, so it fills bottom of bucket and pushes much of the air up and out. Then seal it, to trap the carbon dioxide. Bugs cant live in carbon dioxide as they asphyxiate, if they hatch at all. And, things cant go rancid as there is little oxygen left. Dry ice is a bit pricey, but the process is simple. Lynn Pardey used this when storing dry goods for a long trip at sea, such as flour, etc. FYI: anywhere near the equator, temperatures are always hot and humidity is extreme: ideal for bugs and mold. Commercial bread for example would mold in matter of few days, so must be prepared on board as needed. They had a lot fewer problems using this method to store flour. Might be worth a try. Of course, once a container gets opened, it needs to be used up before the critters awaken, so smaller containers pay off. Also: on occasion she had a “worm” / larva drill a tiny hole out the side of thinner plastic containers!!! Glass has its merits!
could one use co2 gas, say like from a co2 extinguisher, rather than dry ice?
A short burst into the jar instead of a chunk of (expensive, hard to handle, unstoreable for long) dry ice?
I don’t think that would be a good idea, the fire extinguisher contains chemicals that may not be safe to eat, at least this is my opinion
I specifically mentioned a CO² extinguisher, which contains ONLY CO²
gas. They are the thick, heavy metal ones with the conical black horn on them, not the lighter ones with the pressurized dry powder inside them.
http://www.sc.edu/ehs/modules/Fire/05_co2.htm shows a picture of one. (pardon the superscript 2. I couldn’t find a subscript 2 code)
Grintch: No, you cant use a CO2 fire extinguisher. As Jerry says and I – a 30 year fire fighter – agree with, extinguishers are filled with industrial grade CO2 which isn’t always the best. If you blasted a jar of dry goods with an extinguisher cone, I doubt you would have any dry goods left in the jar… 😉 Secondly, you missed the point of using dry ice. As CO2 is heavier than air, it needs to evaporate at the bottom of the jar very soon after it is filled with the dry goods and the CO2 slowly pushes regular air up and out of the jar. The CO2 completely replaces air from the bottom up. A quick blast from the top will never penetrate to the bottom to point of replacing the air in the bottom. Yes, dry ice is expensive and of course it doesn’t store well, but you get what you pay for. For a gallon jar, a lump size of half golf ball will push all regular air out. Size of a marble is ok for a quart jar. So if your jars are ready to be filled and you have your ducks in a row, go get some dry ice, lay a towel over it to catch flying pieces and slap it with a hammer or rolling pin so it breaks into smaller pieces, toss a piece into each jar, fill them quickly, then lay lid on top – loose – so that the air can flow out as it gets pushed out by the CO2. Of course, don’t handle dry ice with bare hands: use glove or spoon to handle the ice. In about 15 minutes you can assume most of the CO2 is evaporated and you can tighten the lid. If you’re not sure if it has all evaporated, come back in a few minutes and very quickly loosen the lid to see if you can release any pressure. We don’t need positive pressure inside the jars.
I’ve had good luck using CO2 gas. 8-10 years ago, I bought an empty 20 lb CO2 gas cylinder on eBay. I took it to a place that provides industrial/medical/food gases and got it filled with CO2 for … I want to say about $35. The tank came with a valve knob like an outdoor hose faucet, and a threaded fitting that also looked ready for a garden hose.
I was using it to fill 2L PET soda bottles that had been rinsed out and dried. I attached a clear plastic hose and a hose clamp from hardware store to the tank fitting, to easily fill the PET bottles. Just a crack of the valve, and it was apparent the air in the PET bottle had been mostly if not completely, almost instantly displaced. Then I used a funnel to fill the bottle with rice, beans, etc. I figured there was little net pressure to purge the CO2 in the bottle as long as the bottle remained upright. I could stick the CO2 hose down into bottle, through the grain, and give it a brief micro-blast of more CO2 to help displace any remaining air, before I retracted the hose, and screwed the bottle cap on tightly.
Once I was set up, the slow part was filling the bottles with grain through a funnel. One thing I noticed, is that the grains apparently absorbed a lot of CO2. Perhaps it was the latent moisture in the grain. (The oceans absorb massive quantities of CO2.) But the PET bottles would repeatedly collapse and conform to the shape of the grain contents. I would carefully recharge these bottles annually (or longer) to restore the CO2 volume, but had I used glass jars, there would probably be a considerable vacuum in there, and no need for recharging, plus the additional protection against bugs that a vacuum provides.
Thank You for this information! It was very helpful.
When you use dry ice for dry food canning, can one combine this process with a vacuum sealer? Maybe vacuum seal it twice to make sure there is a negative pressure not a positive pressure.
I have a concern about dry canning as stated, a brownie mix.” When volunteering at a food pantry I learned a lot about expiry dates. They would distribute year old canned goods with safety, however, never cake mixes. I have also read online, to never prepare a cake mix, brownie mix etc, once expired. That is the #1 item we should get rid of. Do you have any further information. That makes me think of bisquick, pancakes etc. Thank you.
As a steadfast LIFE RULE, I buy the best quality flour I can afford aka NOT store brands. Before flour goes on my shelves, they go live in my garaged, large upright freezer.
Not stuffed in, placed in with space to allow air flow around – no matter how many 5 lb bags I buy. They live there for 3 weeks. Then they are allowed to come into my massive cupboard. 3 weeks = no bugs survive.
FYI – all pasta goes through the same regimen.
How did this come about ? After throwing out 30 boxes of pasta + 7 bags of flour + countless cake mixes etc, all containing bugs is how the rule was adopted. Plus the fact that I live in Florida.
And none of this was because of prepping! Just because of LIFE and not wanting to waste $$
I wonder if your freezing system would be as foolproof it you lived in a more northerly climate. Pretty much all bugs around here (upper Midwest) have evolved ways to deal with freezing to survive the cold winters.
Good post though …. Thanks!
I saw a comment about dry canning with dry ice. If you’re going to the expense and trouble of dry ice, you might as well do some freeze drying with it. I’ve seen instructions all over the internet on how to do it. Seems simple enough and we all know freeze drying to be far superior to dehydration.
Are the jars one quart ot a half gallon? I was told to place 1/2 gal jars in for two hours. Is that appropriate?
IIf there is a little bit of moisture in your canned flour can that cause botulism?
What size of oxygen obsorber per mason jar? Looking on Amazon I see different sizes.
Hi Crystal, I’ve seen Youtubes about dry pack canning that said to use 100cc in 1/2 gallon size canning jar.
I’d like to find a chart or list with shelf life for dry pack canned foods. If you come across one, I would appreciate it if you would share it.
Thanks!
When oven dry canning, do you put an oxygen pack ?
I am just confused on witch jars to use? Not the jars itself but the lids, had a video tell me not to put a type of lid in the oven. But I can not find anything on that. What do you use that I can dry can and put the lids also to disinfect in oven with jars?
I want to dry can rice, flour, macaroni and oatmeal. I have the 1/2 gallon Ball jars. Most of the instructions are for pints or quarts or there is no mention of the size of the jar in the posts. What would you recommend the temperature and time to be on these items in the 1/2 gallon jars?
Not having any luck on the internet was wondering if you could water bath can dry corn dry rice Etc
Is it possible that one can use the dry canning method to can roasted peanuts?