


You know those cool brownie mixes in a mason jar that some people give as gifts? Well, let’s take that one step further and apply the concept to prepping.
Dry canning entire meals has several benefits, and today we’ll take a look at them, and I’ll share some recipes, too.
In my article about dry canning, I discuss the methods of dry canning in detail but to sum it up, it’s canning dried foods instead of wet foods using dry heat or oxygen absorbers. The process is much easier wet canning but if you plan to use meat, you’ll want to use freeze-dried instead of dehydrated to really extend the shelf life. There are several reputable places to purchase all sorts of dehydrated and freeze-dried foods online.
5 Reasons to Dry Can Meals in Jars
You have your stockpile neatly organized. Green beans with green beans, pasta with pasta, etc. The boxes are lined up and the bags of flour and sugar are stacked, so why in the world would you want to throw a wrench in the spokes?
Better and Easier
Well, because dry canning an entire meal makes your stockpile better and easier. You can make several of the same meal all at once so that you don’t have open containers.
Keeps Bugs Out
The lights are out and the grocery stores are empty. Fortunately, you stockpiled plenty of sugar and flour, so all you have to do is build a fire and mix up some biscuits or pancakes, right? Sounds awesome, until you pour out about 100 little bugs along with your flour and sugar. Dry-canning seals out the bugs that can get into boxes and bags.
Take the Guesswork Out of Meal Planning
It’s tough for many to plan how many boxes of spaghetti, cans of peas, or cups of flour you’ll need per person per week, but if you have one meal for 4 in a quart jar (that’s about average), then that’s one meal you don’t have to worry about. No dividing cups of flour by number of people.
Keep Meals Interesting
One of the hardest things that many people who have survived catastrophe report is the need to eat the same foods over and over again. Yes, beans and rice will nourish you (sort of), but do you really want to eat variants of it daily? That may be your only option if you store food separately and have to bug out.
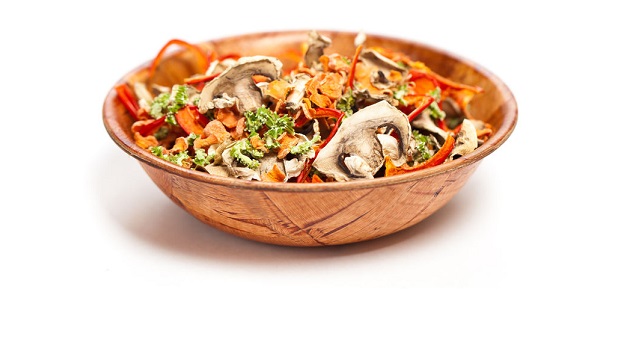
You can dry can soups, chili mixes, a variety of breakfast and dinner dishes, and even desserts so that you have wide variety of meals pre-made and ready to go. Many of these only require water. If you decide to bug out (or are forced to), you can always pour the contents of the jar into a plastic bag along with the recipe and toss it in your bug-out bag so you’ll have complete meals along the way. Lightweight, easy, delicious, and nutritious.
Great Way to Save Money
The cost of these recipes varies from $1 to $8 per quart jar full, not counting the price of the jar. Compare that to the cost of MREs made for camping and it’s almost mind-boggling how much you can save just doing it yourself! Once you get the hang of things, start making your own recipes and come back here to share them with us.
5 Recipes for Dry Canned Meals in Jars
OK, now that we’ve talked about some of the benefits of dry-canning meals in jars, let’s get down to the recipes.
Penne with Mushrooms and Sausage
- 2/3 cup tomato powder
- 1 tsp. garlic powder
- 1/2 cup freeze dried onion
- 2 tbsp. freeze dried spinach
- 2 tsp. Italian seasoning
- 1/4 tsp. salt
- 1/4 tsp. marjoram
- Small pinch of thyme
- 2 Tbsp. dried cheese blend
- 1 tsp. sugar
- 1 cup sausage crumble
- About 1 cup penne (or whatever pasta you like)
- 1/3 cup freeze dried mushrooms
- 2 Tbsp. diced carrots
If you have extra room, stuff more pasta in. Remember to keep gently shaking/tapping the jar to settle the ingredients as you add them to the jar.
Directions: Pour the contents of a jar into a large skillet and add 4 1/2-5 cups simmering water. Simmer for 15 minutes or until pasta is cooked and the sauce is thickened, stirring frequently. Add a bit more water if necessary.
Cheesy Hamburger Macaroni
You can make this cheesy if you want, or you can skip the cheese and just make it cream of soup – style. You can also substitute a couple of cheese sauce packets from mac and cheese for first 4 ingredients. You can also add some freeze-dried veggies if you’d like, if there’s room or if you’re using Mylar bags.
- 2 tbsp. sour cream powder
- 1/4 cup corn starch
- 2 tsp. chicken bouillon granules
- 1/2 cup freeze-dried cheddar cheese
- 1 tbsp. dried onion
- 1/4 cup instant non-fat dry milk
- 1/4 tsp. salt
- 2 cups elbow macaroni
- ½ cup freeze-dried ground beef
- 1/4 tsp turmeric (adds color and nutritional value)
Directions: Pour contents of jar along with 6 cups of water into a large skillet. Bring to a boil and cover. Reduce to a simmer for 12 minutes or until pasta is tender, stirring frequently. Sauce will thicken as it cools.
Universal Bread Mix (or Cinnamon Roll Mix) in a Jar
Bread really helps you stretch portions and this recipe yields about a 10-inch loaf of bread or a dozen rolls. It’s great for breakfast cinnamon rolls, too. When sealed, this mix will store for at least 3 years.
- 2 tbsp. instant potato flakes
- 2 tbsp. granulated sugar
- 2 tbsp. instant non-fat dry milk
- 1tsp salt
- 3 tbsp. powdered butter
- 3 cups + 2 tbsp. bread flour (feel free to substitute 1/2 cup whole grain flour for ½ cup of the bread flour if you’d like)
- 1 packet rapid-rise yeast
Pour the bread mix into a bowl and add the yeast. Add 1 cup warm water stir until it’s kneadable (is that a word?). You’ll need to add a bit more water, but do so slowly until the dough is elastic – neither dry nor sticky.
Knead for 5 minutes then shape into round ball and cover, rubbing a tsp or so of oil over the top to keep it from drying out. Allow to rise until double in size (60-90 min). Punch down, knead for a couple more minutes and shape into loaf or rolls. Allow to rise again.
Bake at 425 degrees F for 15 minutes. Reduce heat to 350 degrees and bake for another 20 minutes. To make cinnamon rolls, just roll the dough out after the first rise, slather with butter, sugar and cinnamon, roll it up, slice it, and follow the directions listed above, though baking time may be a bit less.
Breakfast Sausage and Egg Hash
We all need breakfast, and this one is hearty and delicious. Keep the egg mixture separate from the meat and potatoes because they only take a few minutes, whereas the meat and potatoes will take several minutes to rehydrate.
I like to add a pack of sausage gravy mix to the jar, too. I just slide it down the side of the jar and press it to the glass so that it doesn’t take up much space.
Place directly in jar:
- 1 packet country gravy mix (use mix that requires water, not milk)
- 2 cups diced dehydrated potatoes
- 1 cup freeze-dried sausage (the real stuff)
- 1/2 tsp. salt
- 1/2 tsp. pepper
Put in small fold-top sandwich baggie on top of potatoes and sausage in the jar:
- 1/3 cup powdered eggs
- 1/3 cup freeze dried cheddar cheese or cheese powder
- 1/3 cup freeze dried bell peppers (optional but nutritious)
- 2 tbsp. freeze dried mushrooms (again, optional)
Directions: Combine the first 4 ingredients in a large skillet along with 4 cups of boiling water. Let them rehydrate, then drain any extra water. Cook for 10-15 minutes.
While the potatoes/sausage mix is cooking, combine the egg baggie with 2/3 cup cold water (only 1/3 if you didn’t add the veggies) and whisk together well. Let it rehydrate for 5 minutes, then cook in a separate skillet, or pour right in over the potatoes and sausage when they’re nearly done and cook them all together for the last few minutes.
Make gravy as directed on packet and pour over the sausage/potatoes/eggs.
Scalloped Potatoes and Ham Skillet Meal
Tip: Substitute 2 boxes of scalloped potatoes along with the cheese mix for the first 3 ingredients. Of course, if you buy in bulk, making the recipe as written will be much more cost-effective.
Tip: To make it vegetarian, substitute other veggies for the ham. Good choices include broccoli, peas or other greens that will add nutrition.
- 2 1/2 cups dehydrated potato slices
- 2/3 cup all-purpose flour
- 1/4 cup powdered cheese sauce
- 1/2 cup instant milk
- 2 tbsp. dried onion
- 1/2 cup freeze dried ham (no substitutions)
- 2 tbsp. freeze-dried carrots
- 1/2 cup freeze dried mushrooms
- 2 tbsp. butter powder
- 1 tsp. salt
- 1/2 tsp. black pepper
Pour ingredients of jar into a large skillet and add 6 cups of water. Stir to mix while bringing to a simmer. Simmer for 12 minutes or until potatoes and ham are tender. Sauce will thicken as it cools.
And here’s another one:
Video first seen on Linda’s Pantry.
3 Tips to Remember
And here are some tips to do it right:
Tip: Once you have the jar sealed, label the lid and place the recipe inside of fold-over sandwich bag and tape it to the outside of the jar. I do this for two reasons: it keeps the directions from fading or smearing, and if I want to pour the meal into a large zipper bag to take with me on the fly, I can peel the directions off and toss them in the bag, too.
Tip: For pasta dishes, I add the pasta first, then add the spices so that they settle through the pasta instead of taking up space at the bottom.
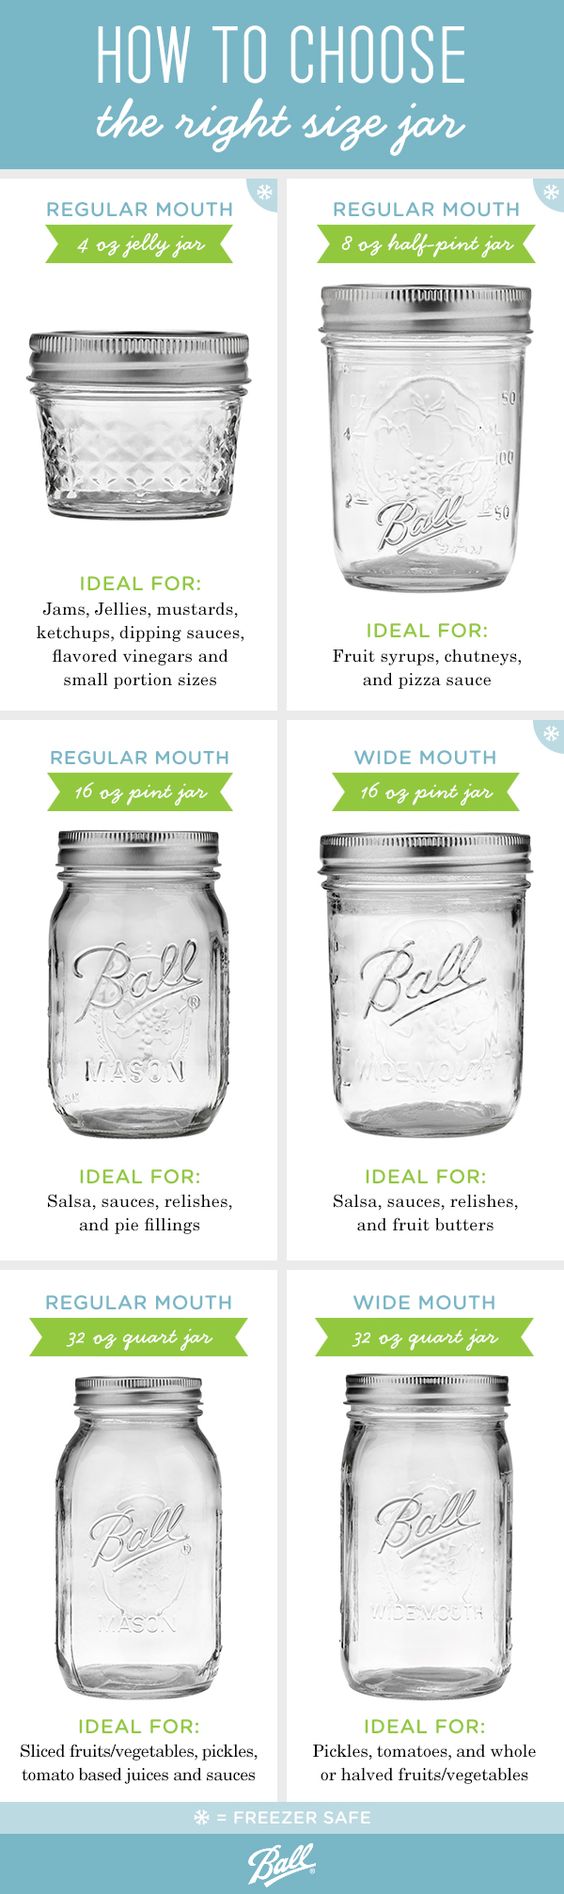
Tip: Instead of using jars, you can always use Mylar bags if you’d like, though that can get expensive and the bags aren’t rodent-proof.
These are just a few recipes to get you started and in the right frame of mind. I wanted to include some go-to recipes that include breakfast, pasta, potatoes, and bread so that you have a good base. I really recommend using oxygen absorbers instead of the oven method, especially in meat or egg dishes. That way, you know that the oxygen levels in the jar are nil or almost nil so that bacteria can’t grow.
There is much more to find out about long term food storage. Click on the banner below for more knowledge on homesteading and survival!

Now, start thinking and experimenting so you can share some ideas with the rest of us! If you’ve already made up some meals in a jar, please tell us about your experience (and share your recipe!) in the comments section below.
This article has been written by Theresa Crouse for Survivopedia.


Great article. I’m going to try this.
I’d like to add, for those who have vacuum sealers and the mason jar attachment, it would extend the shelf life by vacuum sealing the jars. Make sure you soak the lids in boiling water, then dry them before sealing………………………yes, use gloves to dry the hot lids!
Instead of putting the lids in hot water, heat them in your toaster oven.
I see you have a few recipes calling for pasta. For those who have a dehydrator you might want to consider first cooking your pasta, dehydrating it, then using it in the dry canning recipe. Why bother? Well, it saves on the amount of water needed to finish cooking the meal and saves most of the time needed to cook pasta from scratch. Dehydrated pasta will reconstitute even with room temperature water, it will just take longer. Your food is ready sooner and you spend less time advertising your business if forced to do this outdoors.
Wheres the best place to buy the freeze dried and dehydrated food?
Walmart has the Mountain House brand of freeze dried foods. at least the one closest to me does. They’re in the sporting goods department. Just add hot water and mix. The instructions say to stir, but I just shake the bag side to side and back and forth,and that works fine. They actually taste pretty good.
They also sell a brand of emergency food ration bars called UST (Ultimate Survival Technologies) that are 2400 calories per vacuum sealed pack. Four of these take up about as much space as one MRE, which is about 1200 calories. I have some of them, but haven’t tried them yet. They’re supposed to be apple cinnamon flavor.
Our local Walmart does not carry “emergency food” on the shelf but does carry Mountain House, Augason Farms, Wise, and Emergency Essential brands which can be ordered online and shipped free to the store for pickup or to your home for free if over $50.00 total. I have compared the Augason brand both at the Augason web site and through Walmart and have found that the pricing through Walmart is frequently cheaper than through the Augason web site. The Emergency Essentials brand can also be checked out at it’s home page “beprepared.com”. You can sign up there to receive a sale catalog every month. I have purchased all these brands and have gotten some great pricing. Another avenue would be to visit a Gordon Food Service store which caters to the restaurant business as well as retail sales. I like to buy the utility size cans of fruit and vegetables ($4-$7) and then use my dehydrator for a longer lasting storage option. Gordons is primarily located in the Great Lakes states, here is a link to their store locator: https://www.gfs.com/en/gfsstore/locator
For bulk (#10 cans and 5# pails) freeze dried ingredients I’ve done well buying from Costco online.
Great recipes.
Don’t forget to oven can your saltines for that peanut butter.
I just ate oven-canned crackers from Oct., 2014 and they were as fresh as could be.
Vacuum sealing lets crackers last a year, but oven canning lasts for several years.
Can you please explain how to oven can crackers? Wouldn’t that cook them more?
Good information. I had difficulty in understanding everything spoken in the video .
I am interested in getting more of your recipes.
Thank you for this informative message.
Bob Stevenson
What a fantastic idea! This would be great for a person who, like me, lives alone. I have a boat load of dehydrated food waiting to be used in some either catastrophic or apocalyptic event which I have been hoping waits until after I depart this earth. However, in the event that doesn’t happen, to be able to throw the contents of a jar in a pot when
dinner is late would be such an awesome time-saver, and knowing that the meal is going to be nutritious because I will know what’s in the jar…just too cool! Great ideas to start putting things together now so I know what works and what needs tweaking now before the SHTF! I have the same food sealer you have and was so tickled to find out about that dumb jar sealer…WOW! Just one clarification please: you mentioned using oxygen packets in jars, especially with meat. However, I didn’t see you use one in your video. Could you please tell me why? Thanks!