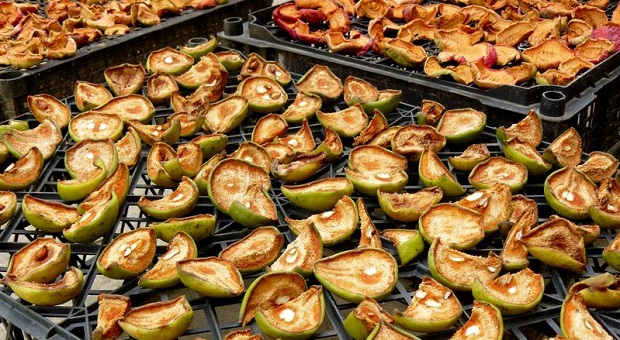
Food dehydration is neither a novelty nor a scientific breakthrough; our ancestors dehydrated meat for long-term storage for hundreds of years before the invention of the dehydrator.
Native Americans in the US and ancient peoples on other continents practiced food dehydration as a means of preservation for about as long as we’ve existed.
Pemmican is a great example of dehydration of both fruit and meat. In case you’ve never heard about pemmican, let me enlighten you. Our Native American ancestors invented a highly nutritious mixture of fat, carbohydrates and protein, a sort of ancient energy bar, which was manufactured using animal protein (bison, elk, venison or other lean meat), fat and dried fruit.
Europeans adopted pemmican instantly after they colonized North America and later on, Arctic explorers like Amundsen and Scott used pemmican to stay alive during their gruesome journeys.
Being a nutritionally dense food, pemmican is basically thin sliced meat left to dry in the hot sun or over a slow fire. To create a pound of pemmican, about 5 pounds of raw meat were necessary. The meat was then mixed with fat and dried fruits (cranberries, blueberries, etc.) and packed into animal skin or textile bags for storage or travel.
Obviously, I’m very much simplifying the method of producing pemmican because it’s only relevant for today’s article to show that food dehydration has been going on forever. I want to make you aware of the importance of knowing how to DIY your own food dehydration.
In case of a SHTF event or scenario or even as a basic survival skill, knowing how to dehydrate food for long term storage may come in handy someday.
Bottom line, this is a skill that’s easy to master and could be of tremendous benefit to you in a worst case scenarios. A huge plus is that beef jerky and fruit leather is extremely expensive if you buy it in the store. If you do it yourself, it’s much cheaper, tastes better and you know exactly what’s in it.
Now, let’s discuss a few ideas about how to DIY food dehydrator, shall we?
The Cardboard Box Food Dehydrator
The concept of using cardboard for building a food dehydration device is pretty interesting. Cardboard can be acquired from virtually anywhere and for next to nothing in term of cash. The best thing about building a food dehydrator using the cardboard box method is that it will cost you $30 or less. If you already have the gear available, you might not even have to make a trip to Wal-Mart or dig through Craigslist for bargains.
The most high-tech component in the cardboard box food dehydrator is the space heater that is used to dry the food (beef jerky or basically anything) and which retails for about $16 new at your local hardware store. Besides the cardboard and the space heater, you’ll require some plastic drying racks (about 50 cents each) and plastic canvas. That’s about it in terms of gear.
The food dehydrator itself, the cardboard box, looks very much like a PC unit with the space heater blowing hot air from the bottom. Below there’s a video tutorial depicting the whole process, including the materials necessary. This is a fairly straight forward DIY project and it will require minimal skill and about three hours of labor to get it done.
Video first seen on John Strabismus
If built properly, this homemade, dirt-cheap food dehydrator will work just as well as a commercially available one, but for a fraction of the price assuming you have a space heater floating around.
Keep in mind that a plywood-made food dehydrator just like the one pictured in the video will last you forever, while this cardboard version is only a temporary solution, with a life span of a season or two.
The Old Drawer Dehydrator
The second idea is to use a second-hand old drawer for building a food dehydrator. The concept is nearly identical to the previous plywood box project except that you’ll use a pre-fabricated unit instead of building yourself one. Hence, for about the same $30 price tag, you’ll get your own, personal food dehydrator that will last you forever.
What’s required for this project in terms of raw materials are the aforementioned drawer, a heater, mesh and a thermometer (optional). As for tools, you’ll need a measuring tape, a stapler, a screwdriver, a marker, scissors, a hacksaw, wing nuts, washers, a threaded rod and a drill. Here’s a detailed video detailing the manufacturing process.
Video first seen on Slowfood Survivalist
Basically, you’ll have to remove the bottoms of the drawers and replace them with the metallic mesh. The mesh will offer physical support for the food that will be dehydrated. The heater goes under the drawer and provides the muscle for the dehydration process. You can actually adjust the air flow by opening the top drawer. The sensor of the thermometer must be placed inside the food dehydrator. Good luck and have fun!
The Portable Food Dehydrator
Lucky number three project is about portable food dehydrators. This project is virtually identical to our first one, but with a twist: it’s portable, meaning that you can take it with you if you need to bug out or want to take it camping.
In terms of materials and design, what we’re dealing with here is a piece of cardboard and readily available materials either in your home or at the dollar store. Budget wise, this is as cheap as it gets; just take a look at the list of materials.
First, you’ll need a cardboard box that’s at least 2”x2”x2” or so. This is the meat and potatoes of our DIY project. Some insulation material is also on the list. You can use a Pot Cozy (take a look at the video tutorial, it shows everything in there) cut to fit the respective cardboard box, 100 watt light bulbs, ceramic receptacles, duct tape, some electric cord, pliers, scissors and some wire. That’s about it in terms of raw materials. Even if you don’t have all of that stuff laying around, it’ll only cost you about $20.
Video first seen on The Weekend Trail Hiker
The general idea is to cushion and insulate the cardboard box with the insulation material and to place the 100 watt light bulbs inside of the box for heat generating purposes (instead of a heater). That about sums it up, so just take a look at the video tutorial and you’ll DIY your food dehydrator in two shakes of a lamb’s tale. It’s fairly easy.
Now, ask yourself this: What’s wrong with my first three ideas for DIY projects? If you’re truly thinking like a prepper, you already know the answer: they are dependent upon an external source of electricity.
Dependence on electricity is unacceptable when you’re prepping for a SHTF scenario, so the next DIY project for a food dehydrator uses solar power and beer cans – empty beer cans, so start drinking! Okay, I know what you’re going to say next: But Chris, the sun doesn’t shine 24/7 so how can you dehydrate food when it’s dark or cloudy outside? Well, allow me to reply. The sun will rise again someday; you can bet on it! I know that the sun doesn’t shine 24/7 but you’ll definitely get some sunshine if you wait long enough.
Solar Powered Dehydrator
Getting back to our business, here’s a video tutorial about how to build a solar powered food dehydrator. The design is based upon a solar furnace design and it works similarly.
Video first seen on Young Savage 80
Anyway, you’ll need a lot of empty beer cans with their bottoms cut out, a few lengths of wood, some paint and some moderate carpentry skills. In the end, if you follow the tutorial thoroughly, you’ll definitely be a happy camper with an effective, permanent dehydrator that doesn’t depend upon electricity.
The concept is simple and ingenious. The basic idea is to build a solar cell using the beer cans which are painted black for optimum results. The heat generated by the sunrays inside the “solar cell” is used to dehydrate the meat, fruit or whatever and voila!
The principle behind this project is to replace the electrical heater with a solar heater. The rest is basically identical to our number 2 project, the plywood job with a solar heater attached to it. Pretty ingenious, don’t you think?
The Pizza Box Solar Dehydrator
Last but not least, let me present you with yet another solar powered food dehydrator, now that you’ve got the general idea. This time the project is in the form of a pizza box so this will cost you next to nothing; all that’s required is a pizza box, a piece of glass, a few pieces of wood, black paint and a little bit of elbow grease.
You’ll have to paint the bottom of the pizza box black, then build a square frame using wood and on top of that, you’ll put the glass screen. Just watch the video tutorial above and you’ll get it. This project scores for maximum simplicity and efficiency, as this baby easily reaches over 120 degrees Fahrenheit. Your food will be dehydrated in a jiffy.
Video first seen on Desert Sun 02
If you have other ideas or DIY projects about food dehydrators, feel free to comment in the dedicated section below.
This article has been written by Chris Black for Survivopedia.


Windi | July 16, 2015
|
An easy method that has been suggested is to line a cookie sheet with parchment paper and place sliced fruit, vegetable or meat on it. Place the trays of prepared food inside a hot car like in the trunk area of a station wagon or SUV. It only takes a few hours beneath a hot summer sun to dehydrate to a finished product using simple materials. And it is portable!
Alfred ? | July 16, 2015
|
I know the claims on freeze drying foods. On the average will properly dehydrated food last just as long? I guess tastes of food is a personal preference. Is the nutrition the same? Thanks!
Ronald F. Bradford | July 16, 2015
|
About 30 years ago I pastored in South Carolina and there was an older couple that dried their fruits and veggies on top of their storage building in a wood framed box with 1/4″ plywood backing lined with Tin Foil. The top was covered with screen wire and could be closed up with hinges on a window-type glass during the rain. It worked great for them for years.
cRYSTAL hAYWARD | July 18, 2015
|
I’ve seen it done with just putting the food between two window screens (to keep flies off it) and just let the sun dehydrate it. Flip it to get both sides dehydrated good. You’ll need something light to carry and you may not be around a electrical socket to plug into when you are bugging out . I have a commercial dehydrator use it for dehydrating fruit, veggies and meat.
Debra L. | August 10, 2015
|
Greetings
Thanks for a great article.
I would like to add: Some items dry too quickly and create a hard shell around the moist interior. I suggest taking it out of that hot spot, allowing the inside moist area to rehydrate that ‘outer shell’. Dehydrate longer until the small cut piece of food doesn’t bend, but would shatter if hit with a hammer. That way you know it is ‘dry throughout’. Botulism can exist in the inside of moist, partially dried foods. Using a car is an excellent idea! Dry using a box, aluminium foil or parchment paper, One can use tulle fabric with elastic sewed on the edges to make a nice insect proof box cover. I save silica packs which come in pill bottles to help maintain that dryness for foods stored in glass jars. ( Silica paper packs can be rinsed off and dried for reuse.) I have a regular dehydrator too. My favorite thing to dehydrate is eggplant before the seeds become too large. Makes a wonderful hamburger extender. I can make a nice veggie burger with it.
Pingback:5 Basic Skills You Need To Make Survival Food | October 6, 2015
|
Pingback:The Best Way To Stockpile Vegetables Off-Grid | Prepper's Survival Homestead | November 11, 2015
|
Pingback:The Proper Guide For Attic And Roof Insulation - Survival By Preparedness | December 18, 2015
|
Pingback:Crosleigh's APES Blog | May 6, 2016
|
Pingback:Survival Herbal Recipes From Our Ancestors | Survivopedia | May 16, 2016
|
Pingback:How To Rehydrate And Prepare Your Preserved Food | | disasterdefense.us | May 27, 2016
|
Pingback:How To Rehydrate And Prepare Your Preserved Food - Prepper Dome | June 2, 2016
|
Pingback:How To Dry Can Food For Survival | Survivopedia | June 6, 2016
|
Pingback:How To Dry Can Food For Survival | Prepper's Survival Homestead | June 6, 2016
|
Pingback:How To Dry Can Food For Survival | | disasterdefense.us | June 7, 2016
|
Pingback:Survival Foods To Stockpile For Diabetics | Survivopedia | June 21, 2016
|
Pingback:DIY: How To Make MREs At Home | Survivopedia | October 27, 2017
|