


On my journey to self-reliance, I read endless books, attended many dozens of classes, and spent a small fortune to realize my dream of living off-grid. But I kept encountering the same troublesome snags.
Like most Americans, I’m not wealthy and couldn’t afford to simply write a check for a turnkey homestead. Now I’m glad I couldn’t. Because if I had, it probably wouldn’t have worked in the first place.
Why?
Because self-reliance isn’t something you can buy. Instead, it’s something we must build ourselves.

Nowadays, when people confront a problem, their standard response is to reach for their wallets. Which only ever papers over the cracks as it causes our problem-solving skills to atrophy.
For example, a generator could be a good backup power source. But what happens when fuel runs out? Like it did in Puerto Rico, in 2017, after Hurricane Maria battered the island. Leaving locals to bake in long lines under a hot sun. Just to squeeze a tiny drop or two of gas from emergency relief efforts.
In short, their safety net was far too specialized. This made it unadaptable and a little better than a paper shield vs. other resourceful locals who could pull together wind turbines, water wheels, solar panels, and more from the storm’s scrap debris. To give their family comfort.
With that in mind, every project in this article can be built using a basic home toolkit and features parts that can either be scavenged or bought from abandoned structures, junkyards, or your local hardware store. Even in the aftermath of a major catastrophe like a tornado, earthquake, or terror attack.
Today, there seems to be too much emphasis on highly specialized time and labor-saving gadgets that only do one thing but do it well. Often this works fine. But at a price. Because when your circumstances change it’s the highly specialized who struggle most. While the “Jacks of all trades” prosper.
So, without further ado, here’s your first project.
Wind Turbine from A Treadmill Motor
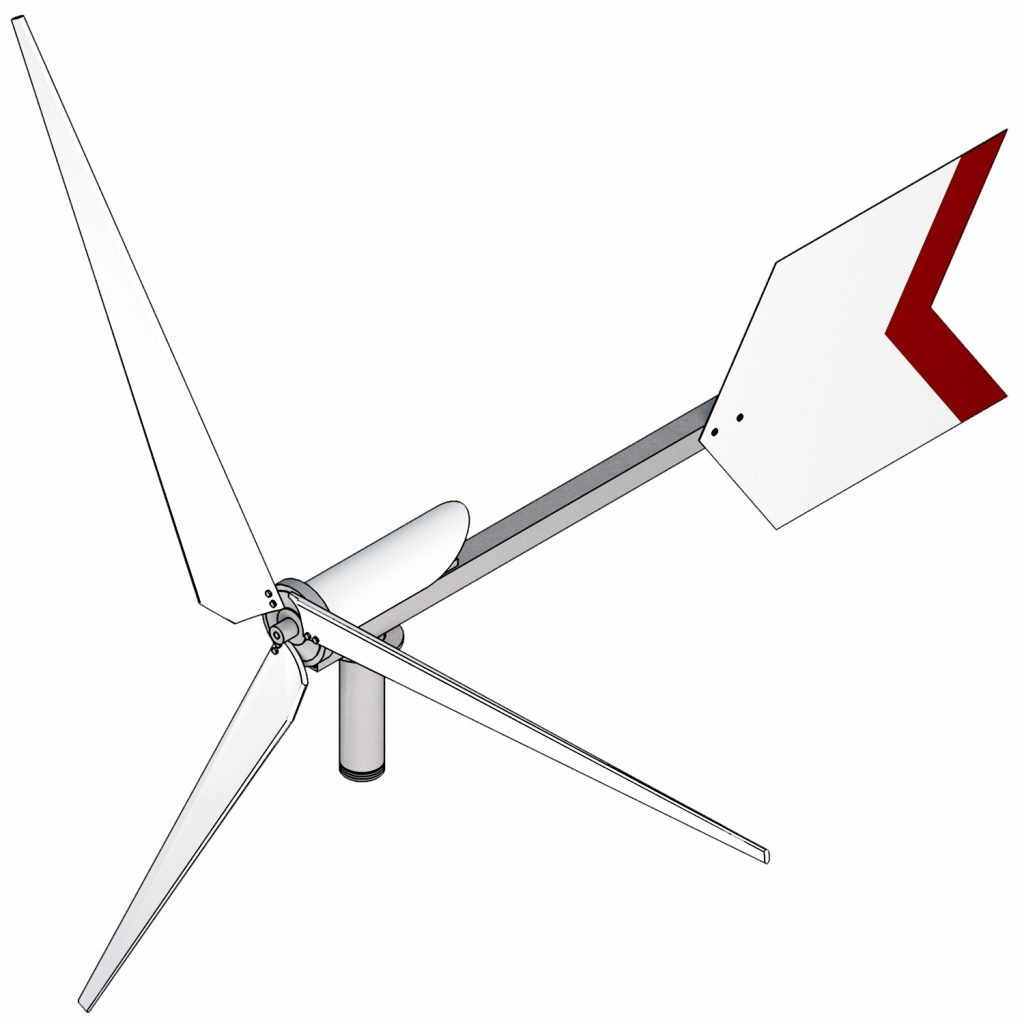
This simple windmill can be built at home out of scavenged parts and will generate electricity whenever there is wind.
It uses a permanent magnet treadmill motor to output around 100 watts and produces electricity twenty-four hours a day, provided there is enough wind. The electricity can then also be stored in a battery bank and used as needed. By comparison, a 100-watt solar generator only outputs electricity for about eight hours per day in peak sunlight hours. The advantage of using a treadmill motor is that:
- Treadmill motors are widely available and easily procured. After all, with the grid down, who will use them? They can also be purchased from garbage dumps, thrift stores, or purchased inexpensively online.
- They have good volts/rpm ratios. In fact, a treadmill motor will output 4V or more just by turning it by hand. That means very little wind is needed for the windmill to start generating power (8-10mph, or roughly 12-16kph) as compared to a car alternator, which only generates electricity at high RPMs.
- The Amperage is usable. For this project, for instance, the treadmill motor output must be at least 5 amps, but the higher the better.
What You Need
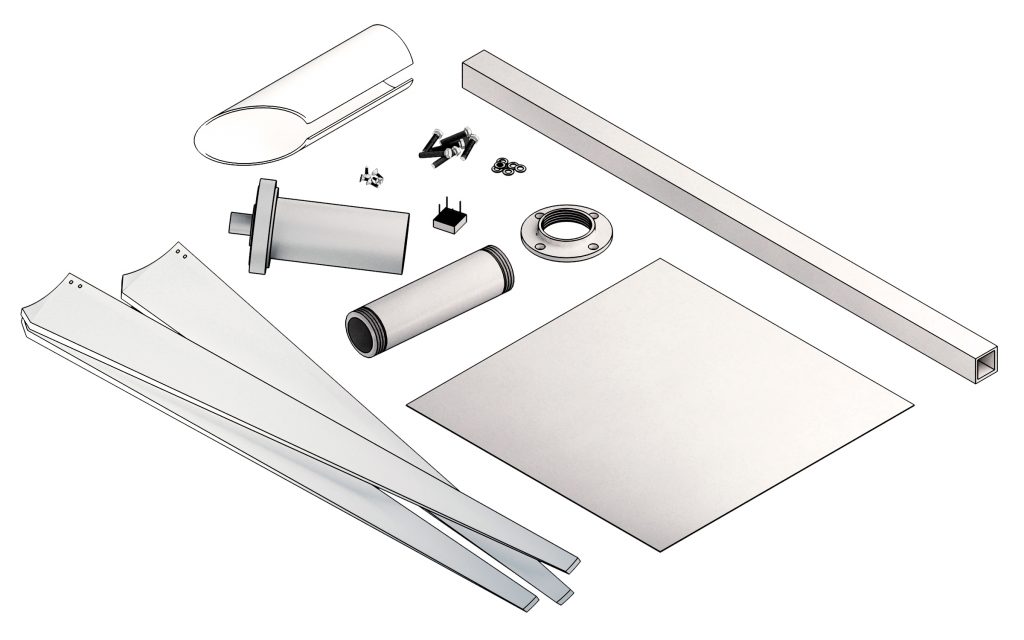
For the motor
- 1x 260VDC, continuous duty treadmill motor with a 6”(152.4mm) threaded hub
- 30-50 amp blocking diode
- 2x hex head bolt, 5/16” (7.87mm) diameter x1/34” (44.45mm) length
- 1x PVC pipe, 3” (7.62cm) diameter x11” (27.94cm) length
For the mount
- 1x 2” (5.08cm) floor flange
- 1x nipple, 2″x 4″ (5.08cmx10.16cm)
- 1x square tubing, 1″(2.54cm) square x 36″ (0.91m) length
- 3x self-tapping screws, 3/4″ (1.91mm) length
For the tail
- 1x lightweight sheet metal, 1’x1′ (30cmx30cm) 22ga or thinner (approximately 0.03″ or 0.76mm)
- 3x self-tapping screws, 3/4″ (1.91mm) length
For the blades
- 1x UV-resistant PVC pipe, 8″ (20.32cm) diameterx24″ (60.96cm) length
- 1x roll of 1″ (2.54cm) masking tape
- 6x hex-head bolt, 14″ (6.35mm) diameterx20 TPI (threads per inch)
- 9x flat washer, 14″ (6.35mm)
- 1x flexible straight-edge ruler, 24″ (60.96cm) length. If you do not have a flexible ruler, tape three sheets of paper together to form a straight edge and mark as needed using a rigid ruler as a guide.
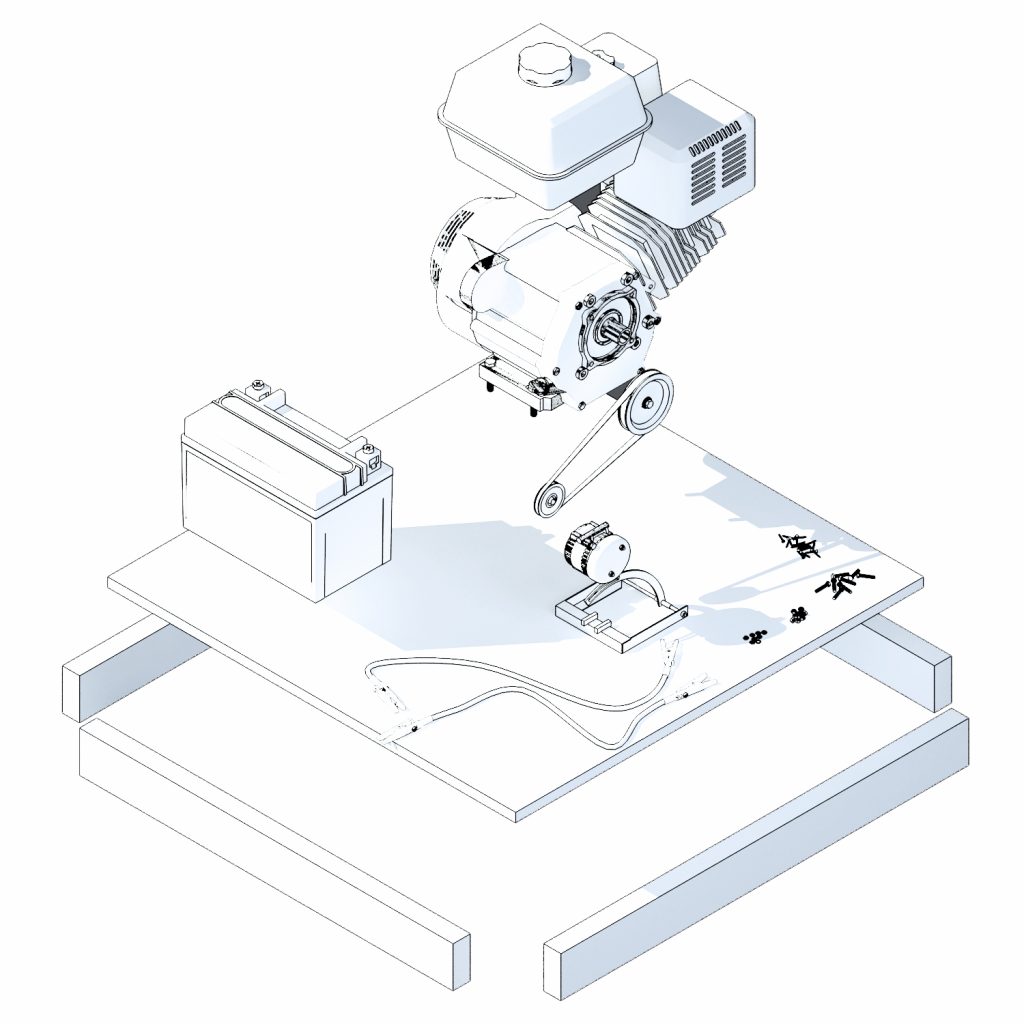
Generator Improvised from Car Parts
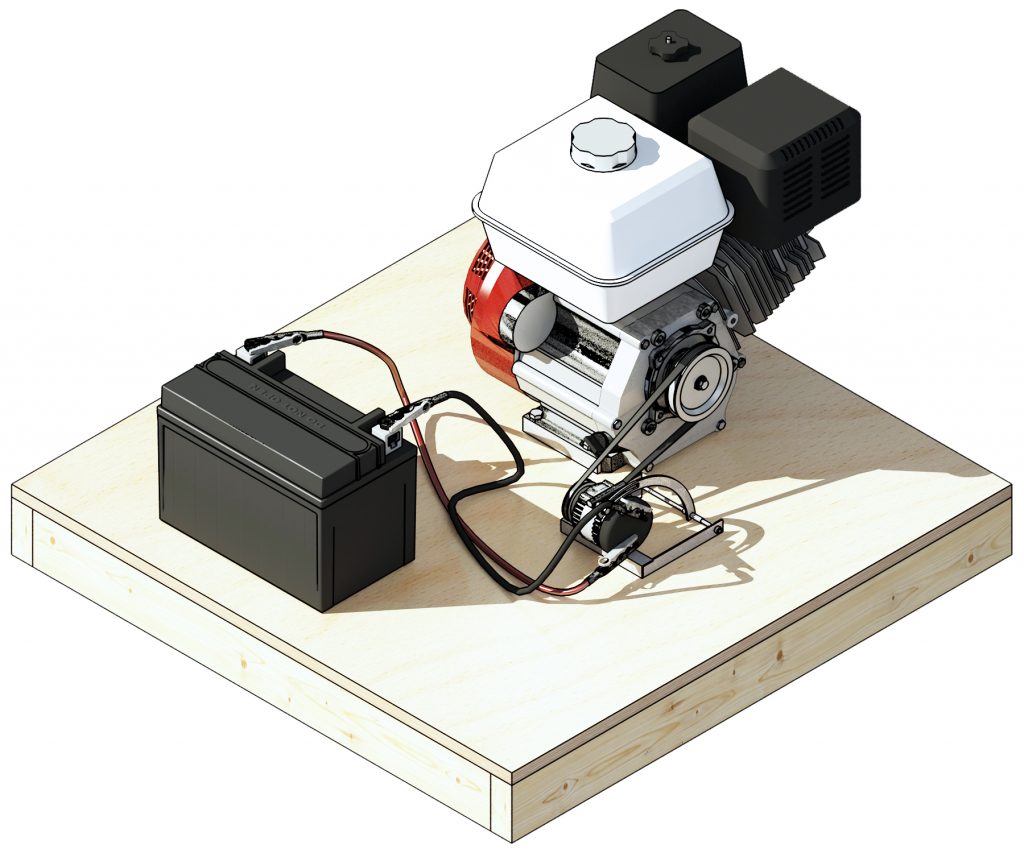
When disaster strikes you may be left to fend for yourself, and this includes generating electricity. In its most basic form, a generator is little more than an alternator with an engine to turn it. With a quarter of a billion vehicles spread across the USA, a capable survivor could easily scavenge everything needed to generate electricity on a small scale.
This project uses the same principles to build a simple 12V DC generator capable of recharging car batteries.
What You Need
For the Mounting Platform
- 2 x 6′ (1.83m) 2×4 lumber
- 1x 3’x3’ (91.4cmx91.4cm) sheet of 3/4″ (1.9cm) plywood
- 16x 2.5″ (6.35cm) Phillips-head wood screws
For the Alternator
- 1x alternator
- 2x pulley
- 1x belt
- 1x tension bracket
- 4x 1.5″ (3.81cm) hex bolts with nuts and lock washers. (When you pull the alternator, belt and bracket, pull those fasteners as well).
TIP: Newer 12V alternators are well-suited to this application because they provide a steady 12V DC regardless of the speed at which the spindle is turned. If the alternator is pulled from a vehicle, simply leave the attached pulley in place and pull it along with the alternator, tension bracket (used to tighten the belt), the belt, perhaps a second pully for the motor, and any fasteners they are attached with.
For the Motor
- 1x motor in the 3-5 horsepower range
- 4x 1.5″ (3.81cm) hex bolts with nuts and lock washers
TIP: While a larger motor such as a car motor could be used in an emergency, a small motor in the 2-5 horsepower range will be more fuel-efficient. If a lawnmower motor is used, the fuel lines and tank will also likely be attached.
For the Fuel Tank
- 1x fuel tank
- 1x 3’ of the fuel line, sized to fit the motor
- 1x 1-3 gallons of fuel, depending on the size of the motor
- 4x 1.5″ (3.81cm) hex bolts with nuts and lock washers
For the Battery
- 1x 12V DC deep cycle battery. While a car battery could be used in an emergency, a deep-cycle battery would last for hundreds of additional charge cycles, giving it much longer service life. Sources for scavenging 6V or 12V deep-cycle batteries during a grid-down ordeal may also include trailers, boats, golf carts, motorized wheelchairs, electric scooters, and electric forklifts
- 1x 6’ (1.83 m) 12V DC battery cable
- 2x battery terminals or alligator clips
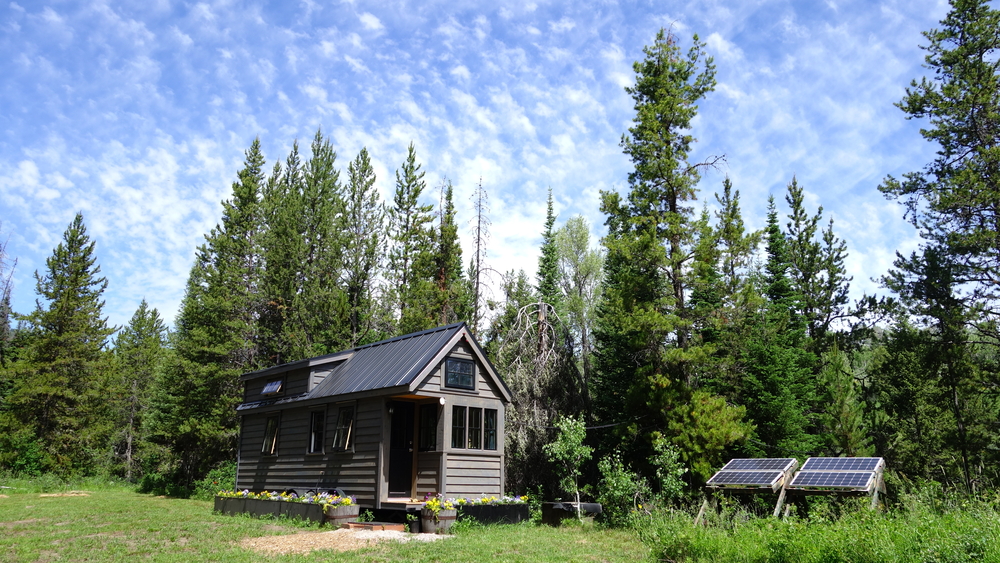
Home Solar System
Home solar power systems have really come down in price in recent years which is great news for anyone who would like to invest in an ability to generate their own electricity. You can pay an electrician to install a system or you can build your own. I suggest the later, so you understand how it works and how to fix it, expand it, or otherwise adapt it to meet changing needs.
In this project, you’d build a 400-watt home solar power system by starting with a 100-watt solar power kit and expand it to 400 watts by adding three additional 100-watt solar panels. As you add panels, you will also increase the size of your battery or battery bank, by adding additional batteries wired in parallel to increase battery capacity without increasing the voltage.
As a rule of thumb, you should increase battery capacity by approximately 35 amp-hours per additional 100 watts of solar panels you add. A 100-watt solar panel can charge a 35 amp-hours (or 420 watt-hour).
A 12V DC battery, in a single day’s sunlight, coupled with a 400-watt solar array can also be charged four times over for a total of 140 amp-hours, or 1.68 kilowatt-hours of stored energy per day, for years. Not a bad return on a modest $850 investment.
What You Need
The components listed are sold in kit form which takes the guesswork out of the types and sizes of cables needed to connect the various components of a solar power system. In case you do not acquire the components as a kit, I have listed the components and connectors separately. If you use a kit, make sure it includes the necessary components or acquire them separately.
- 4x 100-watt solar panel
- 1x 400-watt solar panel combiner or universal connector
- 1x 15 amp, 12V DC solar charge controller
- 4x 12V DC, 35 amp-hour, SLA, AGM, deep-cycle battery
- 3x 24″ (61cm), 12V DC, parallel wiring to link the batteries together in parallel to form a battery bank (appropriate for the type and size of battery terminals of your batteries)
- 1x cable to connect the solar panel connector to the solar charge controller
- 1x cable to connect the battery or battery bank to the solar charge controller
TIP: Solar systems are generally sold as kits with each manufacturer using different combinations and sizes of connectors, both to encourage you to buy all the components from the same manufacturer and so that cables only plug in one way, which prevents mistakes when connecting the components.
If you choose not to use a kit, you will need to either buy cables that interface with the types and sizes of ports or adapt the supplied cables. To adapt the supplied cables, simply clip off the connectors, strip approximately 1/4″(0.64mm) of insulation and crimp the type of connector you need in place of the supplied connectors.
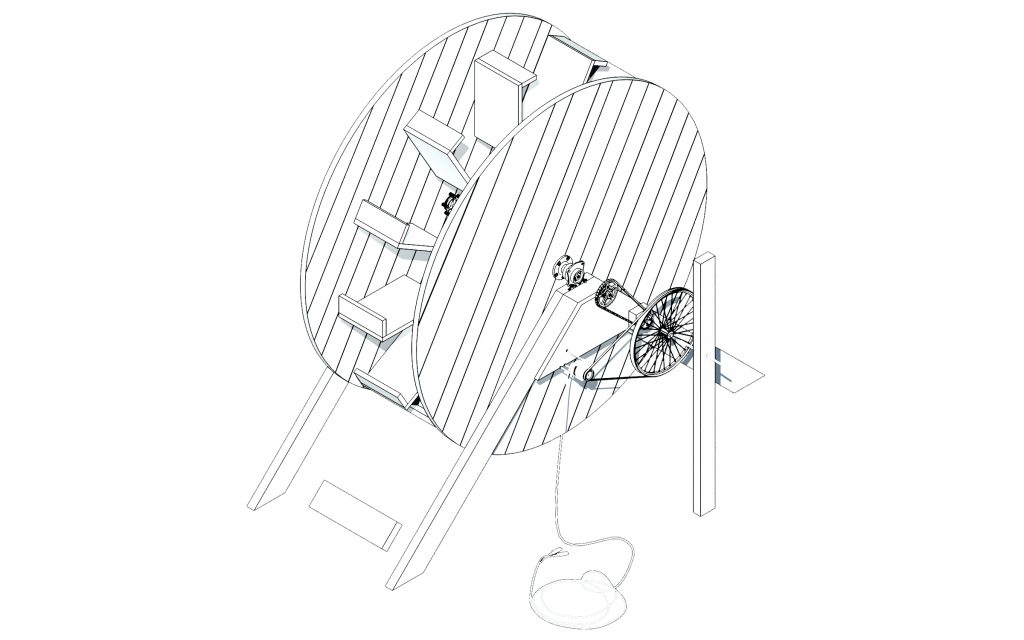
Water Wheel Generator
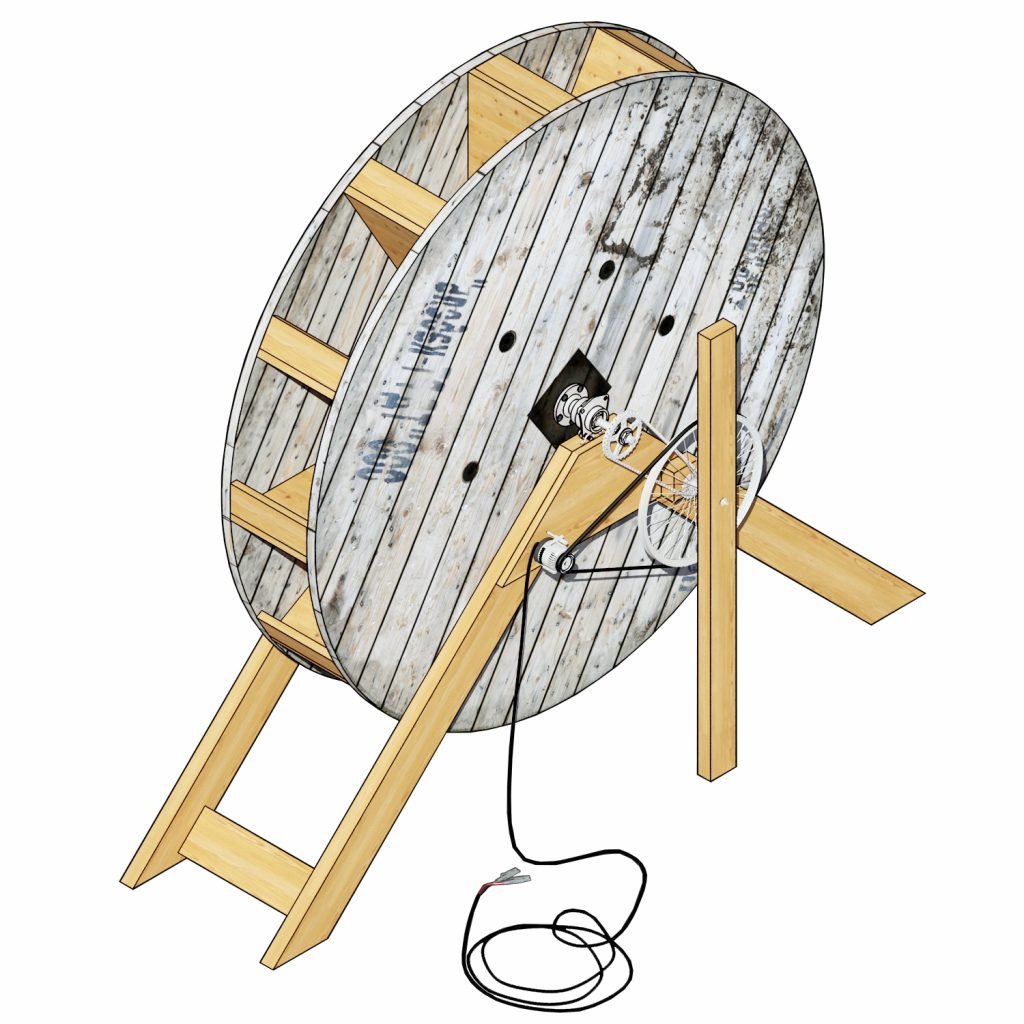
The water wheel is one of the first technologies used by mankind to harness renewable energy. While many cultures developed water wheels, only Europe had enough streams and waterfalls and the right socioeconomic conditions to run the water wheels that drove the Industrial Revolution. Any survivalist with access to a stream or river would do well to learn how to build a basic water wheel because they are simpler than micro-hydro technology, yet still produce energy 24-hours a day.
What You Need
TIP: Because this build is sourced from scrap, you may have to make some substitutions for the materials listed to find a combination of threaded rod, washers, and nuts to secure the sprocket or bicycle wheel, jury rig a bracket or make other minor modifications.
- 1x 6’ (182.88cm) bulk wire spool (if you can’t find a six or eight-footer, the larger the better)
- 1x 12V auto alternator with pulley and tension bracket
- 4x 6″ (15.24cm) long galvanized 5/16″ (7.94mm) bolt (must fit alternator)
- 7x 5/16″ (7.94mm) galvanized nut (must fit alternator bolts & the shorter threaded rod)
- 4x 65 2/5″ (166.12cm) long pressure treated 2×6″ (5×15.2cm) lumber
- 2x 20″ (50.8cm) long pressure treated 2×6″ (5×15.2cm) lumber
- 2x 41″ (104.14cm) long pressure-treated 1×12″ (2.5×30.48cm) board
- 12x 18″ (45.72cm) long pressure-treated 1×12″ (2.5×30.48cm) board
- 12x 12″ (30.48cm) long 1×4″ (2.5x10cm) lumber
- 4x 2.5″ (6.35cm) long, 1/2″ (1.27cm) galvanized hex head bolt (must fit the inside of the wheel hub)
- 2x wheel hub & bearing assembly from a front-wheel-drive car
- 1x 28.5″ (72.35cm) long, 58″ (1.59cm) diameter galvanized threaded rod (must fit the center of the wheel hub & bearing assemblies)
- 5x 58″ (1.59cm) galvanized nut (must fit the 28.5″ or 72.35cm threaded rod)
- 4x 58″ (1.59cm) galvanized lock washer (must fit the 28.5″ or 72.35cm threaded rod)
- 1x 58″ (1.59cm) galvanized or brass retainer (must fit the 28.5″ or 72.35cm threaded rod and be larger in diameter than the hole in the spool)
- 4x 3.5″ (8.89cm) metal bolt strap for 1/2″ (1.27cm) bolt with
- 5/16″(7.94mm) holes (must fit the bolts that fit the wheel hub & bearing assembly)
- 8x 2″ (5.08cm) long 5/16″ (7.94mm) galvanized hex head lag screw
- 156x 3″ (7.62cm) galvanized Phillips pan head wood screws (Must be long enough to penetrate the spool flange plus 1″ or 2.54cm)
- 140x 2″ (5.08cm) galvanized Phillips pan head wood screws
- 12x 4″ (10.16cm) long 5/16″ (7.94mm) galvanized hex head lag bolt
- 22x 5/16″ (7.94mm) galvanized fender washer
- 1x rear 28″ (71.12cm) mountain bike wheel with gear cassette, bolts, and nuts. The larger the diameter the faster it will spin the alternator. The inner rim width must be wider than the serpentine belt
- 1x bicycle pedal gear and chain. The larger the diameter of the pedal gear, the faster the alternator will spin
- 1x flat serpentine belt at least 110″ (279.4cm) in length or longer that is also narrower than the bicycle wheel’s inner rim (It must fit the bike rim and the pulley on the alternator and must be long enough to fit around the bicycle wheel and connect it to the alternator)
- 1x 11.5″ (29.21cm) 5/16″ (7.94mm) galvanized threaded rod (must fit through the hub of the bicycle wheel)
- 2x 5/16″ (7.94mm) galvanized lock washer. Must fit an 11.5″ (29.21cm) threaded rod
- 1x 6″ (15.24cm) long pressure treated 2×4″ (5x10cm)
- 1x 4″ (10.16cm) long pressure treated 2×4″ (5x10cm)
- 1x 5′ (152.4cm) long pressure treated 2×4″ (5x10cm)
- 1x 50’ (15.24 m) long 2-conductor 8-AWG (3.26mm diameter) multistrand copper electrical wire
- 1x pair of alligator clips for 8-AWG (3.26mm diameter) wire
Of course, all of these are great projects. The kind that could make all the difference when SHTF.
Plus, making them is a cinch. Even for some of the worst DIY-dunces, I’ve ever known. The kind that, when hammering, hit their thumb more than a nail.
But a step-by-step explanation for how to make them all would be far too long for a modest article. That’s why we’ve included step-by-step instructions, in our latest book ‘Survival Sanctuary’, your one-stop shortcut to off-grid self-reliance.
Even better, you’ll get sixty full days to return it in the extreme, highly unlikely event your unhappy.
That gives you two months to test it out, try some of the projects, and if they’re not for you, no hard feelings, you’ll get your money back.
What makes these projects special is they’re made with adaptability in mind. Meaning if the sky falls, and you crawl out of your bunker to glimpse little more than a barren, ashen waste, you’d still find enough material around you to assemble your own off-grid paradise. Or, save money on your bills when times are good.
So why not check it out? Click the image below for more info.
4 Easy Projects That Instantly Slash Your Water Bills


GOOD STUFF, Cache. I like what you write. For the Treadmill motor, go to the Surplus Center in Lincoln, Nebraska. They have a Good Selection and their Prices are Better than Anyone Else. For the gas powered generator use a Briggs & Stratton single, about 7-9 H.P. Any less HP just won’t pull the load and will burn much more gas trying to. Tecumseh motor is OK, just hard to start. For the Alternator use a Chrysler type, pre- 1983. I have been down this road 4 times. Trust me.
One of the best, simplistic explanations of what the day-to-day experience of living on an average solar system set-up looks like. For all of us contemplating solar for the first time, thank you.