


OK, I’m a huge fan of fast food. By that, I don’t mean the golden arches; I’m talking about something that I can warm up and eat without putting forth much effort. I also like the idea of having ready-made meals that can be heated up in case of emergency.
Since I have to can my food at the end of the season anyway, and I always go home to help my parents since they still run the farm, my mom and I have developed some pretty delicious recipes. I also admit that I’ve snagged and adapted my share from the ‘net.
Since we all know that pressure canning is a must for low-acid food, why bother just canning green beans when you can make an awesome soup or stew instead? We just make up a huge pot of the meals, then ladle them into the jars before we cook it. The pressure canning will cook it, so cooking it in advance will just give you a jar of mush.
A couple of tips – always use a spoon or bubble remover to get the bubbles from inside the jar. Clean your rims with vinegar before placing the seals on them. Add the rack to your canner before putting your jars in. Add 4 or 5 inches of water to the canner after your jars are in the canner, or refer to your pressure canner for specific instructions. Have the water simmering when you add the jars to prevent bursting hot jars in cold water.
Without further ado, let’s get to the recipes. I’m including a bit of everything to get your creative juices flowing. Remember that anything that you cook can be canned, so there’s no need to rough it when the lights go out. You can eat easily and deliciously by candle light.
Grandma’s Chicken Soup
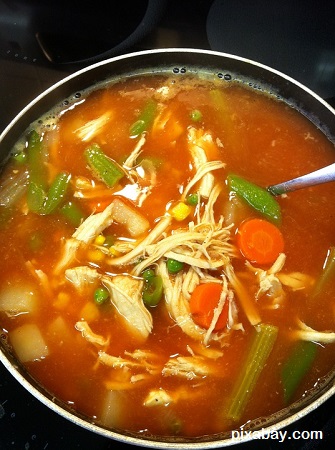 Personally, I like to add pasta to this when I’m warming it up, but you don’t want to can the pasta or else you’ll have mush.
To add it later, just toss in a handful of egg noodles when you’re warming up the soup and cook long enough for the noodles to get done.
Yields about 6 quarts.
- 4 quarts water or chicken broth
- 4 chicken bouillon cubes if you’re using water
- 4 cups of chopped raw chicken
- 1 cup chopped celery
- 2 cups sliced carrots
- 1 cup chopped green onions
- 1 tbsp. minced garlic
- 2 tsp salt
- 2 tsp black pepper
Place broth (or water and bouillon) and chicken into a large stock pot. Bring to a boil and add remaining ingredients. Bring to a boil again. Ladle into quart jars, leaving 1 inch head space.
While soup is cooking, get your seals hot. After you ladle your soup into jars, clean the rims very well and add the seals and rings. Process for 90 minutes at 10 pounds.
Traditional Chili
There’s nothing better than a good chili on a cold night, or a warm one when there’s no power! You can make this a vegetarian chili by leaving the meat out, obviously. Yields about 6 quarts.
- 2 pounds ground chuck
- 1 cup chopped onion
- 2 tbsp. salt
- 1 tbsp. minced garlic
- 1 tsp. black pepper
- 1/2 tsp cumin
- 2 cups chopped tomatoes
- 2 lbs. dried kidney beans
- 2 quarts tomato juice
- 3 tbsp. chili powder
Rinse your beans and soak them overnight. Brown the hamburger and drain well. Bring the water to a boil and add all ingredients. Boil for 5 minutes. Meanwhile, heat your seals in hot water. Ladle chili into jars and clean the rims well. Place in the pressure canner and cover with hot water to the bottom of the rings. Process for 90 minutes at 10 lbs.
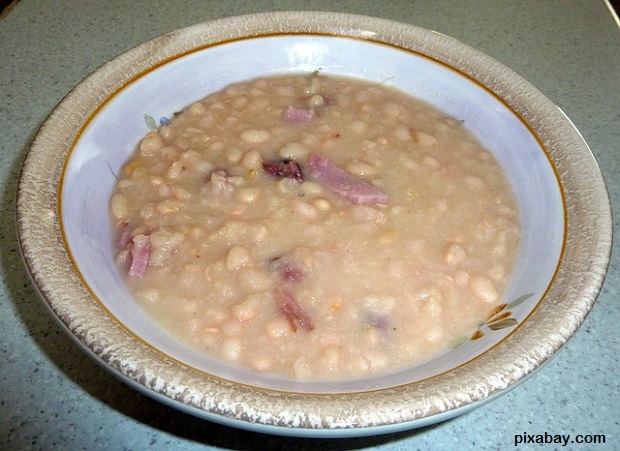
16 Bean and Ham Soup
This one says it all. Make up a pan of cornbread and you’ve got a delicious, nutritious meal that will stick to your ribs. We don’t add all of the extra vegetables but if you’d like, feel free to toss in carrots, tomatoes, or whatever you’d like. This is the traditional, simple ham and bean country recipe. Yields about 9 quarts.
- 2 lbs. 16 bean mix
- 1 cup chopped onions
- 4 cups chopped ham
- Large hambone – DON’T use the neck bones because you’ll have chunks of bone. That sucks to pick out.
- 14 cups water
- 2 tbsp. salt
- 1 tbsp. black pepper
Soak beans overnight. Add all ingredients to a large stockpot and bring to a boil. Boil for an hour and remove the ham bone. Meanwhile, prepare your seals. Ladle soup into jars, stirring and scooping deep to make sure you get an equal amount of ham and beans in each jar. Leave 1 inch headspace and process for 90 minutes at 10 lbs.
Chicken Corn Chowder
Use a mix of brown and white chicken to add flavor to this soup. Here’s the thing – I love chowder, which means I need to use flower to thicken it. The rub here is that you can’t can with flour because it prevents the heat from getting to the center of the jar. Therefore, add a couple of tablespoons of flour mixed with enough milk to make a thick slurry when you’re warming up a quart of the soup.
- 4 quarts water or chicken broth (use 4 bouillon cubes if using water)
- 4 cups cubed chicken
- 1 cup diced green onion
- 1 cup diced celery
- 5 medium potatoes, cut into 1-inch cubes
- 4 cups corn
- 1 tbsp. minced garlic
- 1 tbsp. salt
Bring the water/broth and chicken to a boil in a large stock pot. Add remaining ingredients to the pot and bring to a boil again. Boil for 5 minutes. While it’s coming to a boil, heat your rings. Ladle the soup into quart jars, leaving 1 inch of head space. Process for 90 minutes at 10 lbs.
Sloppy Joe Filling
Who doesn’t love a good sloppy joe? It’s easy to heat up and the kids will eat it, especially if you throw a slice of cheese on it! Delicious! This yields about 6 pints.
- 4 lbs. ground chuck
- 1 1/2 cups diced onion
- 1 cup diced green pepper
- 1 tbsp. minced garlic
- 2 tbsp. Worcestershire sauce
- 3 cups ketchup
- 1/2 cup water
- 1/4 cup brown sugar
- 1/4 cup apple cider vinegar
- 1 tablespoon mustard
- 1 1/2 cups water
- 1 tsp. salt
In a medium stockpot, brown the hamburger and onions. Drain. Add remaining ingredients and simmer for 20 minutes. While it’s simmering, get your canner and seals ready. Ladle into pint jars and wipe the rims clean. Add seals and rings and place in the canner. Process for 75 minutes at 10 lbs.
Deconstructed Stuffed Cabbage Rolls
It’s not a good idea to can whole cabbage rolls because it’s tough for the heat to get to the center, but you’re just going to chop it up on your plate anyway, right? So why not just can all the ingredients and call it something fancy, like “deconstructed”? It’s still delicious! This yields about 5 quarts.
- 2 lbs. ground chuck
- 1 cup chopped onion
- 1 tbsp. minced garlic
- 1 cup green pepper, chopped
- 1 medium cabbage, cored and chopped
- 1 cup julienned carrots
- 1/2 lb. mushrooms
- 4 cups chopped tomatoes
- 2 cups tomato sauce
- 1 cup water
- 2 tsp. salt
- 2 tsp. black pepper
In a medium stockpot, brown the ground chuck and onions. Drain. Add remaining ingredients and bring to a boil. Cover and simmer for a few minutes until cabbage wilts. Meanwhile, prepare canner and seals. Ladle into jars and clean rims. Add seals and rings. Process for 90 minutes at 10 pounds.
Vegetable Beef Soup
Another stick-to-your-ribs meal. Yuuuumm. This yields about 6 quarts.
- 3 lbs. stew meat (it doesn’t have to be expensive because the canning process will make it tender)
- 2 quarts beef broth
- 2 cups chopped onion (large chop)
- 2 cups sliced carrots
- 1 cups sliced celery
- 4 large potatoes, cubed
- 2 cups corn
- 2 quarts canned tomatoes or 4 cups fresh chopped tomatoes
- 1 tbsp. salt
- 1 tsp. black pepper
- 1 tablespoon Italian seasoning mix
In a large stockpot, brown the meat with 1 tsp olive oil. Add the rest of the ingredients and simmer for 10 min. While it’s simmering, prepare your canner and seals. Ladle into jars and clean the rims well. Add seals and rings. Process for 90 minutes at 10 lbs.

Now that you have a general idea of some great pressure canned meals, get started on your own! Do you have any favorites that you’ve created or that have been in your family for generations? If so, please feel free to share them with us in the comments section below.
This article has been written by Theresa Crouse for Survivopedia.


Can this be done in a regular canner? I don’t havee a pressure canner.
No, Virginia, you have to use a pressure canner for all of these recipes. A waterbath canner doesn’t get nearly hot enough to get the job done safely.
Yes, you can waterbath anything. You just need to waterbath meats, for example, for three hours. Four hours for anything fish.
Sorry, Noemi. You absolutely CANNOT waterbath anything. Thinking this is true puts people in hospitals (and cemeteries!) every year. Water bath canning is ONLY for high pH foods (acidic), or those with high osmotic pressure, like things with high sugar or salt. You cannot kill thermophilic bacteria and some mesophilic bacteria at the temps you get from a boiling water bath. You cannot destroy any spore-forming bacteria, such as Clostridium botulinum and Clostridium perfringens, which is very common on meats, just by boiling. Boiling for 6 to 10 hours will not destroy some strains of C. perfringens. This is extremely dangerous advice.
The idea that you can water bath meats goes way back to the beginning of canning when we simply did not know any better. We are talking well over 150 years ago – even before bacteria was well known. The military were early adopters of canned food and they found out the hard way that water bath canning did not always prevent spoilage and dangerous food.
Also, for those who wonder why pressure makes a difference, it’s just like the radiator in your car. The pressure cap allows the coolant to get will above the normal boiling point and remain a liquid. In the same way, allowing pressure to build up in a canner raising the temperature well above 212F and killing ALL the dangerous bacteria.
Have a question on Theresa Crouse’s Traditional Chili recipe. In the directions it says to bring the water to a boil, but in the list of ingredients no water is listed. How much water are we supposed to bring to a boil?
I thought the same thing Sandy! I just put the water in that filled up over the beans and hope that when I open the jars, I can add water as needed if it wasn’t enough. No one answered you though from back in 2016.
Since I have never done any canning, I do not know what “seals” and “rings” are.
What does it mean to “add water to the rings”?
The rings and seals are the two part ‘lids’ to the jars. Just add a few drops of water, evenly distributed to the seals (seals will have a small rubber grommet) which is were you put the water. The ring (screws on clockwise) fits over the seal and completes the ‘sealing’ of the contents (food). PS: Never reuse a seal when canning. They are one time use only. Of course once opened if you don’t eat all the jar at one meal then you can reuse and put in the fridge, but never for canning again.
Daamn….I’m getting hungry just looking at the pictures!! Looks SUPER good!!!
Maybe you could start selling some of that on the side!!
I live at sixty five hundred feet, is that going to change the processing time? If so, how much?
Yes, altitude adds processing time. Follow your canner directions or your local extension service will have the correct info.
Always check what your pressure needs to be. In almost all cases processing time remains the same , you usually just have to change the pressure.
Here’s my recipe for a chicken soup jarred meal:
Take your whole chickens cut into pieces, cover with water and simmer until cooked. Remove the chicken and when cool, remove the meat and shred. Throw the skin and bones back in the stock, add a splash of white vinegar and simmer for another hour or two. Then strain through a colander to remove the solids.
In your quart Mason jars, add in the following order; 1 cup chopped onion, 1 cup chopped celery, 1 cup chopped carrots and 1 cup shredded chicken. Fill the jar to the neck with the chicken stock you just made. Remove air bubbles, wipe the rims, seal and process 90 minutes at 10 pounds (15 pounds over 1000′).
When I need a quick meal, I just open the jar, add canned chicken broth and a handful of rice or noodles, and the meal is ready to go.
Thank you for the recipes. I was thinking about doing this but didn’t know what type of recipes to try.
Please use only USDA tested recipes…National Ctr for Food Preservation.
I don’t see your answer to another person’s question: how much water for the chili recipe? It says to boil it but does not list it in the ingredients.
I made your chicken corn chowder recipe. I had about a cup left over after filling my jars, so i added a little milk and flour (I mixed flour and milk until smooth, no lumps ). It is absolutely wonderful. I’m going to make it again and double the recipe so i”ll have plenty this winter.
I also made your vegetable beaf soup. I’ts perfect. i plan on making 2 more batches of it also.
These 2 recipes are better than any fast food i”‘ve ever had. Thank you for the effort put into developing great tasting, easy meals.
And to the kill joy who says only use tested recipes, boil for 10 minutes if in doubt and you have killed all botulism.
For your sloppy joe recipe you list 1
/2 c water and 1 1/2 c water. Explain
Hello- so excited to make all these. Your traditional chili says to boil water however no water is listed in ingredients- only tomato juice. Am I missing something?
I want to make a beef stew for canning but don’t want regular white potatoes in it. I would like to substitute sweet potatoes. Is this possible to do safely? Do you have a canning beef stew recipe that does not include regular white potatoes? Hopefully one that has sweet potatoes instead.
What kind of ham do you use for the ham and bean soup!? I really wanna make some but everything says that cured meat like ham is not approved for canning.
Thank you for this post!
I have a ton empty quart jars that needed filling. While I type this, I have your bean and ham soup in the canner and later this week I’ll try the chicken corn chowder.
I would also appreciate an answer to the question about how much water to use in the sloppy Joe recipe? I used 1/2 cup only and it turned out dry. I do love your recipes…the 15 bean soup was delicious. Please share more recipes with us.