


If you rely on your guns to survive disasters, then you should know how to clean and maintain the two basic types of handguns. The first is the revolver, which is a simple firearm to clean and maintain. The second firearm is the semi-auto pistol. The maintenance is not as simple as for the revolvers, but with a little bit of practice it can be mastered too.
The shooter must remember that a dirty and a not well maintained handgun is a dangerous weapon to the shooter. With neglect and poor cleaning and maintenance a handgun will begin to rust and the internal parts will weaken or possibly break. The firearm’s dependability will fall and the handguns will eventually fail when you need them the most.
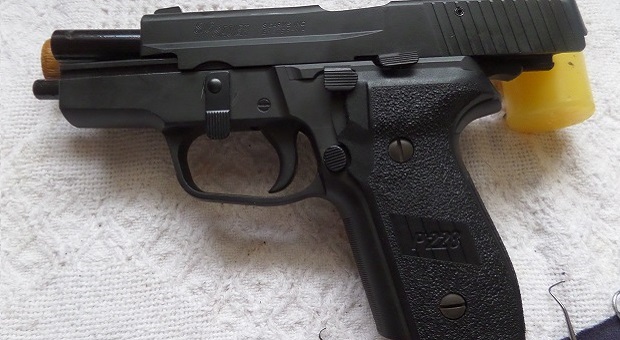
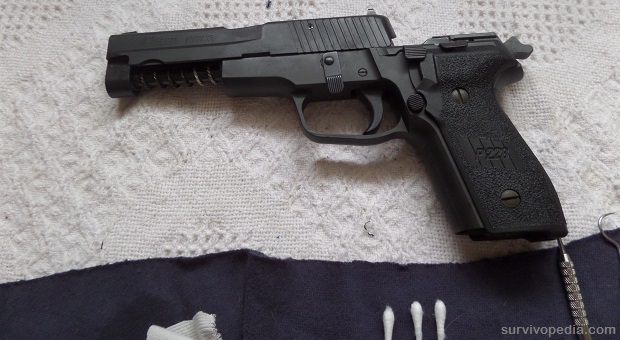
Let’s get to work and see how you should take care of your Sig Sauer P-228 9mm Pistol.
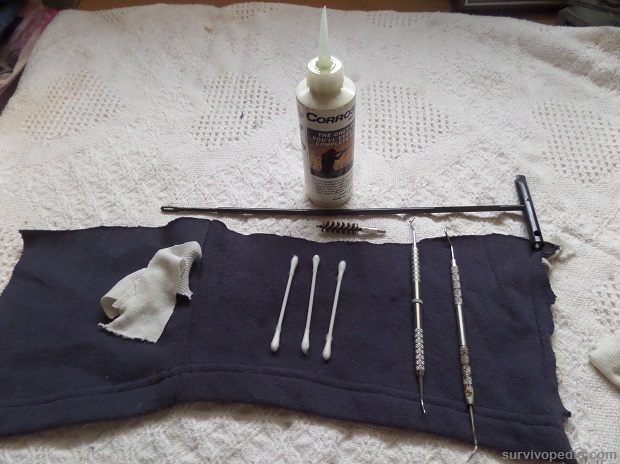
Step 1- Lay out all needed cleaning supplies in cleaning area.
Step 2- Always visually check to make sure the pistol and all magazines are unloaded. Also remove all ammunition from the cleaning area.
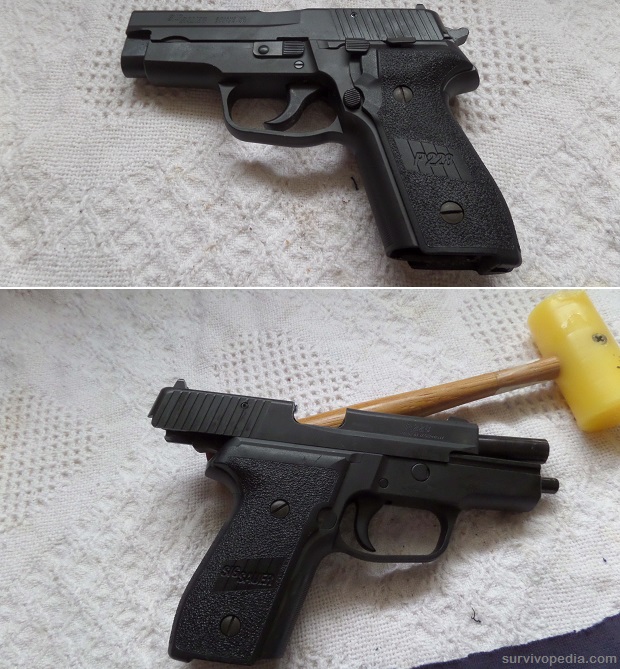
Step 3- With the slide in the locked back position and an empty chamber, turn the take down lever clockwise from the 3 o’clock position down to the 6 o’clock position.
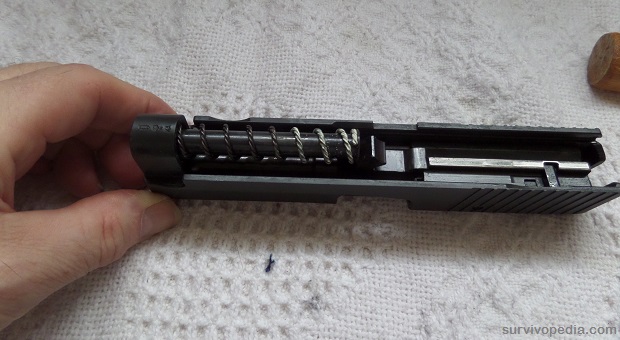
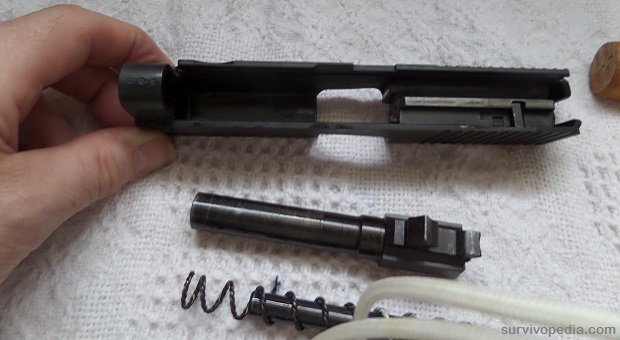
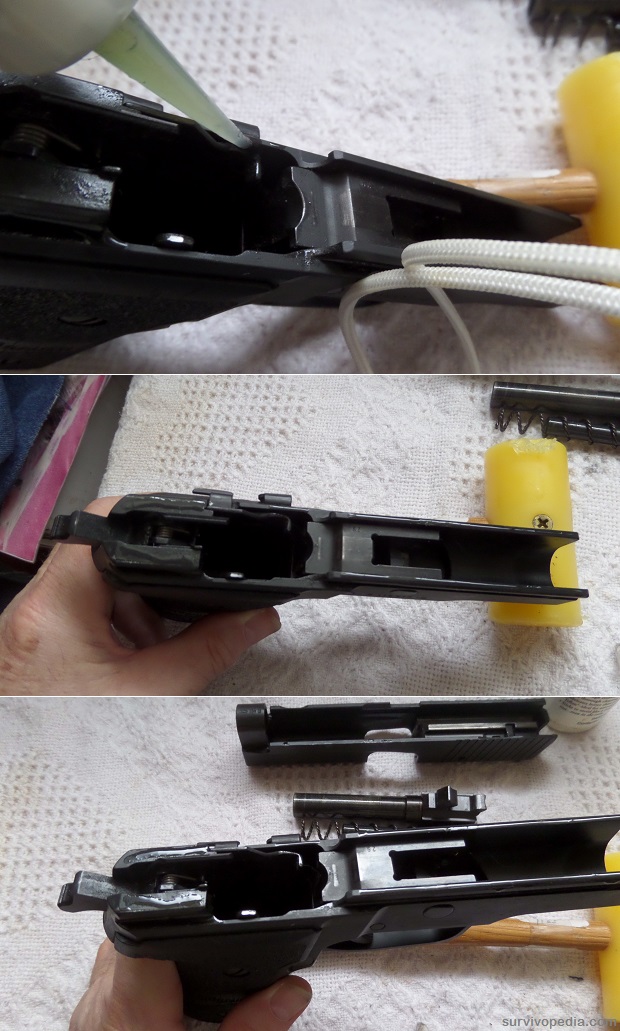
Step 4- Separate the slide from the frame by pulling the slide forward off the frame.
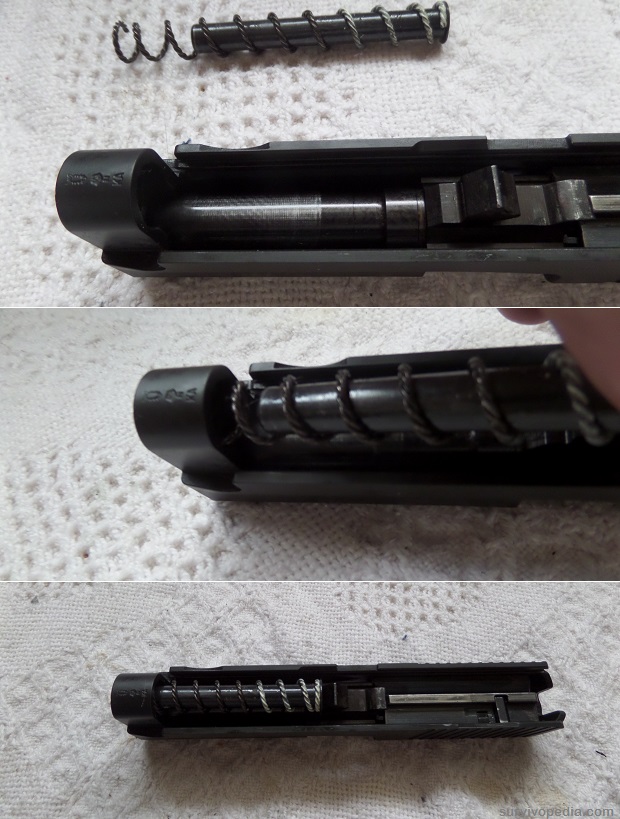
Step 5- The slide consists of 4 parts: the barrel, recoil spring, guide rod, and the bolt assembly.
Step 6- To remove the recoil spring and guide rod from the slide, push the guide rod forward into the slide and lift off the spring and guide rod as a unit. Be careful, because this this assembly can easily slip from your fingers and fly away from you. If it hits you in the eye it may cause an eye injury.
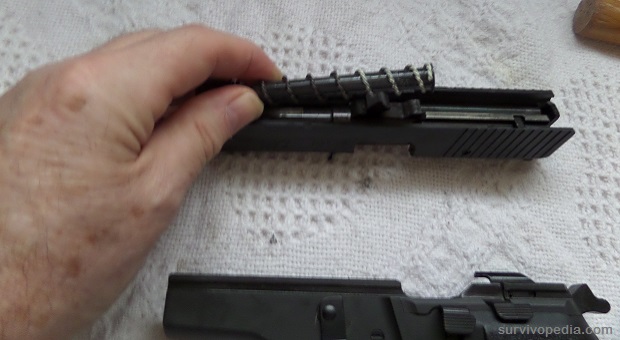
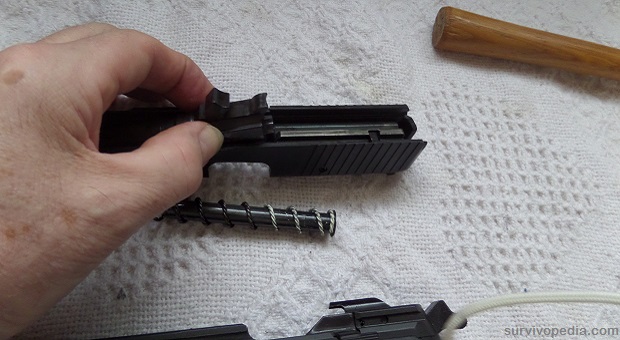
Step 7- Once the guide rod and spring are out of the slide it is easy to remove the barrel. This is done by gently pulling the barrel back about an inch. Then lifting upwards and backwards to remove the barrel from the slide.
Step 8- Do not remove the bolt assembly unless it is very dirty or the possibility of broken parts in the assembly. This should be done by a certified armor or gunsmith and is beyond the scope of this cleaning article.
Step 9- Set aside the slide, barrel, spring, and guide rod to be inspected and cleaned.
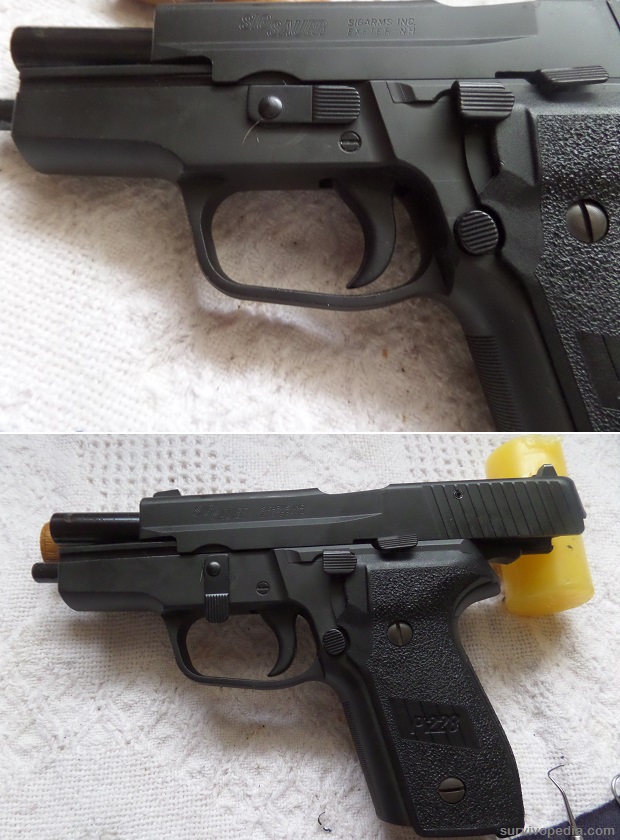
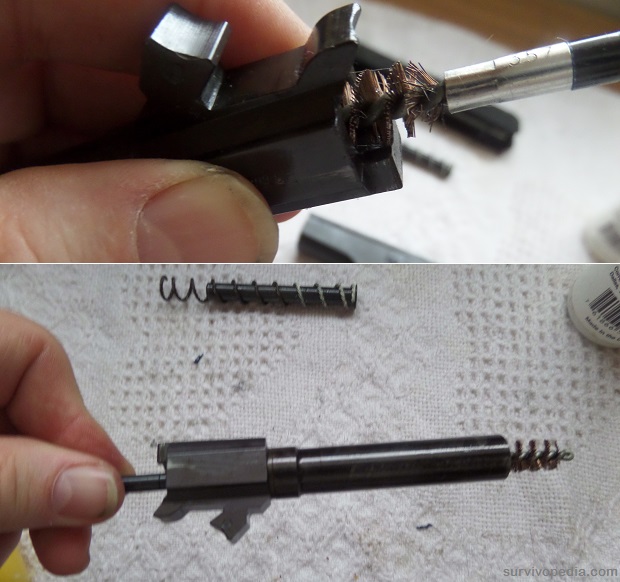
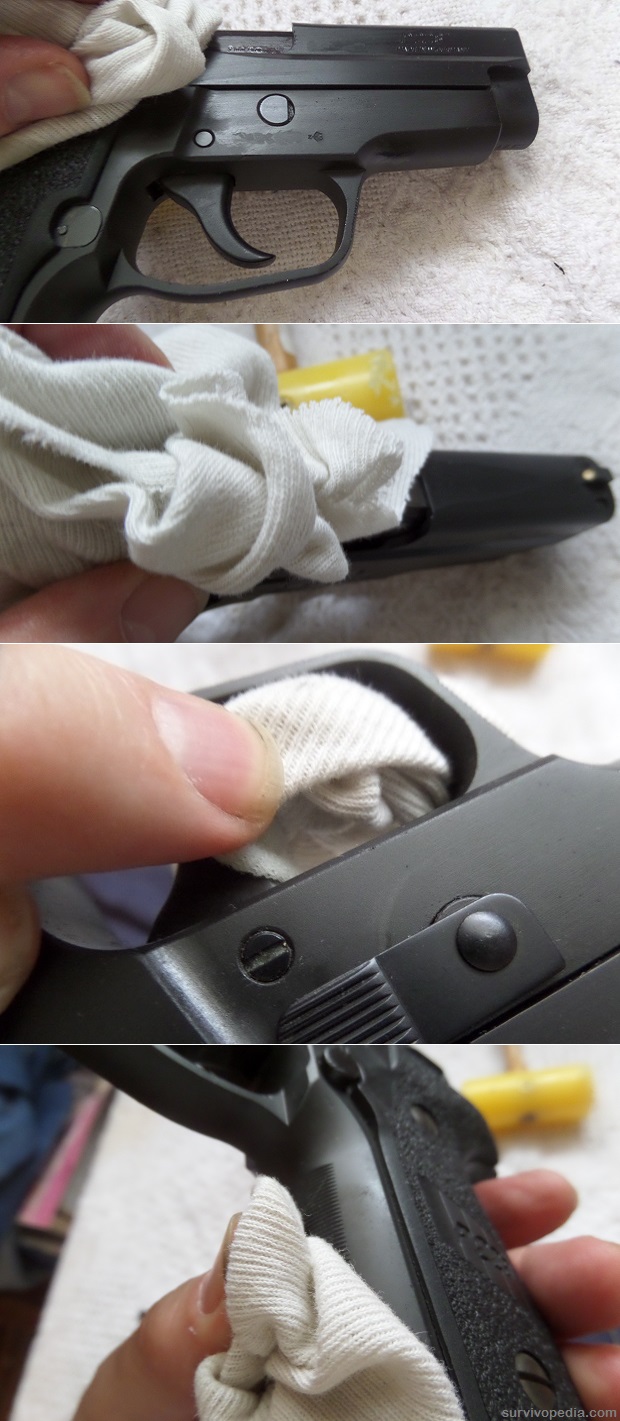
Step 10- The first thing to do when cleaning the frame is to use a small soft wire brush to remove dirt and grime from the slide rails.
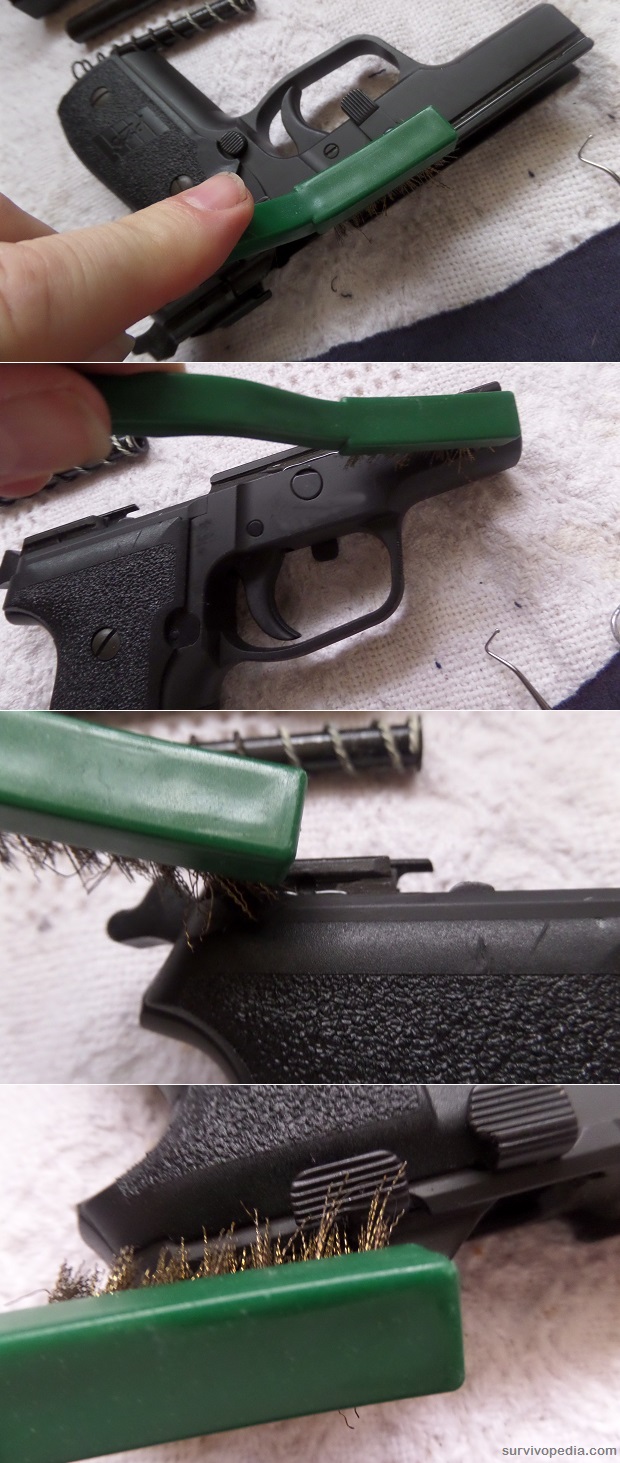
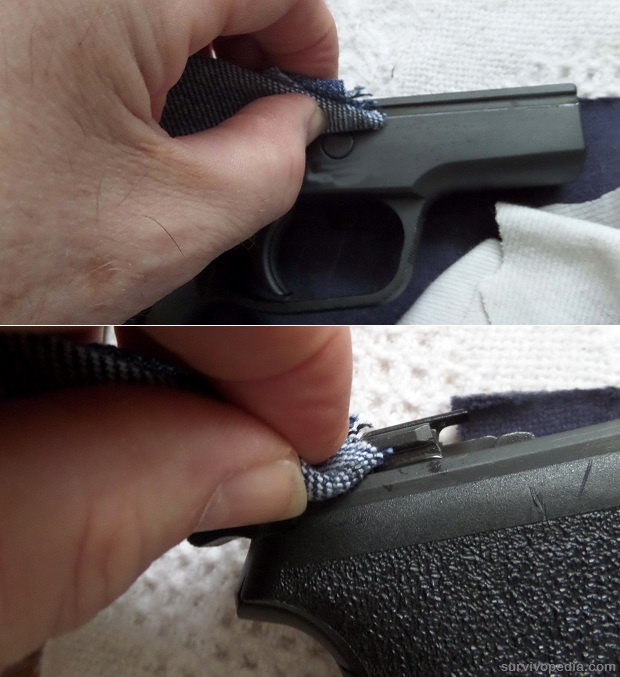
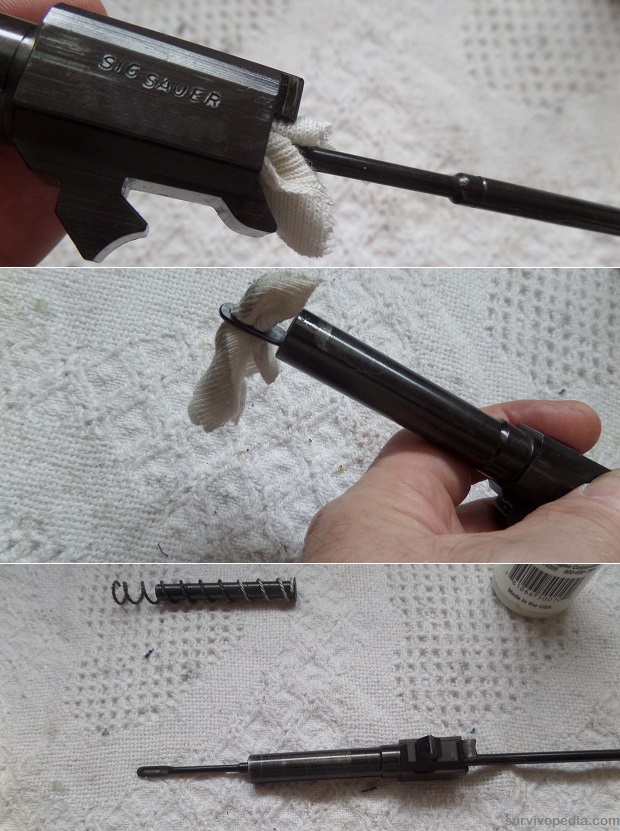
Step 11- After finishing the frame brushing use a rag with gun cleaner on it to remove any dirt or grime that the brush did not remove.
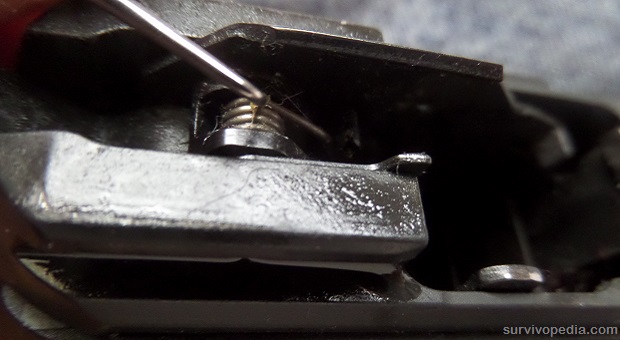
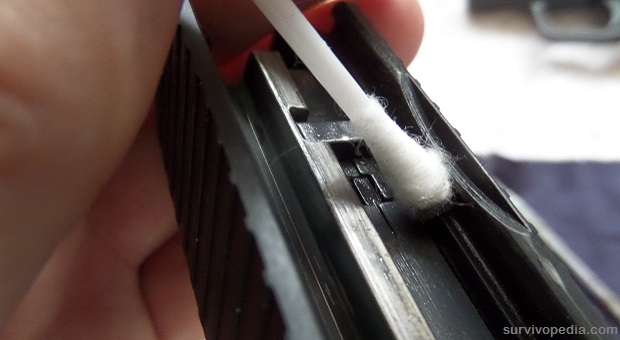
Step 12- To clean the inside of the frame, trigger,hammer, and springs I use Q-tips with gun cleaner on them.
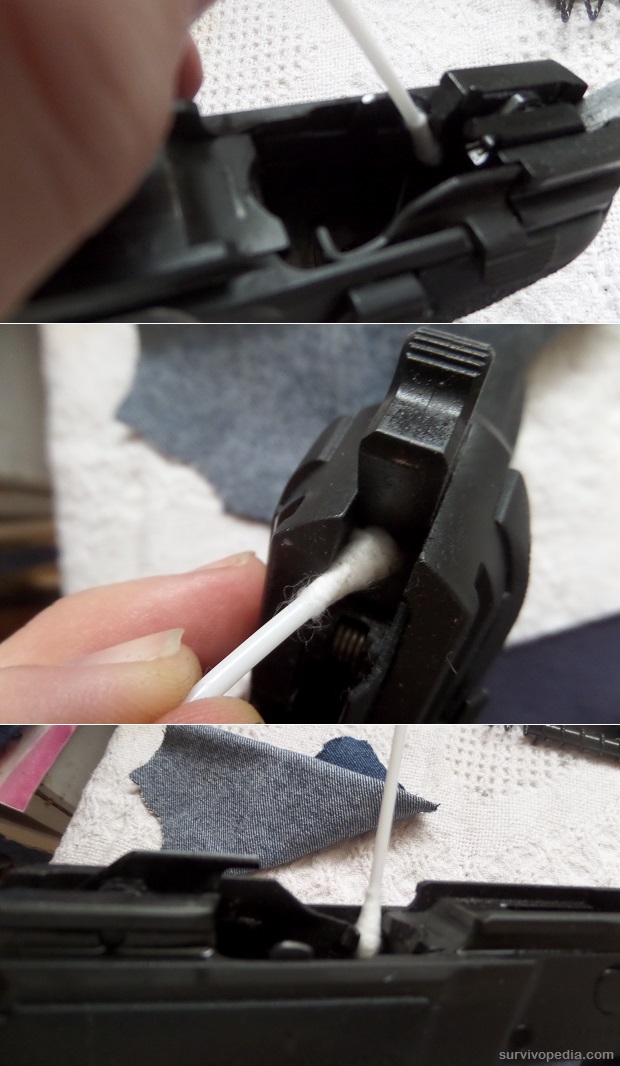
Step 13- Use a metal dental pick to remove dirt or grime that the Q-Tips could not remove.
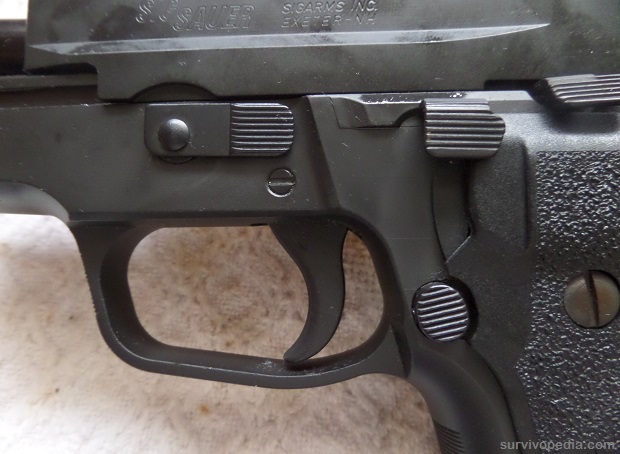
Step 14- Now that the frame has been cleaned it is time to lubricate it. Put a drop of gun lubricant on all springs, spring pins, magazine release parts, slide rails, slide release parts, and hammer drop parts.
Step 15- To clean the slide, I first start by using Q-Tips with gun cleaner on them. I begin by first cleaning the bolt and firing pin assembly. After cleaning off all dirt and grime with the Q-Tips, I use a metal dental pick to remove the last traces of dirt and grime on the bolt and firing pin assembly.
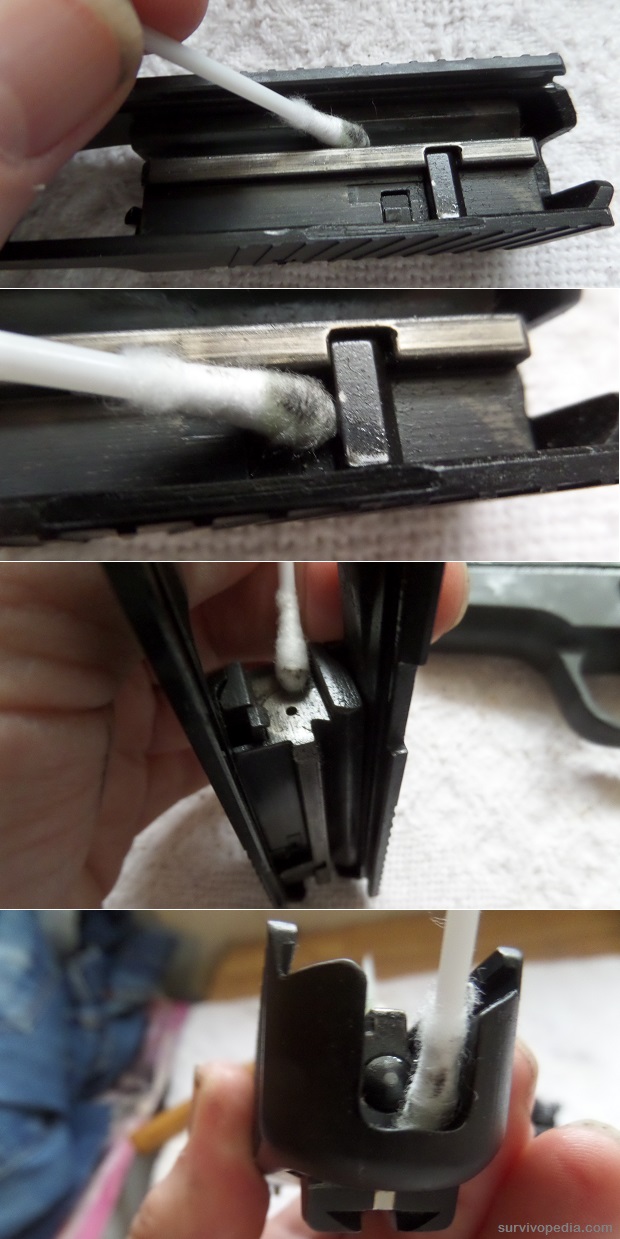
Step 16- The next section of the slide to be cleaned is the front section. I use Q-Tips with gun cleaner to cleaner to clean this area. The barrel, spring, and guide rod must be well cleaned to remove dirt, grime, and powder residue. I also use Q-Tips to clean inside the slide top.
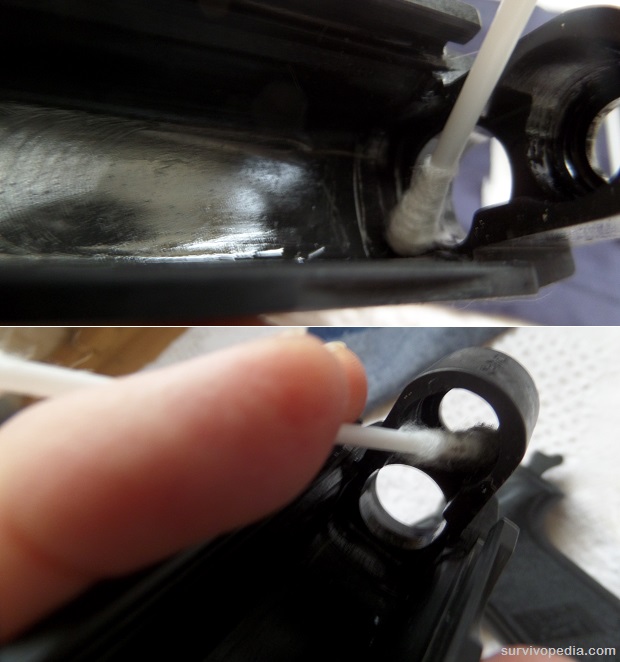
Step 17- Use Q-tips with gun cleaner to clean the slide rails.
Step 18- Lubricate the bolt and firing pin assembly lightly with a Q-Tip.
Step 19- Wipe down the inside of the slide lightly with a gun lubricant to protect and lube all surfaces.
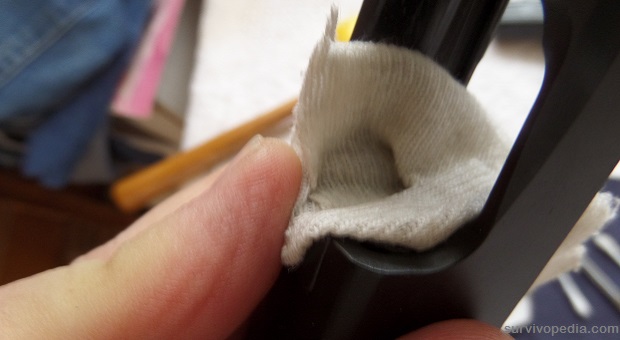
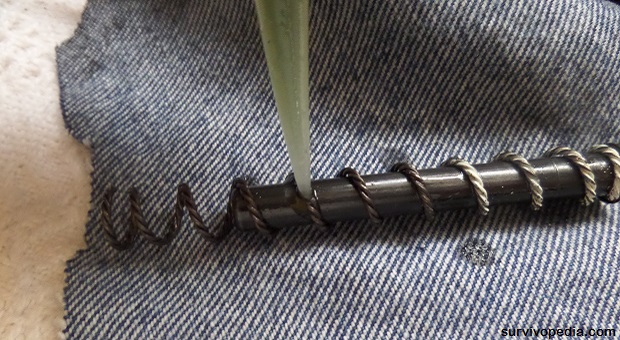
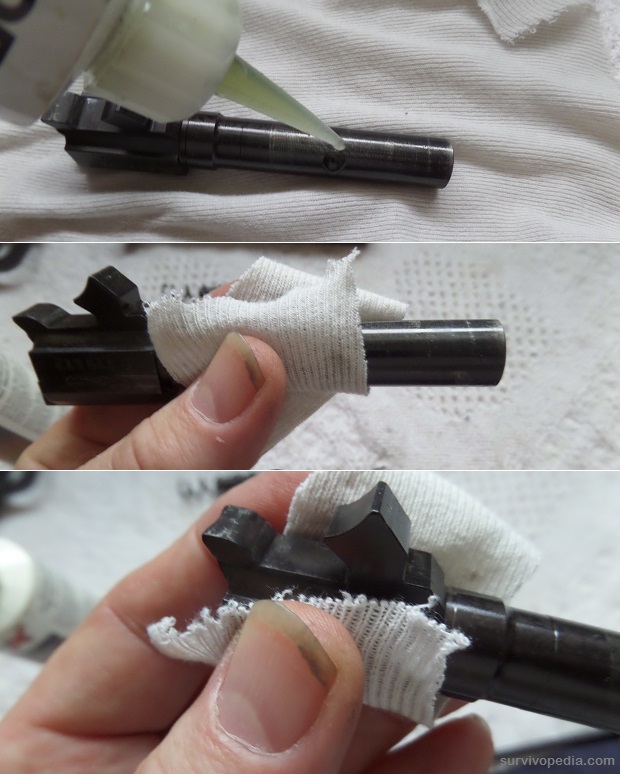
Step 20- To clean the recoil spring and guide rod put, some gun cleaner on the assembly and wipe off with a clean rag to remove dirt, grime, and powder residue.
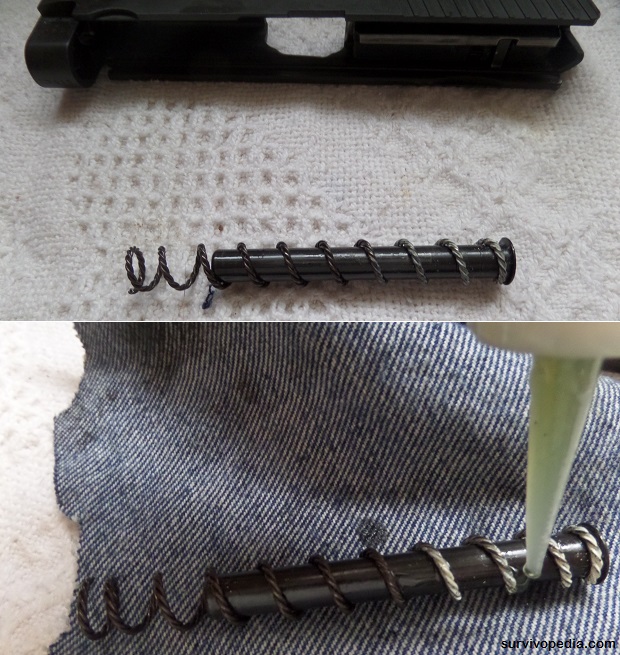
Step 21- When the recoil spring and guide rod are clean, lubricate with a good lubricant and wipe off the excess.
Step 22- To clean the barrel, use a wire brush dipped in gun cleaner. Clean the barrel from the back to the muzzle. Do this between 5-8 times or until the barrel is clean.
Step 23- Next run a dry patch through the barrel to remove any left over cleaner in the barrel. When this is completed, put a fresh lubricated patch on the cleaning rod. Push the patch through the barrel from the back to the muzzle.
Step 24- The last step in cleaning the barrel is to put a good gun lubricant on it and wipe off the excess with a clean rag.
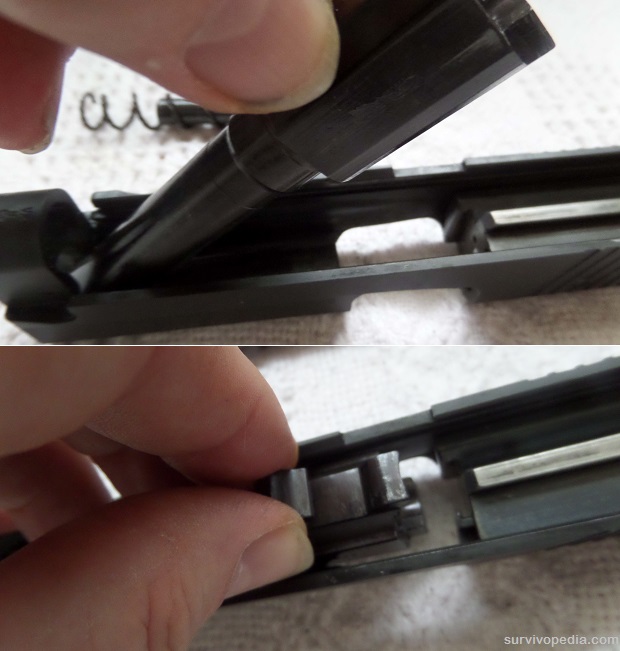
Step 25- To reassemble the slide first carefully install the barrel in the front of the slide with the muzzle down and the rear facing slightly upward. Then push the barrel down and into the lower larger hole of the slide to mount the barrel in the slide.
Step 26- Next place the spring and guide rod assembly in the front of the slide in the upper hole with the excess spring side of the assembly going in first. Then compress the spring with the guide rod and place it in the guide rod holding section of the barrel.
Step 27- Reassembling the slide to the frame is done by putting the rear of the slide rail groves on to the slide rails of the frame. Continue pushing the slide up the rails until the slide is all the way back and can be held in place there with the slide release.
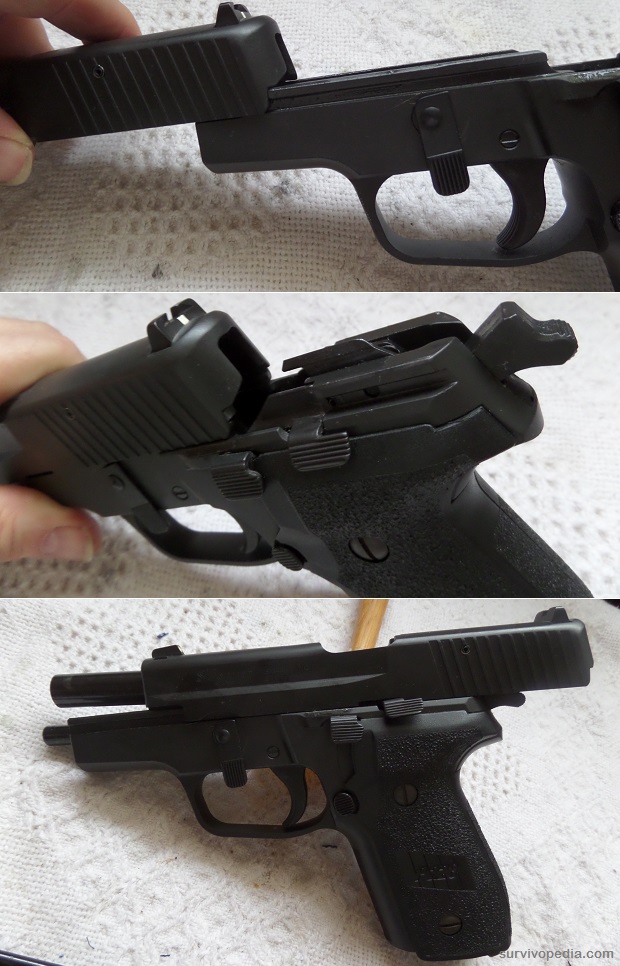
Step 28- Push the take down lever counter clockwise from the 6 o’clock position to the 3 o’clock position to lock the slide on the frame. Function test the pistol for proper functioning.
Step 29- Wipe down the outside of the pistol with a good gun lubricant to protect the firearm from rust, corrosion, and finger prints.
Warning To take your pistol totally apart without the proper training can be dangerous and possibly life threatening if you do not put it back together properly. If your pistol needs more in depth cleaning or maintenance take it to a certified gunsmith or armorer for these services.

This article has been written by Fred Tyrell for Survivopedia.


Comments 6