


This article from Ropes Direct will explain exactly how to build a strong and secure shelter out in the wildness.
There are many reasons you should know how to build a shelter in the outdoors, whether it’s to keep yourself protected whilst sleeping or from bad weather conditions and animals. This article will show you exactly how to build a shelter in a variety of different ways and using different resources.
This is a guide that anyone can follow – we’ve specifically chosen designs of shelter that are easy to construct, no matter the resources you have with you.
Inexpensive, Easy to Build Cellar Will Protect Your Life and Supplies in the Next Crisis
We do recommend that you always take an essential set of items with you when you set out into the wilderness, whether it’s on a hike, a camping trip or your own adventure. In case you find yourself stranded without any equipment however, we’ve split this article into two sections: how to build a shelter with your own resources and how to build a shelter without.
With Resources
Resources to remember
We’d recommend packing some canopy or tarpaulin, rope, some pegs or poles, a blanket or sleeping bag and a pocket knife before heading out into the wilderness, especially if you think you’ll still be outdoors overnight.
At the minimum, a rope and a sheet of waterproof tarpaulin is enough to build a good shelter outdoors. You should be able to pick up both of these items from your local camping or DIY shop. Just remember to make sure the rope you choose is a decent length!
Creating your shelter
There are a variety of tent designs you can create using rope and tarpaulin. It might be a good idea to practise these at home before you set off on your adventure so that you know which design you prefer. That way, you won’t waste time struggling with different designs.
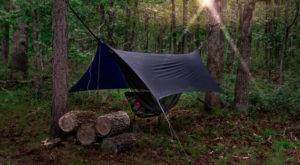
The first tent design is the A-frame.
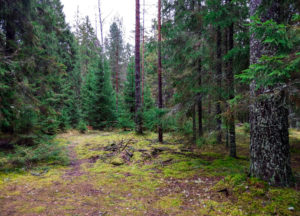
- Find an area with trees and within this area, locate two trees that are a reasonable distance apart (around 10ft).
- When you’ve found two trees of a suitable distance apart, tie each end of your rope around each of the tree trunks, making sure the rope is taut.
- Place the tarpaulin over the rope so that it hangs in a tent shape, as shown in the image below. You can secure the edges with pegs or poles if you have them. If not, make do with anchoring down the sides with any heavy rocks that you can find nearby.
Another design you can try is the Envelope shape. This design is a similar shape to the A-frame, with the advantage of having a floor.
- Locate two trees in the area and secure the ends of your tarpaulin to the trunks by tying a strong knot with your rope.
- Find the centre of the tarpaulin and secure each side to the ground, using pegs or poles. Secure this part of the tarpaulin a distance from the trees that creates the shape you want from your tent.
- Take the end of the tarpaulin and secure the corners to the ground, to make the tarpaulin taut and finish the shape of your tent. Make sure the back of your tent is facing towards the direction of the wind, to ensure you have a protective barrier in the event of rainfall.
Bonus tip!
It’s a good idea to teach yourself to tie strong and secure knots for constructing your tent. One knot we would recommend learning is the clove hitch knot. It’s not too hard to learn, and to help you out we’ve created an easy-to-follow diagram to help you!
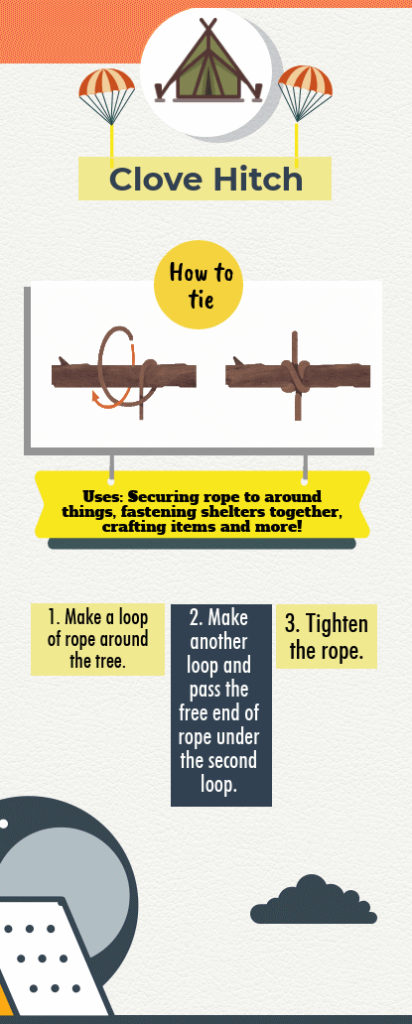
Click here to learn how to tie more useful knots.
Without Resources
Found yourself stranded in a strange place with no equipment? Here’s what you’re going to need to do to build a shelter if there’s a sudden downpour of rain or you need to get a good rest before continuing your expedition.
Resources to look for
First of all, assess what resources are available to you. Here are some things to look out for:
- Trees make great shelter and can be a great foundation for a strong and secure shelter.
- Loose branches and foliage. These are great for reinforcing your structure and creating a
- Heavy rocks can be useful as support for your structure.
- Dead plants. Dry, dead plants can be used to create strong rope
Bonus tip!
Rope is going to be really useful when constructing your shelter and using the natural materials around you, it’s possible to create strong rope that you can use to tie branches together and secure items to trees by using grass. Here’s how to do it:
- Find a patch of long grass in the area and collect a bunch of this grass.
- Tie a knot in the end of the bunch of grass.
- Divide the bunch of grass into two sections.
- Twist each section around each other and continue this action to the end of the bunch of grass. As you start reaching the end of the bunch, you can continue adding more grass to each of the sections before continuing the twisting motion, to create a length of rope at the desired length.
- Once you’ve created a piece of rope at the length required, you can secure the end by tying a knot.
To follow the process of creating rope from grass, look at this video:
Creating your shelter
You may find building a shelter more challenging than you would with proper equipment, but there are a few ways you can create a shelter from natural resources.
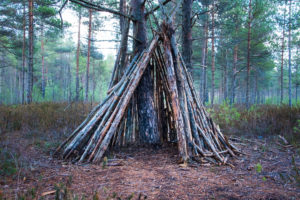
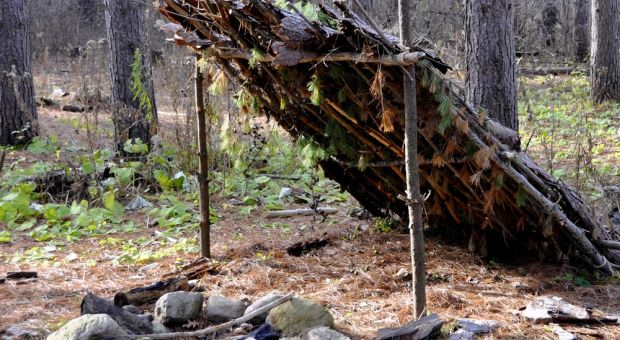
One design you can try is a tipi-style shelter.
- Find long tree branches that are about the same length and prop them up against one another to create a tripod-shaped frame.
- Once you have a basic shape that can stand up on its own, continue adding branches to reinforce the structure and make your shelter sturdier.
- When adding branches, try to ensure that there are as few cracks as possible in the frame. If there are any gaps, use leaves, bark and moss to conceal them as best as possible.
- Create the outside layer of your shelter with leafy branches. And your shelter is complete!
Another design of shelter you can try is the lean-to shelter. For this shelter, you will need to make a grass rope. You can learn how to do this using the instructions provided earlier in the article.
- Find an area with trees, and locate two trees around 6-10 feet apart. The distance you’ll need there to be between the trees will depend on how tall you are.
- Next, you need to find a long branch that is slightly longer in length than the distance between the two trees. Ideally, this branch should be thick and sturdy.
- Use your grass rope to tie each end of the branch securely to each of the trees. It’s important that this branch is properly secure, as it will be supporting the entire weight of your shelter.
- Gather as many long branches as you can find. Lay these branches against the branch tied to the two trees until there is no gap.
- Cover the outside of your shelter with leaves, sticks, moss and other foliage for insulation.

Resources
https://adventure.howstuffworks.com/survival/wilderness/how-to-build-a-shelter2


Learned this in the military- get a very strong poncho with eyelets and press studs around the edges (military type).
Clip it into a sleeping bag shape.
Find the thickest,thornyist bush you can.
Climb inside your poncho and literally “kick-in” a way to the centre of the bush.
It’s very dry because of all the foliage.
Pull your equipment in and pull the branches back into place.
Not only is it good against the elements but it will hide you from people and protect you from a lot of wild animals.
Like Brer Rabbit! Excellent!