


 Even before our society arrives at a complete meltdown, summer cooling bills can easily leave you with little money for daily needs and prepping. At the same time, once society collapses, it is not going to be feasible to try and lug around portable air conditioners let alone avoid areas where some form of advanced cooling will be required.
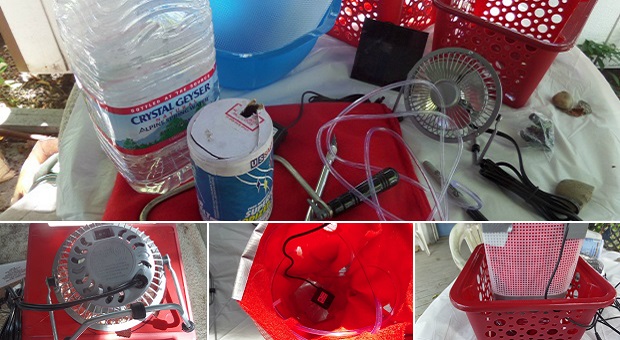
This particular “air conditioner” requires little more than a fan, submersible water pump, and salt to deliver as much as 20 – 30 degrees in temperature reduction.
How It Works
As water evaporates, it tends to produce a cooling effect. Evaporation can be sped up by heating the water (which happens in an air conditioner), or a fan can be used to push air over water. Using a fan to speed up evaporation will only work as long as the surrounding air has less water in it than what is being pushed out of the unit.
In this case, pushing the cooler air through salt (or some other desiccant) absorbs excess water. This makes it possible to achieve lower temperatures without increasing humidity.
Materials
- 2 small baskets with holes in them (I found 2 perfect ones for 1.00 each at Dollar Tree)
- 1 basin large enough to fit small baskets in completely (I used a round bowl for 1.00 from Dollar Tree).
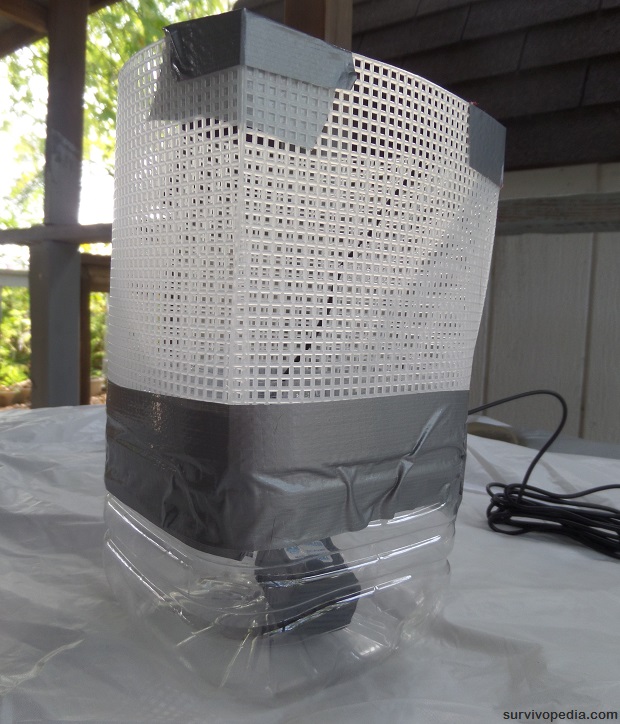
- Plastic canvas (costs approximately $3.00 in craft section at Wal Mart)
- empty square water bottle (I used the 1 gallon clear container from Dollar Tree)
- Solar submersible water pump (about 10.00 on eBay)
- Disposable wash cloths or any other material that air blows through easily (also just 1.00 at Dollar Tree; or cheapest fabric you can find in Wal-Mart).
- Coffee filters
- Table salt (or some other desiccant)
- Duct tape
- Twist ties
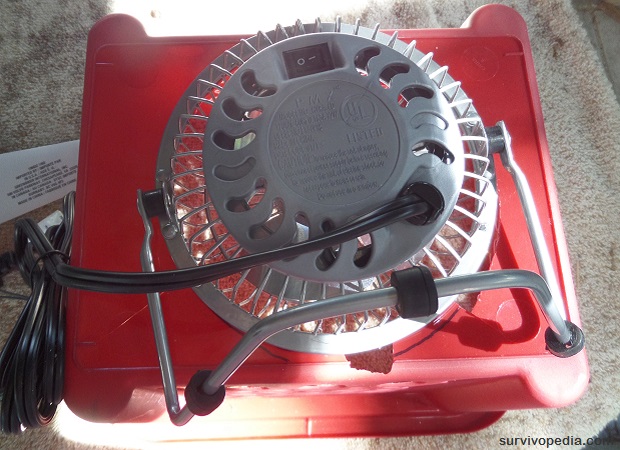
- Small fan (a desktop computer fan, or just about anything else will do)
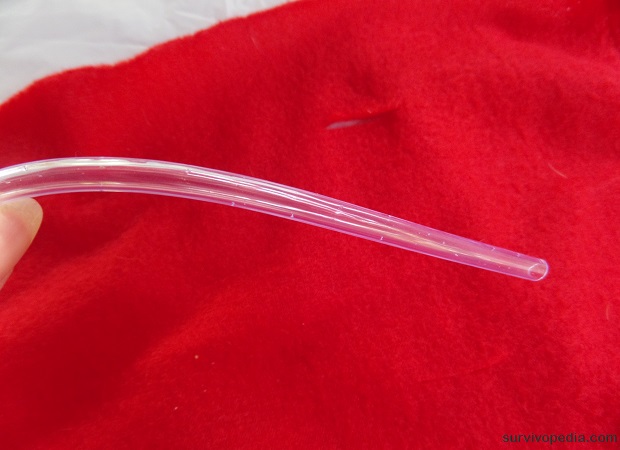
- Aquarium airline tubing (1.88 in Wal-Mart)
- Water
Tools
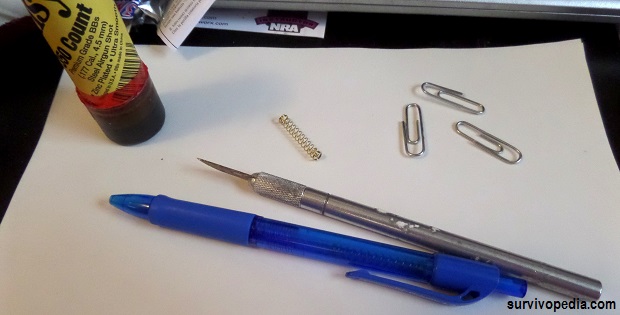
- Small saw
- Scissors
Steps to Build
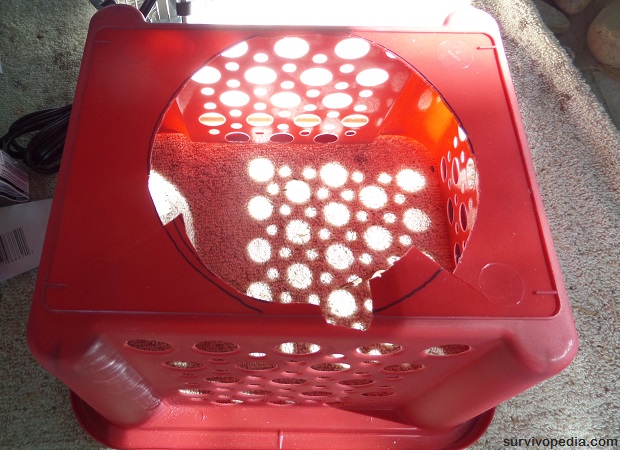
1. Cut a hole in the bottom of one basket so that fan fits through without falling in.
2. Cut water bottle down so that it is no higher than the rim of one basket. This forms a water reservoir.
3. Punch holes in airline tubing (this creates a soaker hose). Do not put holes in the end of the airline tubing where it will attach to the pump. Soaker holes should only be in areas that touch the cloth.
4. Cut plastic canvas so that it is tall enough to reach about 3/4 way out of lower bucket. You should be able to place top bucket over the lower one without problem. It should also sit low enough so that the fan does not touch the canvas.
5. Tape canvas to reservoir.
6. Cut fabric to fit over the canvas and reach about half way into the reservoir.
7. Cut slits in the fabric so that you can weave airline tubing through the fabric. This will make soaking easier and more efficient. You may need to add additional rows or poke more holes in the airline tubing to get adequate soaking throughout the entire fabric.


This article has been written by Carmela Tyrell for Survivopedia.


I have made many different types of these “air conditioners”. Better than nothing, but the most important aspect is having a high CFM fan. My next project will be using a 55 gallon drum in lieu of small reservoirs. Size matters?
When the shtf you will need to find a fan that take batteries to make this work. Dollar stores have them.
Three of the photos won’t load on your website. I can’t follow the instructions.
Can you repost the photos? I can’t see 3 of them on my iPad, & can’t download the PDF file. (I usually have no problem downloading PDFs.) Or maybe email them to me?
The 3 photos I need are “Materials & Tools”, “step 3 (punch holes)”, & step 5 “Tape Canvas”. Thank you.
Some learn best by reading, while others learn best by observing. With that said, very interesting DIY concept but the written instructions and photos are difficult to follow in order for a novice to successfully complete this project. If instead, or in addition to these written instructions, a short informative step-by-step video showing the entire process would benefit the novice greatly IMO. BTW, I am the novice that learns best through observation.
I agree wholeheartedly!! too many moving parts that are limited by the photos…
could you explain more on the white container holding the assembly looks like it is riddled with holes where do you find something like that I pretty much understood everything but that. The two crates with the fan are what the unit sits in. you line the unit with plastic tarp 3/4 up and place material over the tarp weaving in the airline so it looks like cooling lines in air conditioner only make holes in line where it touches material to keep it wet. Why not have two units when one gets messed up pop it out put in new one and clean dirty one for next use. Also connecting the material to the sides you could use those brass notebook paper fasteners that have the legs that spread out. I like the whole concept and its affordable for those of us that are on low fixed incomes.
Thank you for sharing this information and for any help you can give for understanding the resavoir better. Jim
Jim – the white “container” is actually plastic canvas. It is used as grid for cross stitching with yarn. You can find it in the craft department in Wal-mart or most fabric stores. All I did was cut the plastic down to size and bend it to wrap around the water bottle reservoir.
Yes -you can make as many units to add or remove as you wish.
Carmela, I, as usual, enjoyed the essay about improvised air conditioning. I am a “FOG” i.e. “Fine older guy”. We have become very addicted to AC these days. is possible to get accustomed to the absence of AC. To do so means changing the way we do many of the things we do like our strenuous work early in the morning or late in the afternoon. Kind of similar to the Mexican “Siesta”. In a 12 hour day, work from 8 AM to 12 Noon, take 4-hour break for a nap and /or light work in the shade, go back to work from 4 PM ’till about 8 PM. If done in a disciplined way a lot of work can get done.
As a kid raised on a farm wed a very heavily shaded back yard where we snapped beans, shelled peas, shucked and cut off corn etc. for canning/freezing.
Houses can be built or modified to use screens on the windows and doors to take advantage of natural air flow.
There are lots of other things you can do but the main thing to avoid Air Conditioning all together so you become accustomed to the warmer temperature. You MUST stay hydrated too.
I enjoy your writing.
GREAT ARTICLE!! Is timely and well founded on scientific principal. I also have one for you..very close to yours. Ever heard of a “Swamp Cooler?” Same principal except just using an old frame from a window AC unit with a container for water on the top. The fan on one side. Use strips of cheese cloth hanging from small holes in top water container and a container on bottom to catch the water as it drips. Same effect as yours. Cooling from evaporation. Use some filters to clean the air as well.