


Ask ten survivalists what the ideal shelter looks like, and you’ll get ten different answers. The perfect hideout won’t look the same for everyone, it’s true, but they’ll have the same purpose. Your primary goal is to keep you and your family safe in an SHTF scenario.
So, what would you need to know to turn your garage into the perfect hideout, regardless of your preferences? Here are some primary considerations to keep in mind.
Insulate and Reinforce the Room
The biggest problem with using a garage as a survivalist shelter is that these rooms aren’t insulated or attached to your home’s HVAC system. They’re also generally not the most secure room in your home. The door might close, but it’s not going to provide much extra security.
If you’re going to turn your garage into a shelter, start by turning your garage into a safe and secure room. Attach it to your home’s HVAC system — or hire a professional to do it for you — and take the time to insulate and reinforce the walls. You’re trying to create a bunker here, and that starts with a solid foundation.
Strengthen the Walls
Consider the kind of situations you might encounter once the world ends. Are you worried about zombies? Probably not. Are you concerned about your neighbor attacking your place to steal any supplies you might have? What about a violent insurrection or civil unrest?
These are a few possible scenarios you should consider. While you’re reinforcing your walls, consider making them bullet-resistant. It’s easier than you might think. If your home is already made of concrete or brick, it’s already got some bullet resistance built right in. They’re not bulletproof, but they’ll soak up more damage than other types of siding.
Sandbags are an option. Keep in mind they can be awkward and take up a lot of space if you’re trying to stack them to any significant height. You can also invest in bulletproof panels, the only downside being that they are expensive, costing anywhere from $13 to $50 per square foot. If you’re worried about someone shooting up your bunker and you want your best chance, start saving your pennies.
Going Underground?
Next, you need to make a decision. Are you planning on keeping your garage as-is and using it as an above-ground survivalist shelter, or are you going to use it as a launching point to build an underground bunker?
That will depend on your means, your location, and whether you feel like you need a full-blown underground survival bunker. Some places, like Florida, aren’t ideal for underground facilities because of a high water table. Others, like the midwest, may already have underground “bunkers” included because of the need for storm cellars.
If you have your heart set on an underground bunker, start researching what exactly that entails for your part of the world. Will you need construction permits? Most likely. Will you need heavy equipment like excavators? Unless you want to spend months swinging a shovel. Will you need to seal your bunker against moisture? Is it legal to build an underground bunker in your area?
It’s essential to get your ducks in a row before you break ground. Otherwise, you could find yourself with hefty fines and a hole in your yard that you’re not allowed to finish digging. An underground bunker can be a valuable tool in a survival situation, but it isn’t always viable or necessary. Do your research and make your decision. If you choose to opt for the underground facility, you’ll have a lot more construction ahead of you!
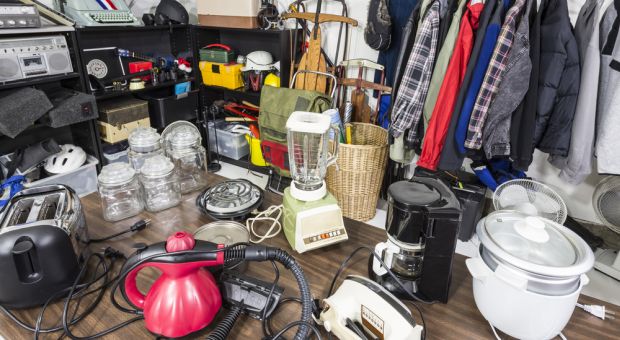
Stock Up on Supplies
Next, you need to worry about how you’re going to survive if you need to take shelter in your survivalist hideout. That means stocking up on supplies.
That can be an expensive undertaking, especially if you’re just starting. Don’t try to tackle this step all at once. Start small. Ideally, you’ll want a few months’ worths of supplies, depending on how much space you have to store things. Buying three months’ worth of supplies for a family of four — or even for yourself if you’re currently living alone — can be an expensive proposition.
Aim for 72 hours’ worth of supplies. That’s three days. Once you’ve got that in place, move up to a week, then two weeks, then a month. Before you know it, you’ll have a year’s worth of rotating supplies in your storage space.
Tackling this undertaking in small increments makes it less intimidating and less expensive and also makes it less likely that you’ll give up halfway through. Start with non-perishable foods, water, first aid supplies, and everything you’ll need to make your shelter self-sufficient.
Don’t Forget Fresh Food
Canned goods and non-perishable foods are the ideal choices for creating a survival bunker, but there are some things you’ll miss quite a bit once you can’t make a trip to the store or farmer’s market. You’ll want to make sure you can be entirely self-sufficient, which includes growing fresh food.
Stock up on heirloom seeds. If you’re worried about cultivating a garden outside your bunker, you may wish to also invest in grow lights. You can still produce a large crop indoors, as long as you’ve got plentiful water and grow lights on hand to replace the sunlight. Growing indoors gives you the added perk of tending crops year-round instead of relying on the changing seasons or being unable to grow food during the cold winter months.
If you have space, consider creating a separate grow room. Hydroponics — using nutrient-rich liquids to grow your plants — is also an excellent option for growing fresh food because you can pack many plants into a small space but don’t have to worry about soil. It’s also a lot easier to monitor chemical, pH, and nutrient levels in a hydroponics solution than to do the same with soil.
Protecting Your Survivalist Hideout
A survivalist hideout isn’t very useful if you can’t protect it. While you’re collecting supplies and fortifying your walls, you also need to consider how you’re going to defend yourself. Self-defense will be a serious priority when the world’s turned upside down.
Take some time to choose your weapons for home and hideout defense. First, what weapons are you familiar with? Familiarity and experience are going to help you outmaneuver and outfight your foes every single time. It’s an advantage you can trust to give you an edge.
You’ll also need to consider the amount of space you’ll be working with. The sort of weapons you choose to carry with you out in the world will be different from those you choose for working in an enclosed space.
An AR-15 or shotgun with a barrel longer than 16 inches might seem like a great choice, but you’re trading maneuverability in closed spaces for firepower, and that’s not a trade you generally want to make.
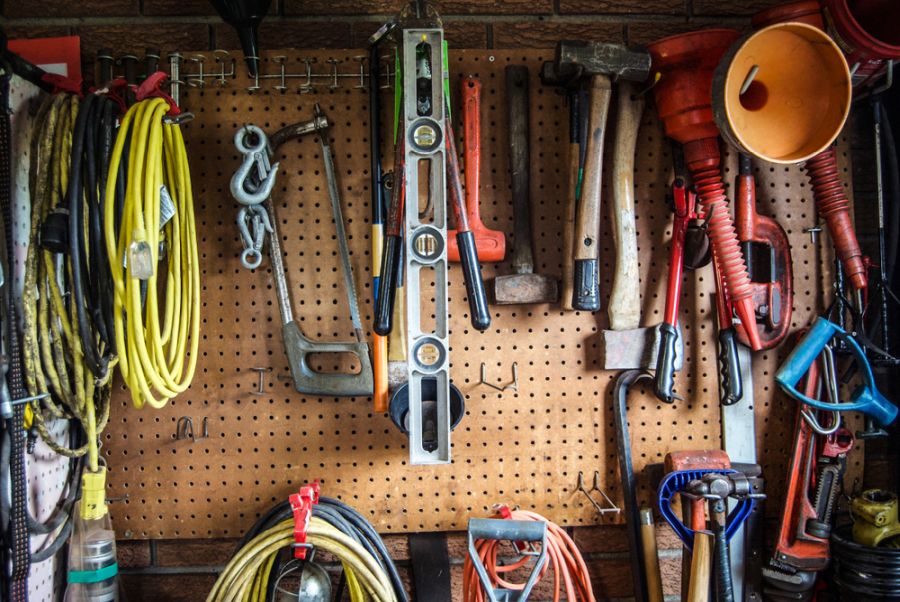
Make the Most of Your Space
Efficient storage is going to be a big part of your survival space, especially if you’re trying to keep everything confined to a single room. You’ll need to be smart with how you situate things.
Take a close look and make the most of your space. Don’t fill up your main living space with supplies. Instead, take advantage of every square inch of wall and ceiling space that you don’t need for comfort and survival. Shelving along the walls, hanging storage from the top, or storing things under furniture are good options for making the most of your space.
Things like murphy beds and other similar furniture can help you make your survival base livable while still making the most of your available space. You can find anything from beds to tables and even things like showers and toilets that you can fold away when they’re not in use.

Make It Comfortable
Surviving the apocalypse doesn’t mean you have to live a spartan existence, sleeping on cots with a scratchy burlap blanket to keep you warm. You’re likely going to spend a lot of time in this space, so make a point to make it comfortable. Personalize it. Make it an area you’re going to be content, if not happy, to be spending long periods.
No one wants to think about how we’ll survive after the end of the world, but we need to be ready for everything. If you’ve got a backup plan for everything, you won’t ever be surprised by anything. That’s the kind of mindset that will help keep you alive if everything starts to fall apart. You can’t take anything for granted, and you can’t expect that anyone will come to your rescue.
If you don’t have the funds or the space to build a massive underground facility, you can turn the garage that’s already attached to your house into a survival shelter that will protect you for years to come.
Others Are Watching Now:


Why would you bother turning a garage into a survival shelter? Why wouldn’t you just do it to your house?
Greetings Cindy. In reply to your question ‘Why not the whole house?, in my (humble), opinion, the answer would have a lot to do with the expense. I’ve never ‘comparison shopped and/or price checked’ bullet-resistant sheets & panels, but at $25 – $50 per panel, for a entire HOUSE??? To reinforce the infrastructure (e.g Windows, doors, ceiling and garages), of an entire house would very, very expense. In comparison, an internal reinforced BUNKER utilizing cinder blocks, sandbags, steel sheets and/or panels may still be expensive (dependent on the materials purchased).
I am in the north… in PA My thoughts were… why not just turn your basement into your survival shelter? its already below ground… I do have a walk out basement…its a block wall construction. just would need to reinforce the complete basement ceiling so incase they put a fire to the portion of the house above ground…. I already have my heating there.. water access and can make a storage room and other rooms… Any thoughts Anyone???
Connecting your garage to your home HVAC is probably a code violation and should not be done.
If you have the furnace in the garage it would be easy to cool it. You only have to worry if you have a gas furnace. I have a heat pump
which only needs electric.
Connecting the garage to the homes HVAC system is usually against code regs and always dangerous (if forced air) due to carbon monoxide entering the home. A garage heater or other space heater is better. Also, most garage doors have slide bolts that can secure door closure- and be sure to duct tape the emergency open cords so they do not hang down as a slim jim (even a yardstick) can fish them out the rubber seal and be pulled from the outside.
And here I thought this was going to be something new. Agree with others here. This coulda said reinforce your home, secure your safe room, hideaway room under your stairs, etc.
when it comes to reinforcing the garage for a pending SHTF – start with the garage door – it’s an access point for home burglaries and pushed in by natural disasters and no-nonsense looters ….
start with bolting the separate door sections together into one large panel – bracket reinforce across the top and floor bottom – diagonally brace thru the middle of the door – not a bad idea to buy extra door track brackets and add a few to each of the two sides …
if you really want to go full tilt – screw sheets of 1/2″ CDX plywood to the inside frame of the door – add a stack of sandbags for bulletproofing ….
Florida Hurricane regulations make the garage door much stronger already. Maybe they should start selling them in illini.
Better to install a Mini=Split Heat Exchanger (does both heat and cool) and most of these units are very quiet.
ChiCom Joe is heading us into World War III as fast a he can. Soon all you preppers are going to find out what you did right, and what you did wrong. One thing is for sure. If the “nukes” start being used, the survivors will envy the dead.
Its a lot simpler. Nuclear EMP will generate internal chaos. Repeat attacks over a month period will wipe out most prepper power provisions. The six months following that will be self destruction. Then they will just come in clean it up and take it over..