
Remember our series on how to keep your firearms in top notch condition? We talked about cleaning your revolver and your AK-47 Rifle, and now we’re back with a step-by-step photo tutorial on how to clean your Ruger 10/22.
So without further ado, here’s what you have to know when you want to clean your survival rifle.
Quick cleaning is recommended if you are shooting less than 500 rounds on the range at one time.
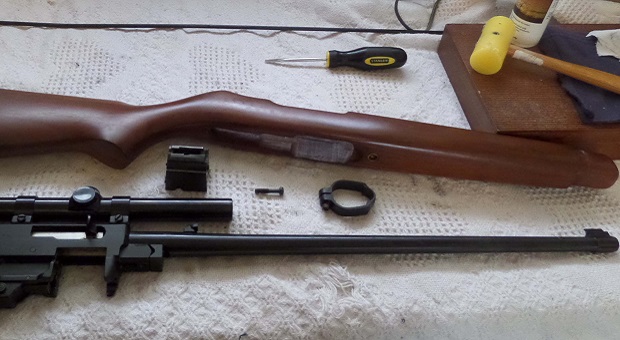
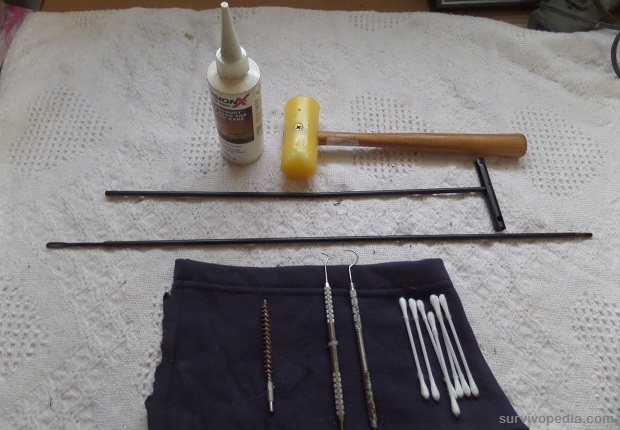
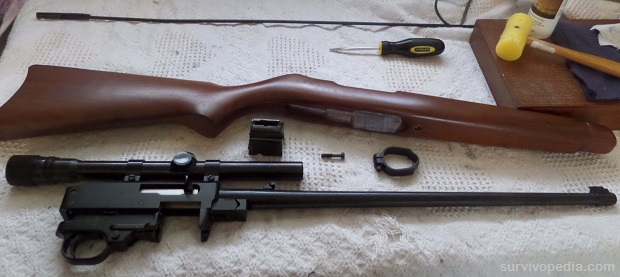
Step 1 – Always prepare the rifle cleaning area with everything that you will need.
Step 2 – Always visually check the semi-auto rifle to ensure that the magazine is out of the rifle and is empty. Pull the charging handle back and verify that the chamber is empty and lock back the rifle bolt for safety.
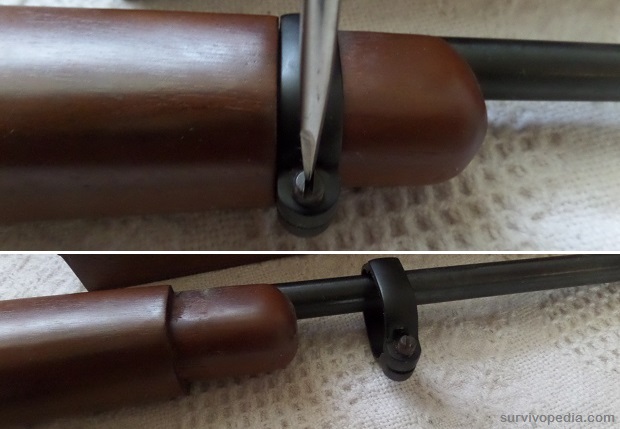
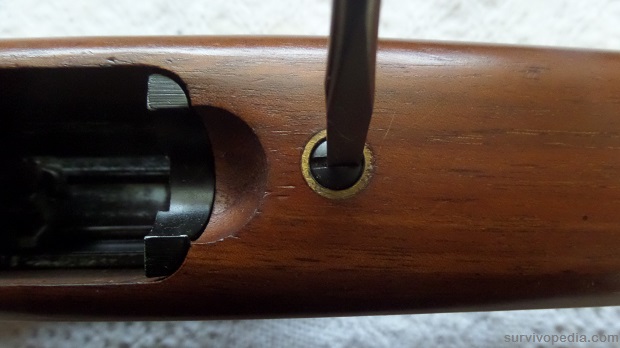
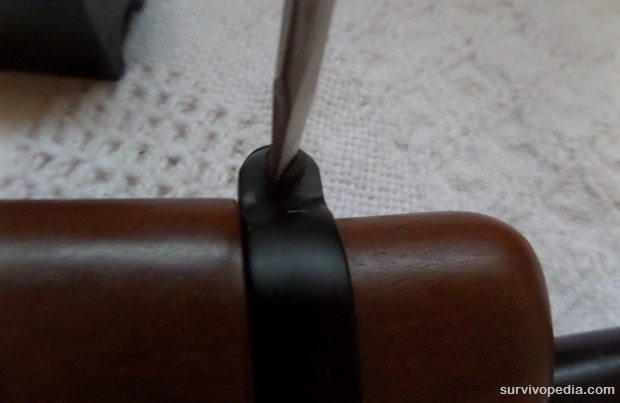
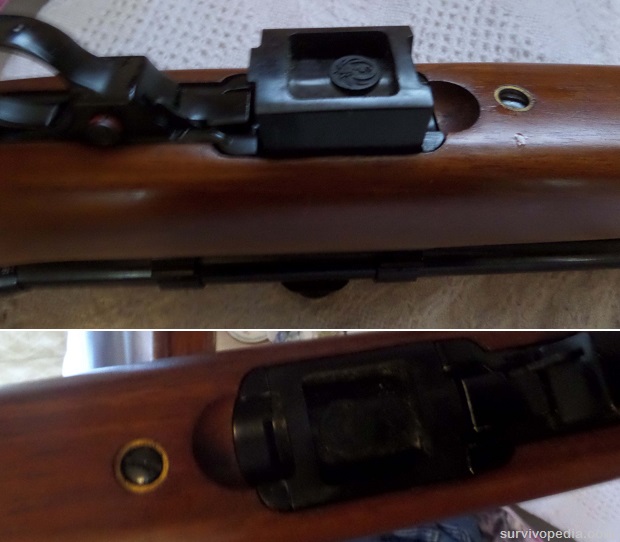
Step 3 – Loosen the front band screw and remove the front band.
Step 4 – Loosen barrel stock screw.
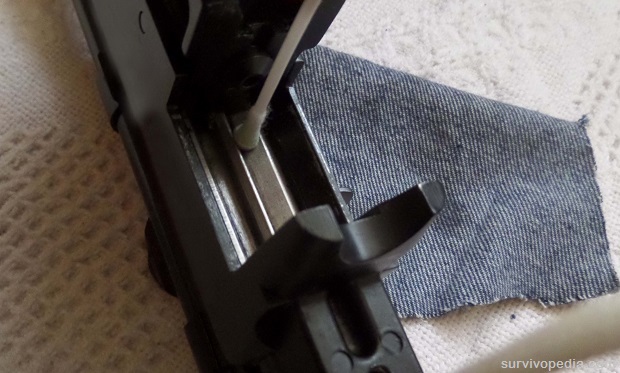
Step 5 – Push safety button so that an equal amount of button is exposed on each side. This is necessary because of the carefully designed trigger housing area of the stock.

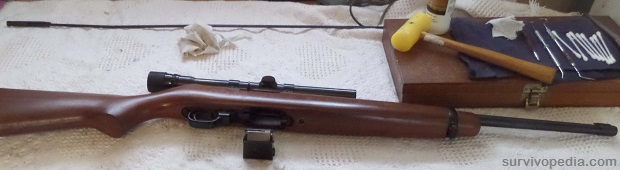
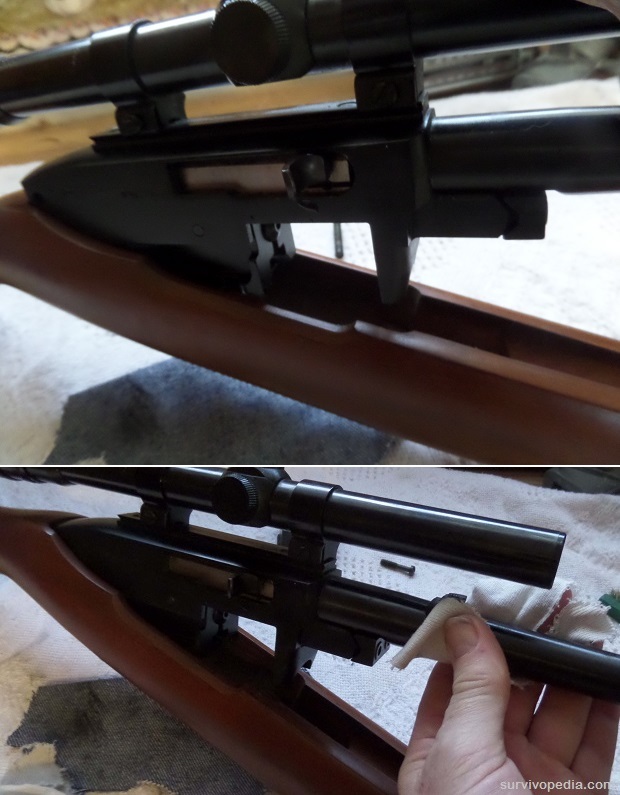
Step 6 – Swing the barrel and receiver mechanism upward and away from the fore-end.
Note: Be careful not to lose receiver and trigger housing cross-pins which might slip out of position.
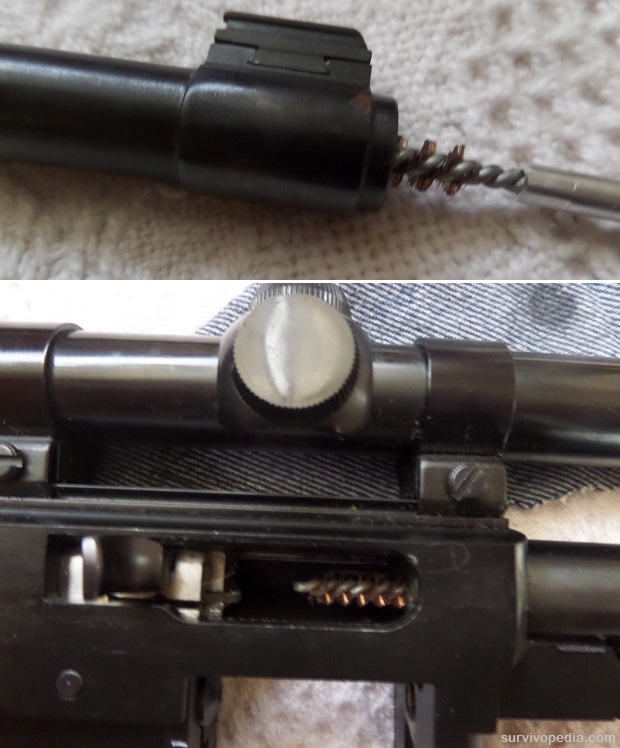
Step 7 – Put a metal cleaning brush on the cleaning rod with bore cleaner on it. Then push down the barrel to the receiver. Remember to remove the bore brush each time before you pull out the cleaning rod. When the cleaning rod has cleared the barrel, put the brush back on for the next run. Do this 5-8 times or until the barrel is clean of dirt, grime, and powder residue.
Step 8 – Remove the bore brush from the cleaning rod and replace it with the patch tip. Then place a clean dry patch on the tip and run it down the barrel from the muzzle to the receiver. At the receiver replace the dirty patch with a clean one and pull it back through the barrel and out.
Do this 3-5 times. Put a clean lubricated patch on the cleaning rod. Run the cleaning rod down the barrel 3-5 times to lubricate the barrel.
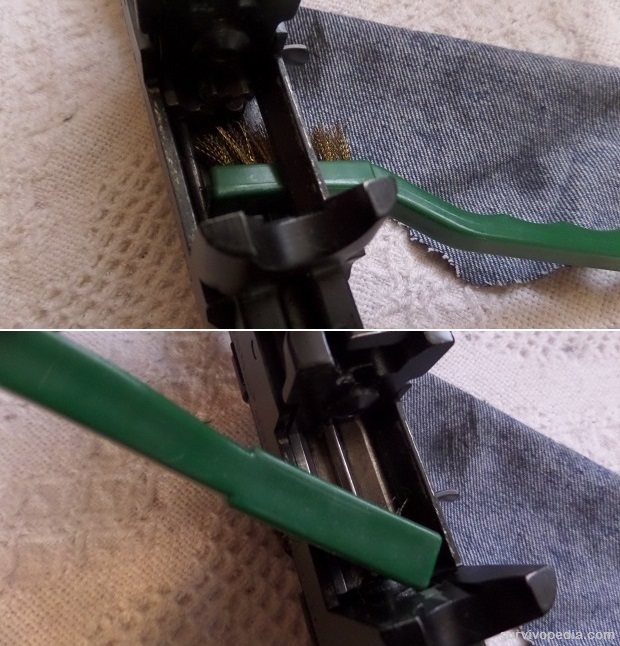
Step 9 Clean the receiver and bolt with a soft metal wire brush. This helps to remove loose dirt, grime, and powder residue.
Step 10 – Use Q-Tips soaked in gun cleaner to clean the bolt and receiver. Use dry Q-Tips to remove excess cleaner. Then use Q-Tips with gun lubricant to lube the bolt and the inside of the receiver. Use only a drop or two on the Q-Tip. Do not overdo it.
Step 11 – Use gun lubricant to lube the receiver and trigger cross pins, various pivot points in the trigger guard housing (such as the trigger pivot, hammer pivot, safety, and the bolt and bolt handle.)

Step 12 – Before final assembly of the barreled receiver to the stock wipe down with a good gun lubricant all the metal parts that will be contained within the stock and outside of the stock.
Step 13 – After the barreled receiver has been lightly lubricated, assemble it back into the stock. Then insert and tighten the stock screw.
Step 14 – Replace the front band and tighten the front band screw.
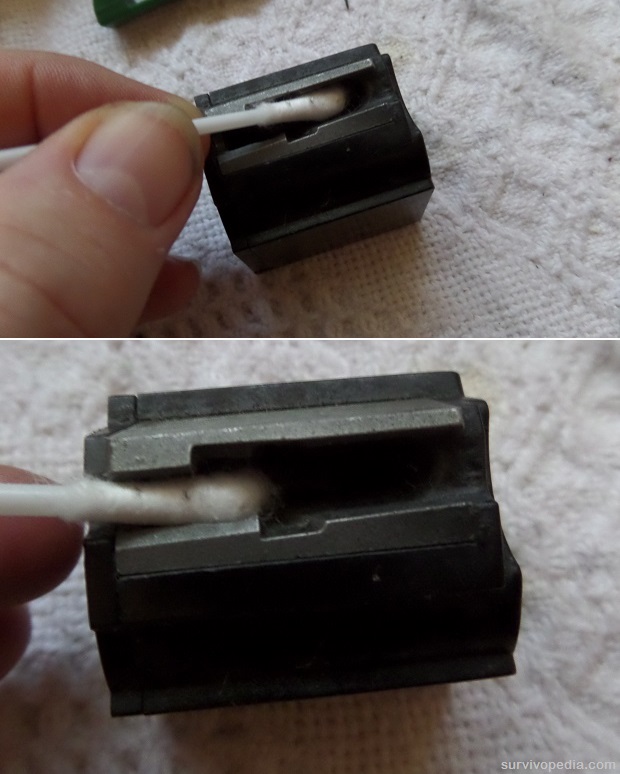
Step 15 – To clean the magazine use a soft wire brush to remove dirt, grime, and powder residue.
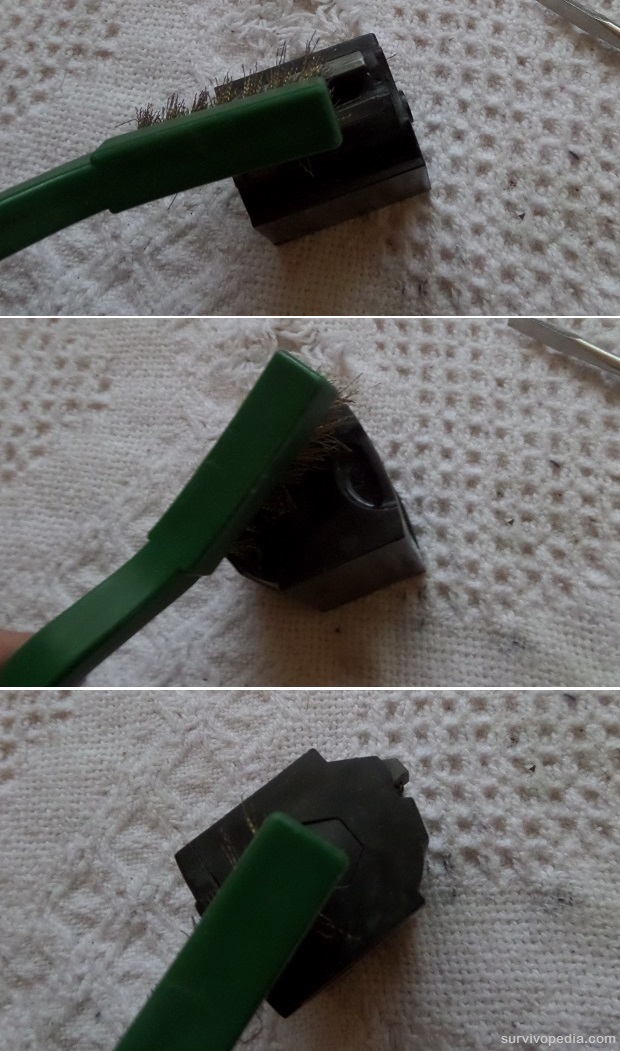
Step 16 – To remove layers of dirt, grime, and powder residue the brush could not remove, use Q-Tips with a good gun cleaner on them. Then use dry Q-Tips to remove excess cleaner. Put a drop of lubricant on each side of the outside of the rotary magazine shaft.
Step 17 – Put an empty clean magazine in the magazine well and lock it in place and function test the rifle.
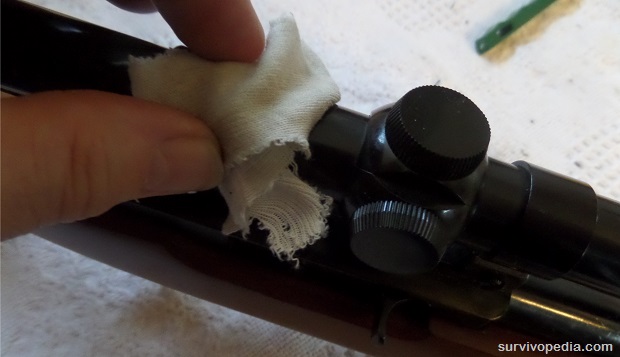
Step 18 – After function testing the rifle wipe down the barrel and any other places that you touched on the rifle with a clean lubricated rag. This is to prevent the sweat in your finger tips from rusting any exposed parts of the rifle.
A Cleaning Note from Ruger Firearm’s Company
A comprehensive field cleaning is not required more than once every 500 rounds. The purpose of such a cleaning is only to remove powder residue from internal components and as a rust prevention procedure.
If a gun has been soaked or submerged in water, if sand or other foreign matter in any appreciable quality enters the mechanism, the reliability of the functioning would be impaired. In this case, the gun should be totally dismantled and thoroughly cleaned by a certified gunsmith or armor.

This article has been written by Fred Tyrell for Survivopedia.
We wish to thank the good folks at U.S. Gun Worx for their assistance with this article. Survivopedia and U.S. Gunworx are the only entities entitled to use/publish these pictures without written authorization from Survivopedia or U.S. Gunworx, LLC.


Pingback:Survival Guns: How To Clean Your Ruger 10/22 - Survivalot | October 2, 2015
|
Pingback:Survival Guns: How To Clean Your Ruger 10/22 - Survival By Preparedness | October 2, 2015
|
Pingback:Survival Guns: How To Clean Your Ruger 10/22 | Freedom Newz | October 2, 2015
|
Fox | October 2, 2015
|
Excellent! The article, the pics, and the procedure are all top notch!
Now, having said that, let me tell you something. You don’t need to do ANY of this, unless the rifle is subjected to EXTREME fouling! I know that’s gonna unleash the dogs of cleaning on me, but I speak from vast experience with Bill Ruger’s magnificent .22LR, the 10-22.
I am 72 years old and have owned three of these wonderful firearms. The first I think I paid $49.00 for, to give you some idea of how long ago that was. IMHO it is the finest .22LR semi-auto rifle in the world.
I put fifty thousand rounds through the first one, and cleaned it twice. That’s because it never needed it at all. The only malfunction I ever had with it was when I tried a 50 rd drum magazine and it did not like that mag at all. With any other magazine, it never miss-fed even once.
The second one was also fired at least 50,000 times and never miss-fed.
Also, I would like to find fault with the choice of cleaning rods in this article. Get a one piece Teflon coated fiber rod or, better still, get a pull-through cleaning cord. Running a rod from muzzle to chamber will eventually wear out the crown of the muzzle and accuracy starts to drop exponentially.
Bill Ruger done good on this one.
Semper Fi!
Ed | October 2, 2015
|
Good article, however I prefer to clean from the breach to the muzzle in order not to drag crud into the receiver area. Otherwise, good advice.
Pingback:Survival Guns: How To Clean Your Ruger 10/22 | TheSurvivalPlaceBlog | October 3, 2015
|
Pingback:8 Tools for Underground City Navigation - Survival By Preparedness | October 6, 2015
|
Pingback:The DOs And DON’Ts Of Gun Cleaningdisasterdefense.us | disasterdefense.us | October 10, 2015
|
Pingback:How To Choose Your Gun Cleaning Kit - Survival By Preparedness | October 15, 2015
|
Pingback:Our 8 Best Choices When Buying A Gun Cleaning Kit - Survival By Preparedness | October 25, 2015
|
Kathe | August 18, 2017
|
Really good info on cleaning the magazine 🙂
Pingback:The DOs And DON'Ts Of Gun Cleaning | Survivopedia | October 24, 2017
|
Faisal | March 18, 2018
|
question – what’s best practice ? To Run a brush from muzzle to breach, or breach to muzzle ? I’ve seen both online. Some advise even says running brush wrong way causes damage.
New 10/22 semi-auto owner
Pingback:These Are The Best Self-Defense Firearms For Urban Survival | Survivopedia | October 10, 2018
|