


Membership at a shooting range, plus covering the cost of ammo if you have to purchase it from the facility instead of bring your own, can be pretty expensive these days.
If you want to practice surprise drills in the dark hours of the morning to help with managing adrenalin response, during bad weather, or low lighting, it may not be possible at the range.
On the other hand, if you expect to defend yourself efficiently with a gun, there is no substitute for practice, including live fire drills and situational drills that you would be able to carry out at a range.
But if you have enough land, it makes sense for you to build your own wooden targets for shooting drills, and use them whenever you want.
Here are some tips for building wooden targets as well as getting the most out of them!
Best Materials for Building Targets
Depending on the design of the target, you can only make the frame from wood, or make some of the other parts. Using wood that is suitable for outdoor use would be best – cedar or pine – however you can expect them to split easily. Choose a soft, less dense wood that is already treated for outdoor use.
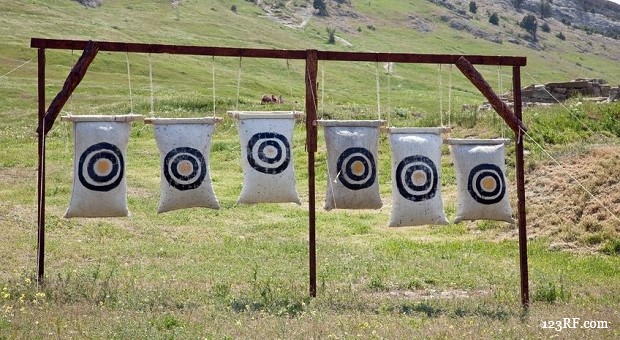
- Most wooden frames for shooting targets can be built using 2 x 6 or 2 x 4 studs.
- You can use old paneling, veneer, composite board, or even cardboard for the areas of the target that you plan to hit.
- Try to limit the amount of metal used to hold the stand together because a bullet can ricochet off those areas if they are hit. Use PVC tubing or plastic collars to hold the wooden frame together and as a mounting for the actual target.
How to Choose a Stand Design
There are hundreds, if not thousands of wooden shooting target stands that can be built for home use. In most cases, you can separate the stand design into the target area and the support frame. There are literally millions of target images and materials that you can use (check the resources at the end of the article), the frame itself will usually be one of the following designs:
Square Frame
At the beginning, most shooters keep their practice stands as simple as possible. You can assemble a wooden stand in just a few minutes with little more than a two upright frames, a base, and one across the top of the stand to form a rectangle. Simply add an additional brace or an area to hold the actual target, and you will be ready to shoot.
Center Stand Frame
The second frame you can build is one that uses a wooden base and a pole or beam that extends from the center. You can use a triangular shape for the base, or use one similar what you might use for a square frame.
These frames can be used for more mobile targets such as ones that will pop up, or ones that will spin.
A Frame
The third frame type looks something like A frame saw horses that you might use to prop up large boards for cutting. You would use these for suspending rope or other materials that a target might move across from one end to the other. They can also be used for suspending other targets that swing back and forth or ones that might flip up or down.
Shooting accurately, efficiently, and with confidence is about far more than hitting a stationary target. As a result, you find that a simple stand will not be enough for your home practice needs. Even though you can still use it to break in new weapons or to work on getting rid of bad shooting habits, you will still need to develop more complex targets. Here are a few things you may want to incorporate into your stands if you are an intermediate or advanced shooter:
- build a stand that accommodates a counterweight so that the stand will pop back up after it has been hit.
- Build a stand with multiple shot areas, and then add smaller targets that will turn at random moments. You can easily turn these into “shoot don’t shoot” drills simply by putting different images on each side of the target. As these mini targets spin randomly in the wind, you would have to evaluate whether to shoot or not, and then do so accurately.
- Make sure you can adjust the height of the stand so that you can put one or more targets at different heights.
Advantages of Pop Up and Pop Out Stands
Even though pop up and pop out stands are harder to build, they can help you develop muscle memory, teach you to pay attention to details before you pull the trigger, and also help you practice basic accuracy skills. Both designs are important to work with, even if you don’t have room for a Hogan’s Alley or cannot accommodate several stations.
To build a Pop Up stand, you can try building one that uses a cord as a trigger. For example, you can build a model where cord is pulled by someone standing behind the shooter. Since the shooter never knows when the cord will be pulled, there is an element of surprise that is not present when shooting at a stationary paper target.
If you want to practice shooting by yourself, you might want to try adapting this system so that a motor acts to pull the cord at random times, and then sets releases the cord so the target is pulled back down after a few seconds.
Pop out stands or ones that move across an area vertically or horizontally will always require a motor as part of the assembly. These stands are also useful for incorporating gunshot sounds, flashing lights, or something else that will startle you as the image pops or floats into view.
Build a timer system that may only produce sounds, but no image so that you do learn more about when to hold fire and when to pull the trigger.
Video first seen on m henry.
When building these designs, include targets that make you think about whether to shoot or not.
Remember that if you are in an active shooter situation, you’ll have to distinguish between innocent bystanders and a criminal threat in less than a second. Maybe another concealed weapon carrier is on the scene and making the same evaluation. Both of you will have to recognize that the other is no threat, and neutralize the criminal that created the situation in the first place.
Once you know how to shoot a gun and have practiced enough to get the feel of it, practice “shoot don’t shoot” scenarios. There are few things worse than that moment when you are in a situation, and everything leaves your mind but the understanding you must fire.
If you do not teach yourself from the beginning to evaluate the target, you may not know what you hit or why, even though you aimed and fired perfectly.
Four Essential Target Patterns
When building a target stand, you should keep the following shooting goals in mind:
- improve basic shooting skills when standing, sitting, or laying down in stationary positions as well as when moving.
- Ensure that you develop skills related to situation awareness.
- Always be able to drill on “shoot don’t shoot” so that you do not hit an innocent bystander or someone else that is not the reason you drew the gun in the first place.
- Once you get past basic shooting, you should also build stands with loud sounds, flashing lights, or anything else that will startle you and produce an adrenalin surge so that you can practice handling that aspect of a shootout.
Keeping these three goals in mind, here are four target patterns that you can use for your wooden platforms:
Dot Torture Targets
This target is ideal for stationary work, and can also be adapted later on for shoot don’t shoot. To adapt the target, make it larger, and then set the dots so that they can spin to reveal either targets to be shot at, or ones that you should refrain firing on. If you add drawing exercises and time the drills, it will add variety and dimension to your practice.
Silhouette Targets
Silhouette targets are very important for improving accuracy insofar as shooting at a critical area as well as making sure that you can cluster your shots in a critical area. These targets can also be easily adapted for “shoot don’t shoot” as well as added to different kinds of platforms.
They are also perfect if you expand to a Hogan’s Alley or decide to expand your range in other ways.
Bobber Targets
These are similar to pop-up targets in the sense that you will have to hit a moving target instead of a still one.
They are also easily adapted to shoot no shoot scenarios. For added complexity, try adding a second bobber so that you have to keep track of two moving targets, one of which may or may not be the one you should be shooting at.
Spinning Targets
As you can see in the video link, these targets are actually fairly easy to make from wood. You can also use wood to create the spokes and locations for the actual target that you intend to hit. This target can also lend itself well to shoot don’t shoot practicing as long as you are able to get the target itself to spin.
Adding a window so that you can only shoot one target at a time as it comes into view may also be useful. When building a spinning target, also try spinning the wheel in a horizontal plane and then hang the targets down at different lengths. As they come into view, you would have to adjust the height of your shots as well as the side to side motions.
If you are interested in an even more advanced target for a single station, take the center support and build it with a cam at the bottom that will cause the center pole to raise and lower. This will also adjust the height of the targets and ensure that you practice wider range of motion in the vertical plane.
Safe Target Stands and Building a Safer Range
Wood is often a favored material for creating shooting stand frames because it is durable, cheap, and less inclined to produce a ricochet if the bullet hits it. That being said, there are some things that you must be especially careful of when building a wooden stand:
- Always be careful about edges or corners that will produce a ricochet. This is especially important for any target with moving parts. It is best to build any moving area out of cardboard or paper so that the bullet will go through, even if it hits at an angle.
- Use as little metal as possible when building the frame, and use plastic collars instead, wooden pins, or wood joint constructions that do not require a metal fastener. Even though these joints may take a bit more work to create, the stand may be safer in the long run.
- Make sure that there is enough room between you and the target. If the bullet doesn’t hit the target, but hits the wooden frame or a base, there is a chance that splinters or other small pieces of wood will fly all over the place. While this is unavoidable, you should still have plenty of room between you and the target so that the debris doesn’t hit you.
- Never construct a target without building a proper backstop and side stops to catch bullets and debris from the target. You will also be well served by creating a wall that you can stand behind while shooting. Aside from protecting you from debris, the wall can also serve as a place to practice taking cover and shooting from a concealed position.
- When it comes to building a safer range, always make sure that you have a storage area for important safety equipment such as shooting glasses and ear protection. At the very least, if you have a space near the range to keep these items, you won’t be inclined to forget them while you are gathering up your other gear for the range. This is also a good place to keep a gun cleaning kit and other accessories that will be useful after you are done practicing.
Overall, you’ll find that building wooden targets for shooting practice isn’t especially difficult. You can save time, money, and also expand many other options when using these targets.
While you can start with simple, fundamental stationary targets, it is even more important to advance to designs that build “shoot don’t shoot” into muscle memory as well as practice shooting at different angles, heights, and positions.
If you are serious about defending yourself and your family with a gun, practicing with more complex wooden shooting targets can improve your skills, and make you a more efficient shooter when it comes to handling an encounter with a criminal. Keep practicing to improve your skills and survive any situation!
This article has been written by Carmela Tyrell for Survivopedia.
Resources:
myoutdoorplans.com/stand/target-stand-plans/
baconfatlabs.com/2012/10/steel-target-stands-for-the-dallas-area-blogshoot-2/
pistol-training.com/drills/dot-torture


 SVP POP UP Desktop (931 x 476 px)")
THE THREE MOST IMPORTANT THINGS ARE LAND, LAND, LAND. iF YOU HAVE SUITABLE LAND, THE TARGET FRAMES WILL COME. iF YOU DON’T HAVE LAND, YOU DON’T HAVE ANYTHING. tELL ME HOW TO BUILD A RANGE ON A 50′ X 80′ CITY LOT AND I’LL LISTEN.