
Even though Obama may have failed in his latest quest to gut the Second Amendment, it stands to reason that there will come a time when conventional firearms and ammo will no longer be a viable means of self-defense. Situations of critical interest include:
- The increasing shift towards stun guns and other technologies that are supposedly not covered by the Second Amendment
- A crumbling economy that prevents the general public from buying weapons and ammo
- A coup from within our outside our nation that puts us in control of a foreign power that will not hesitate to massacre even as they limit access to ammo and weapons
- Disease and other factors that might prevent a person from using guns.
As important as guns are to defense and survival, keeping your focus on them at the expense of other methods and strategies can easily undermine your psyche and capacity to survive a crisis.
Aside from knives and street fighting tactics, it is also important to think about improvised weapons. A BB/Dart gun made from an ordinary pen can help you out of many situations. When built correctly these simple devices can be turned into lethal machines that will escape notice and give you the advantage.
How and Why They Work
Pen guns use either spring(s) or rubber band(s) to launch a projectile from the barrel of the pen. The more force you can get from the springs, the further the projectile will fly, and the more damage it will do to the target.
You can use plastic pens for BBs, darts, and just about anything else that does not heat. For burning darts or smoke bombs, you will need to use a steel pen, or something else made of suitable metal.
Bear in mind that these designs can be used with other materials, or modified for even more power development.
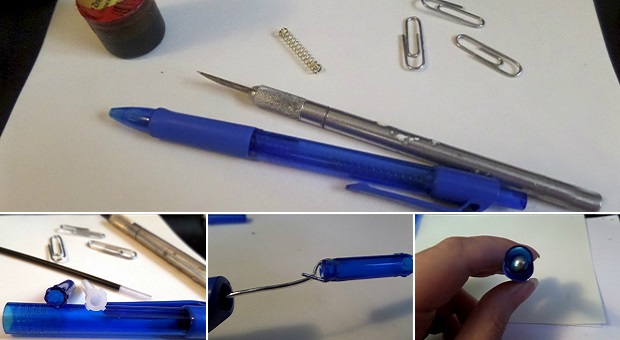
The Spring Based Pen Gun
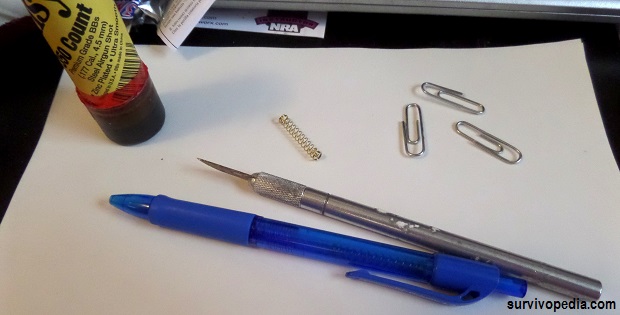
Tools
- Dremel or drill
- Pliers
- Coping saw
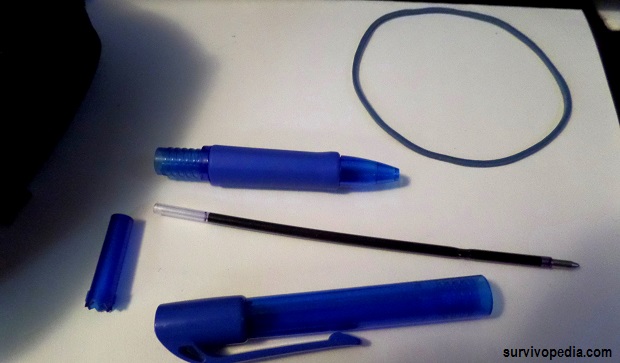
Parts
- 1 – 3 retractable pens (I used the “Grippy” pens from Dollar Store – 4 pens for $1.00. These pens are also ideal because the push button and push button assist are hollow. This makes them easier to drill than solid versions. It should also be noted that most pen gun plans found on other websites that use wads of paper or other such things don’t work properly because there is no way to compress the spring and then release it in a controlled manner.
- 1 paperclip (second paperclip optional) Choose a paperclip that is large enough to accommodate 2 or three springs, and still have a little bit of space left over at each end. Ideally, the paperclip should be at least as long as the full length of the pen.
- 1 keyring or piece of yarn.
Building Steps
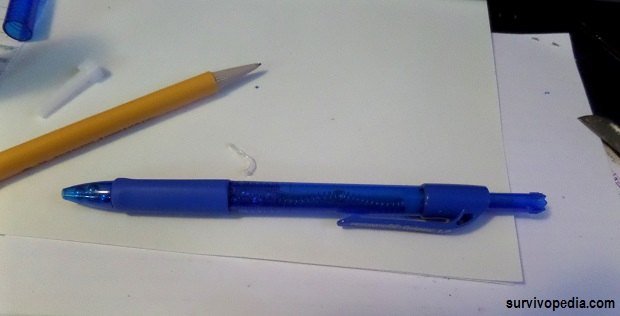
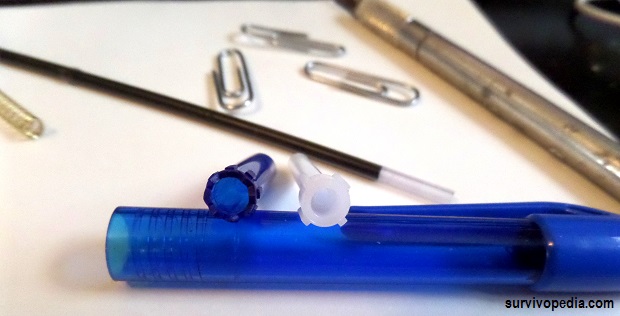
Step 1: Take pens apart. You will need everything from the first pen except for the ink cartridge.

Step 2: Remove the spring from the second and third pens.
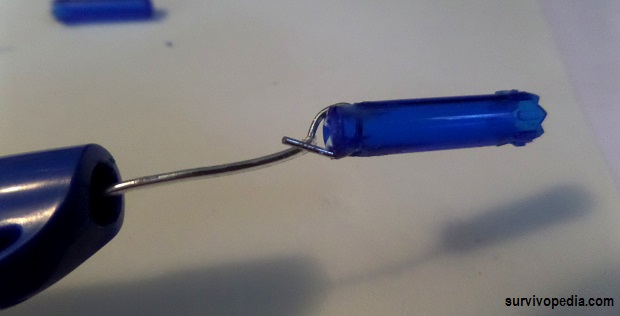
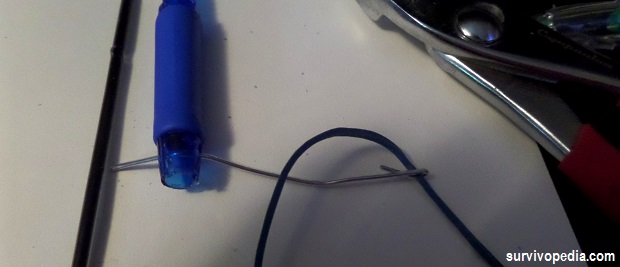
Step 3: Stretch out 1 paperclip. Make sure that it is long enough to accommodate the springs you plan to use, with some room left over on each end.
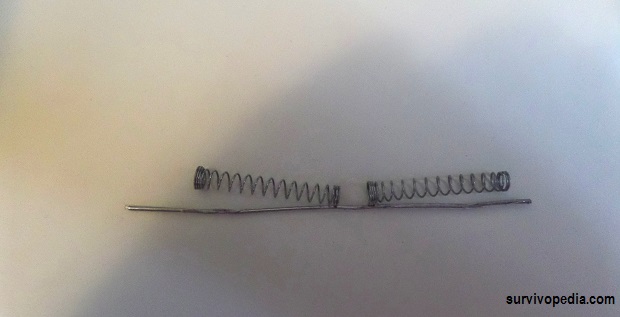
Step 4: Line up one spring on the paperclip
Step 5: Use pliers to secure paperclip to bottom of one spring and then add remaining springs.

Step 6: Drill holes in the upper and lower portion of the push button

Step 7. Cut the white push button assists so that the narrower portion is removed.
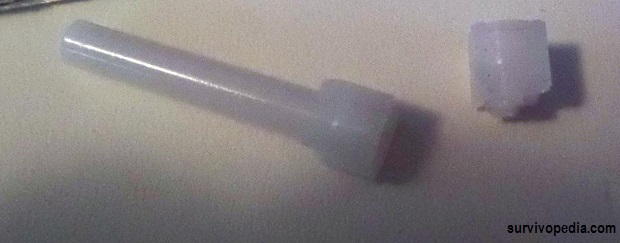
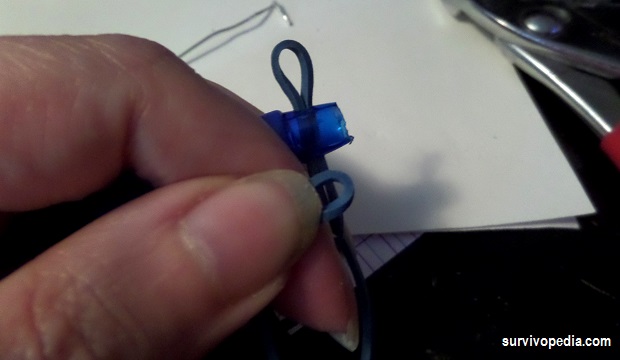
Step 8: Place the thicker part of the button assist onto the paperclip. It should be on the side opposite where you attached the first spring.

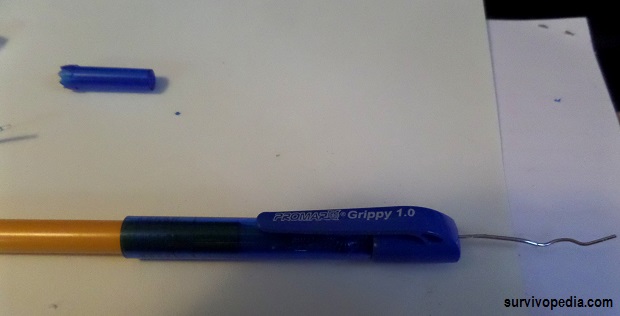
Step 9: Turn the push button so that the narrower portion is facing the spring assembly. Make sure that you are using the end that easily slides into the pen.
Step 10: Place the spring assembly into the upper portion of the barrel. The portion where the spring is directly attached to the paperclip should be facing outward.

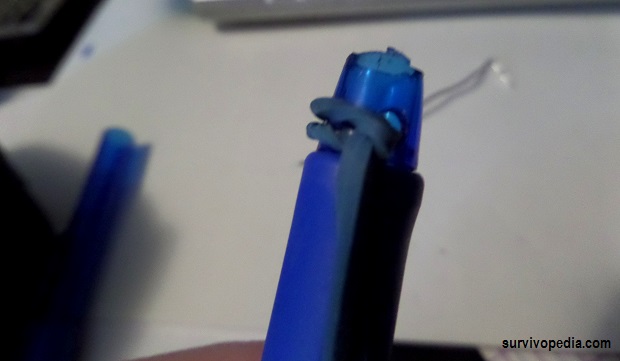
Step 11: Use a pencil or some other device to push the spring assembly up into the barrel so that the other end of the paperclip shows through the back end. The white push button assist should not come through the back. It should also stop the spring from pushing past.
Step 12: Grab onto the paper clip and use pliers attach the remainder of the paperclip and spring assembly to the narrow end of the push button. Try to use as little of the paperclip length as possible so that the springs are fully open when the assembly is not in use. You may need to try a few times to get the paperclip to be flat enough to fit comfortably inside the barrel of the gun.
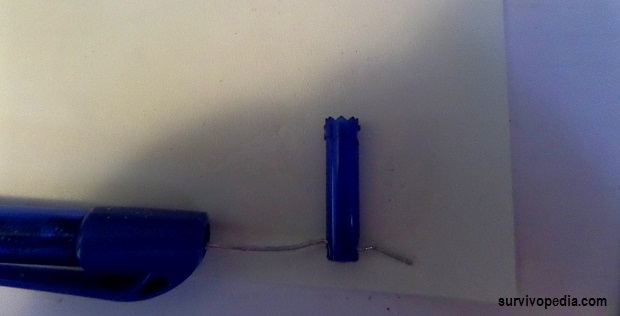
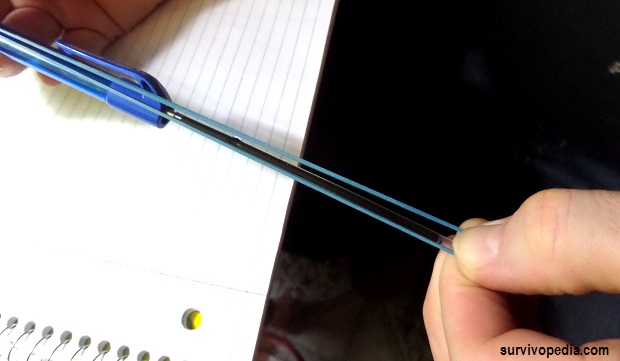
 Step 13: Carefully remove the pencil or wedge device from the other side of the barrel. The springs should snap forward and pull the push button along until the wider portion of the push button stops the action. (Note – you may have to pull on the spring assembly a few times so that the push button wears in and allows for full force.)
Step 14: Use keyring or yarn loop on the remaining holes of the push button. You can use these to help pull the push button back when arming the gun.

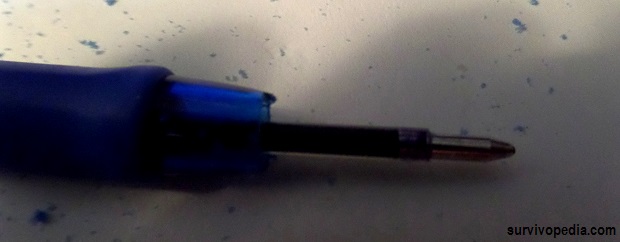
Step 15: If the spring assembly is longer than the upper half of the barrel, to pass through. You can use the pen gun with or without this extender. It may also be of some help to leave a second barrel tip intact so that you can store BB s without them falling out.

Operating
To load the gun, simply place a BB on top of the spring, or fit a dart so that its back end rests against the spring.
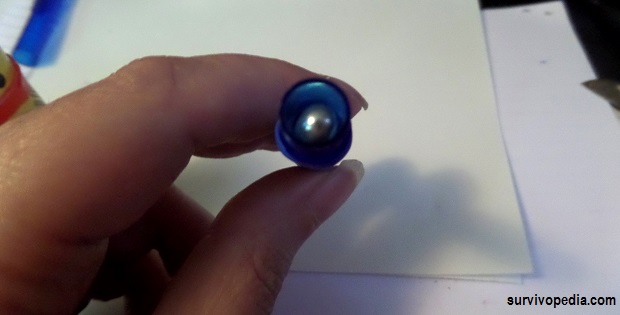
Next, tilt the gun upward so that the projectile remains in contact with the spring as you pull the push button out of the pen.
Finally, take aim with the gun and let the push button go. The spring will snap forward and push the projectile along its path and out of the barrel.
Notes for Future Development
This pen gun version works pretty well, but would work better with a housing for the spring. The housing would prevent the push button from getting stuck outside the pen and also allow for better force delivery.
My future building plans also include building a revolver style chamber into the pen gun. This could be made from cut up barrels of other pens or anything else that would make a suitable sized chamber. A larger chamber size will be needed for darts.
Additional design modifications include using a larger barrel and making it more suitable for home defense. This design easily accommodates a .177 cal BB, however a stronger spring set and wider barrel would make the ideal launcher for a .22 cal projectile. Likewise, larger barrels and stronger springs can also be used for darts with sharper edges and advanced aerodynamic designs.
The Rubber Band Based Pen Gun
Tools
- Dremel
- Paper clip
Parts
- Pen (a retractable pen is not required, as the spring is not needed. You can still use one of the “Grippy pens” from Dollar Tree for this design.)
- Rubber band (larger ones work better).
Building Steps
Step 1: Remove all parts from inside the pen.
Step 2: Cut the pen tip so that the hole is wide enough for your projectile of choice.
Step 3: Drill a hole in the remaining portion of the tip of the barrel

Step 4: Unroll the paper clip and create a hook
Step 5: Use the hook to draw the rubber band through the holes in the barrel. You can add multiple rubber bands for added strength.

Step 6: Remove the hook and knot the robber band to the barrel
Operating
Hold the gun so that the tip of the pen is facing the target. Next, set the projectile so that it is in the center of the rubber band.
Finally, pull the rubber band back far enough so that the projectile is just inside the back of the pen, aim the gun and release the rubber band.
Notes for Future Development
Use a different material and create a crossbow design. This design works better with darts than BB s, so I am also thinking about adding some type of platform or collar to make it work better with round projectiles.
If you have ever been in a situation where no gun was available, then you know what it feels like to be unarmed, perhaps outnumbered, and looking for anything to help you get to safety. No matter whether you need to deliver poison to kill a target, poke someone in the eye as a distraction, or start a fire with a flying lit match, these pen guns can be of immense help to you.
With a few modifications, the spring design is also strong enough to take down small birds. That being said, you will need to practice with the pen gun to develop both aim and speed. In some cases, you may still feel more comfortable with a sling shot; even though these pen guns take considerably less work to operate.
The pen gun is also ideal in close quarters because you can keep it hidden close to your body and there are very few sounds to give you away.

This article has been written by Carmela Tyrell for Survivopedia.


Edith | June 10, 2015
|
Get a slingshot. Get one that also shoots arrows/bolts.
Pingback:DIY Project: Two Ways To Make A Pen Gun | TheSurvivalPlaceBlog | June 11, 2015
|
Pingback:How To EMP Proof 5 Crucial Systems Of Your Car - Survival By Preparedness | October 22, 2015
|
Pingback:DIY Project: How To Make A Clothespin Gun | Survivopedia | October 24, 2017
|
Pingback:6 Basics To Follow When Building Your Weapons | Survivopedia | December 18, 2017
|
Daniel Simmons | October 20, 2018
|
Wow, what a stupid and useless article.
Alex | October 22, 2018
|
Hello Daniel.
We are sad that you didn’t like our article.
Do you mind sharing with us a more detailed feedback, pleas?
Alex, from Survivopedia 🙂
Jay | May 13, 2020
|
I thought it was great I tried both designs and they both had great outcomes like you mentioned a better housing for the spring would do a lot better. If you want to do a crossbow design for the second pen shooter you can steem popsicle sticks or if it won’t be holding much pressure you could use empty pen cartridges. I have used this method the only thing it can really provide is decoration.