


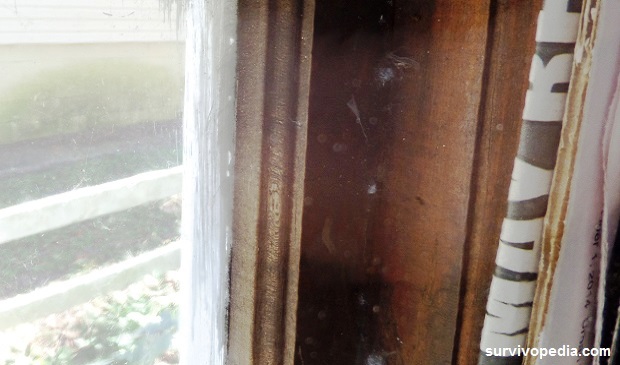
As the winter settles in, you are bound to notice more drafts coming from windows. Without proper insulation, windows represent one of the biggest heat wasters in your home. In fact, leaving your windows bare for the winter is about as useful as leaving one window open in each room halfway.
Caulking windows and buying expensive pre-made insulator covers can be costly. Rather than go that route, you can try this caulk-free vinyl window solution that I have been using for decades. It can easily be adapted to accommodate different climates without much in the way of additional cost.
As an added bonus, this system can easily be assembled from scavenged materials before and after a crisis.
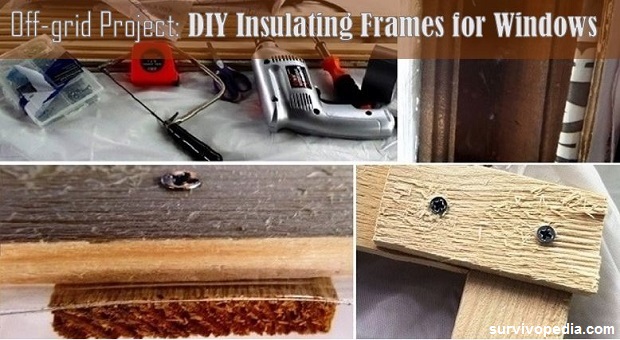
Materials Required
- Clear vinyl or plastic – costs about $2.80 per yard in Wal-Mart’s craft section for mid-weight vinyl. You can go with lighter, cheaper ones (for warmer climates), or the heaviest one available for colder climates and best durability.
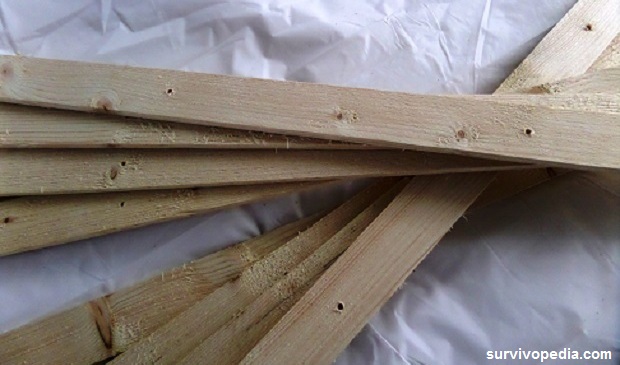
- Wooden slats – for windows that don’t get hit with much wind, just about any slat will do, including the 8 – 10 packs from Home Depot or Lowes. For areas where the wind is stronger, go with something a bit thicker, or simply double up on the slats during frame construction.
- Screws – have enough screws on hand to assemble slats and then mount frame to the window. Since you will likely need different sized screws, go with the multi-pack grab boxes.
- Newspaper
- Corrugated cardboard
- Duct tape – don’t use the light weight cheap stuff, go with the stickiest, strongest duct tape you can find.
- Staples (optional)
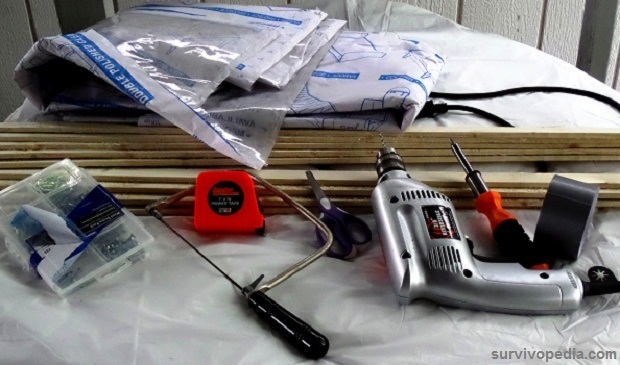
Tools
- Screwdriver – I prefer ratcheting screwdriver with multiple bits. You can get them for as low as $5.00 these days.
- Hand or power drill – power drill preferred, but never hurts to practice with a hand drill for off-grid needs.
- Scissors
- Knife
- Tape measure
- Staple gun (optional)
How It Works
Basically, as long as you have some type of plastic or vinyl, you can always staple it to a window frame and then add some tape over it. Unfortunately, this method will usually ruin the plastic or vinyl in 1 to 2 seasons, plus you will always be taping up leaks during the winter.
On the other hand, a frame system allows you to use smaller pieces of plastic in the “panes” and also provides more stability for the plastic or vinyl. Since the vinyl edges won’t be taking the complete force from wind blowing, the frames and covering will last for years on end.
Steps to Produce 1 Window Cover
Part 1: Building the Frame:
Step 1: Measure window and determine where drafts are coming in from. You may need to cover the entire window frame if you don’t have caulk for the outside. After measuring the window, take note of curtain rod locations and how the frame will affect them.
Step 2: Select wooden slat material that will be strong enough to accommodate curtain rods or other fixtures once the frame is in place. Usually, you will have to remove old fixtures, and then put them back in place once the cold weather passes. While this can be annoying, it is also the best way to get the most heat retention out of each window cover.
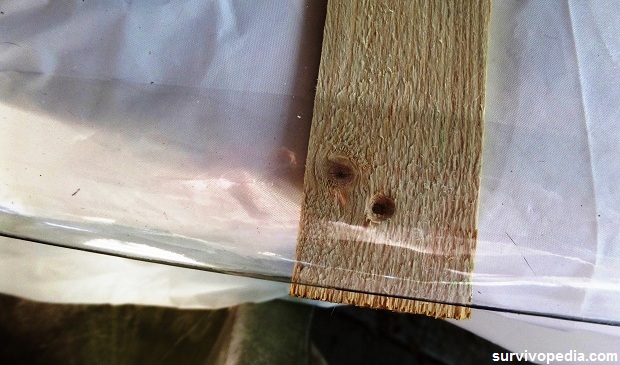
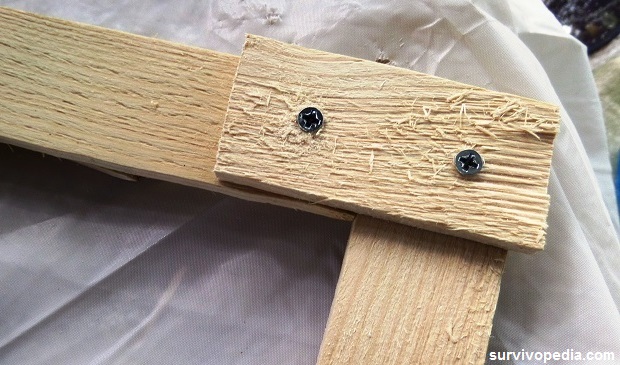
Step 3: Drill pilot holes in the slats.
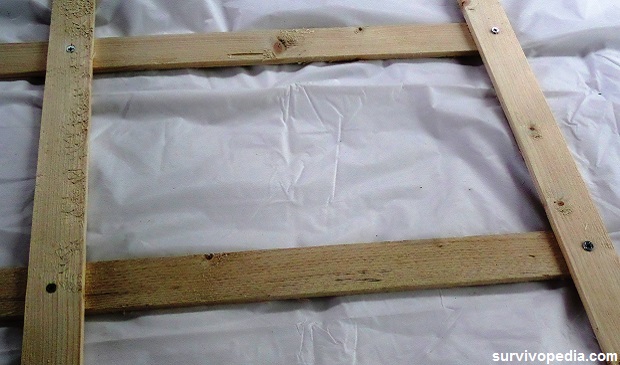
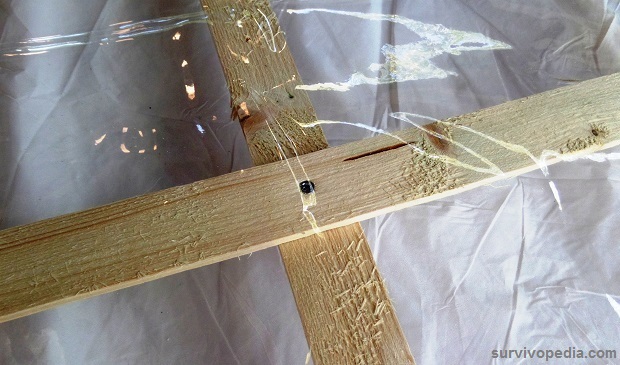
Step 4: Screw together all slat intersections except for those that fall along the outer edge. Be sure to place either all horizontal or all vertical slats so that they are on top of each other. Creating an alternating pattern will produce an uneven surface between the frame and the window.
Part 2: Add the Vinyl
Step 1: Measure and cut vinyl to fit over the frame. No extra border is needed, although you can create a double layer, or as many layers as needed. Simply fold the vinyl over the frame again, or add extra cut layers on the frame.
If you are using a single piece of vinyl or plastic to cover the frame, do not sandwich the vinyl between slat levels.
Optional – if you have smaller pieces of plastic or vinyl that will not fit over the entire frame, simply unscrew the inner frames and place the vinyl or plastic between the slats, then re-assemble. Use cardboard wrapped in newspaper at these joints for better air sealing.
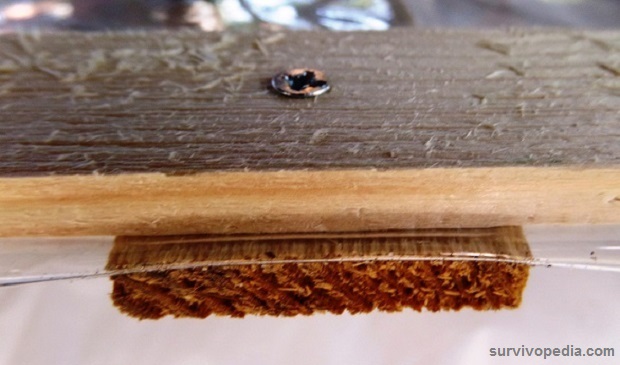
Step 2: Screw slats together so that vinyl rests between the two slats. Always make sure that outer frame slats are even with each other and not irregular in relation to each other.
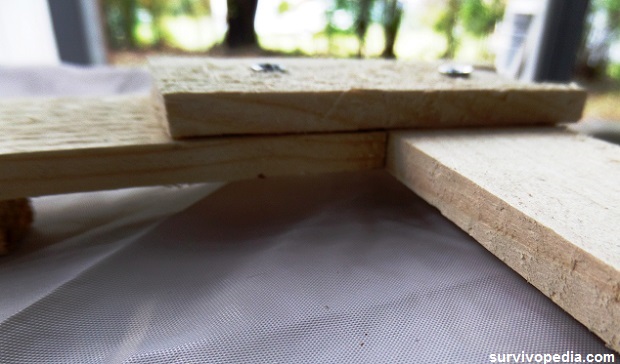
Step 3: Create corner joints by adding a small piece of slat to screw two sides together. Use the side of the frame that you have been using to affix other slats. The opposite side should be perfectly flat all the way around, as this is where the frame will rest against the window.
Part 3: Preparing the Frame for Mounting
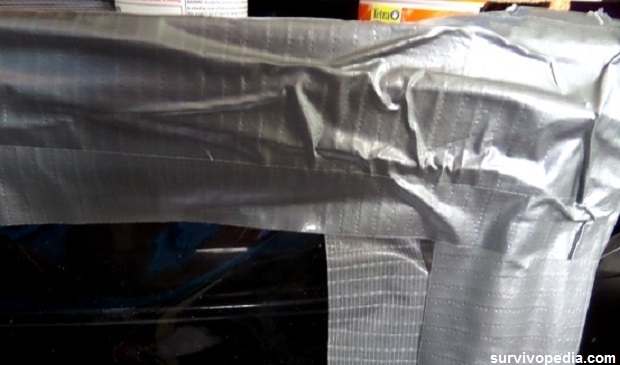
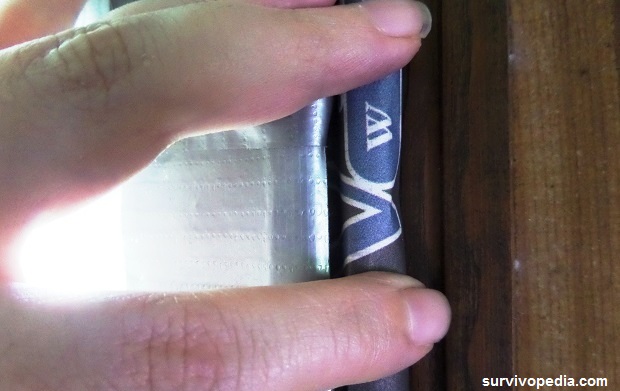
Step 1: Use duct tape to secure vinyl to the frame. You may also want to use staples at this stage for added strength.
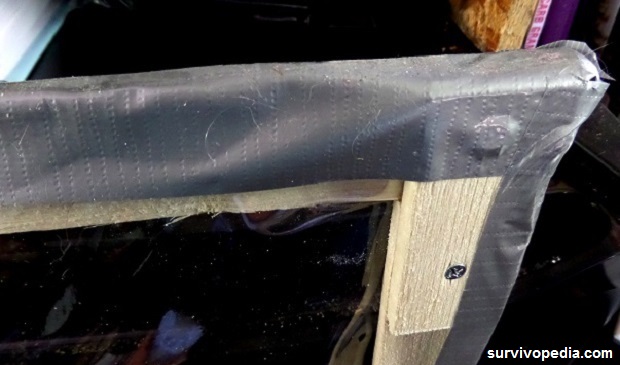
Step 2: Add additional layers of duct tape to fully secure vinyl to frame and also cut off any air pockets left behind.
Staples may also be required at this stage if the duct tape isn’t tacky enough or is too thin (once again – I strongly advocate buying the best and strongest duct tape you can find!).
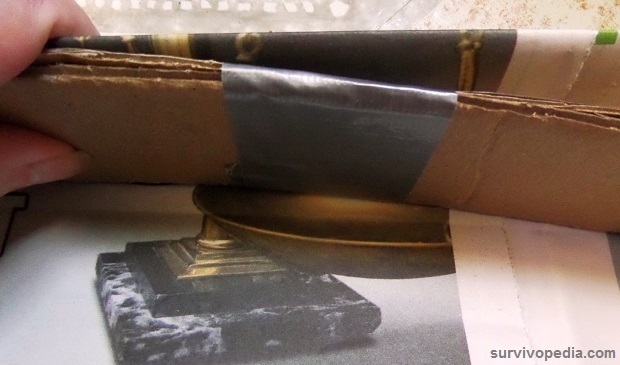
Step 3: Cut cardboard layers into strips. The strips should be the same width as the slats.
Step 4: Create a double layer of cardboard slats by taping them together. Place layers on alternate sides so that the surface is smooth. This cardboard will act as a “gasket” between the window frame and the cover frame.
Step 5: Fold two layers of newspaper until they are approximately twice the width of the cardboard gasket. Remember, if the newspaper is not long enough for the window, simply fold up more newspaper, place it near the end of the first piece; and then cut down to size or simply push the newspaper together much as you would a telescopic rabbit ear antenna.
Step 6: Remove curtains, shades, and any hardware that will interfere with frame installation.
Part 4: Installing the Frame
Step 1: Drill pilot holes in the window frame and cover. Make sure they match up all the way around. Usually 3 holes per side will work well.
Step 2: Starting at the top of the window, fold cardboard gasket into the newspaper and place against the window frame.
Tack in place with duct tape. Make sure that the opening in the paper faces to the inner part of the window.
The outer closed fold of the newspaper should face into the room so that drafts cannot get in.
Step 3: Screw frame to window. Make sure the cover frame fits tightly against the window.
Optional: You can also use screws and plastic latches to hold the window cover in place. Unfortunately, if you need to cover the window and the entire frame, these latches would wind up going into the wall and take up more space.
Step 4: Add an additional layer of duct tape over the frame to complete the air seal.
Step 5: Replace curtains and shades as needed.
Final Notes
As time goes by, the vinyl or plastic will stretch from wind pushing on it. Holes where screws go in will also weaken and eventually form tears. You can easily adjust the slats on the frame to make use of new areas, and also patch both slats and vinyl without having to build a whole new unit.
Even though there are many products on the market for insulating windows, they may not last for more than a few seasons. Since these covers are also fairly expensive, it does not make sense to store them for off-grid or post-crisis needs.
Instead, learn how to build highly scalable window insulation frames now and save heat with them on and off the grid.

This article has been written by Carmela Tyrell for Survivopedia.


Great information on how to insulate a window. Thanks for posting this.