


Nothing matches the smoothness of the first time shooting your shiny, new rifle.
Once it’s out of the box, real-life won’t go easy on it, and after dozens and dozens of shots on the range, you’ll notice a considerable downgrade in your rifle’s accuracy.
Fear not; we’re here to help you clean your rifle properly with our comprehensive step-by-step guide in order to maintain the same day-one performance for years to come.
What You Need to Clean Your Rifle
Before getting your hands dirty and diving right into the process of cleaning your rifle, you need to make sure you have all the right tools and materials lying around. This way, you’ll be well-prepared to tackle anything that comes your way and won’t have to interrupt your workflow and stumble around for any missing tools.

Bore Brushes
These are used to remove any carbon build-up along your rifle’s barrel, bolt action, and even the semi-auto portions. They come in two materials; bronze and nylon. As you can expect, the bronze ones can deal with heavy carbon soot, while the nylon ones are more flexible to reach curved portions of the shooting channel.
Cleaning Swabs
Swabs come in next to remove any leftovers and ensure no particles are plugging your barrel. They also come in handy to remove excess rifle lubricating oil.
Cotton Patches
Since they’re inexpensive, you can use as many as you need till your rifle is truly as good as new. These patches are meant to be dipped into the solvent of your choice.

Solvent
It’s used to clean and lubricate your rifle. There are many different options on the market, so make sure you pick the ones with the least dermal toxicity to ensure you don’t end up with skin burns.
Cleaning Rod
This is the most crucial tool in the bunch, as you’ll be mounting your brushes, swaps, and cotton patches on it. Check your barrel’s length and caliber to ensure you’re getting the right-sized cleaning rod.
Rifle Holder
While you’re disassembling different parts of your rifle, it’ll be helpful to have a holder that keeps everything in place while you’re working. If you have a rifle vise, the whole process will be much easier. In addition to supporting your rifle, it provides slots to store all your tools and removed screws.
Disassembly Tools
Finally, you can’t forget the tools that let you get into the guts of your rifle. For most models, a screwdrivers’ kit is all that’s needed to pull off the trick. Other special rifles require proprietary tools, so make sure you check your model’s specific disassembly guide.
It’s worth mentioning that we’ve made a deliberate choice to only include the key requirements for you to get started on your rifle cleaning DIY project. You can find even more tools in the universal gun cleaning kit that bundles everything you’ll need in one package.
Let’s Get Started
We’ve finally come to the part you’ve been waiting for all along, getting to actually clean your rifle. It should be a walk in the park from here on as all the preparatory steps are all attended to. Follow along step by step, and you’ll be all done before you know it.
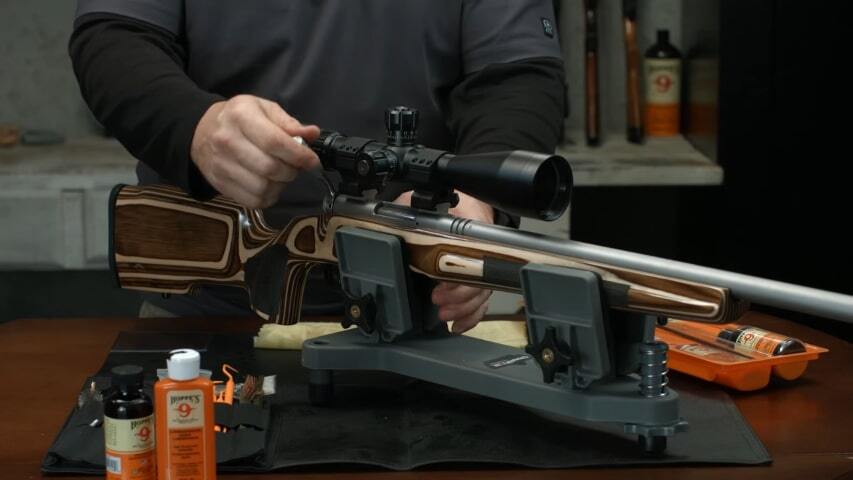
Step One: Disassembly
Since bolt rifles are by far the most widely adopted ones, there’s a great chance yours is one of them. So, again after making sure your rifle is unloaded, just pull the bolt open. Then press the trigger, and the bolt should slide out from the back of the rifle.
Once you’ve removed the bolt, set it aside and get back to further dig deeper into your rifle. If you have a scope mounted to your rifle, you can unscrew that as well.
For the most part, this should do it for the disassembly step, but if you’re cleaning your rifle for the end of the season, you can take apart the trigger assembly and the barrel as well, so you don’t leave any rock unturned.
Step Two: Wipe
Once your rifle is disassembled, take a moment to check that all the parts are in good condition with no breaks or loose screws. After you make sure that everything is fine, use a paper towel or a clean cloth to wipe off any dirt or soot.
Step Three: Barrel Cleaning
Next up is cleaning the barrel. Soak your cotton patches in the solvent and run them along the barrel groove. Make sure to start from the rear side, as the crown occupies the muzzle end of the barrel. If you scratch or crack the crown, you’ll mess up with your rifle’s accuracy.
Furthermore, you can also attach the right caliber bore brush to the cleaning rod and add more solvent to the barrel before running it along the internal groove. These bronze bore brushes can remove the tightly adherent carbon particles that weren’t dislodged by the gentle cleaning using the cotton patches.
Once you get the bulky carbon particles out of the way, use the cleaning swap to remove any fine leftovers. Finally, keep running solvent-soaked cotton patches along the barrel until the ones coming out from the other end appear clean.
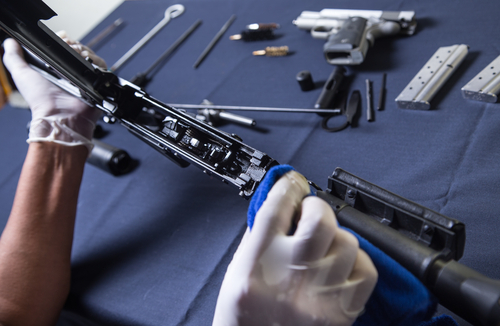
Step Four: Clean The Metal Parts
With the barrel out of the way, let’s move to the other metal parts yet to be cleaned. You can simply soak parts like the bolt face, magazine box, and trigger guard in the solvent for a couple of minutes and then wipe them off with a clean cloth.
If the metal parts have any painting that might get damaged by sitting in the powerful solvent, use a spray instead. Then brush your way along the metal parts using a fine brush to remove any soot sticking to the metal frame.
Step Five: Stock Treatment
The stock shouldn’t take much of your time, as all you need to do is inspect it thoroughly. Just make sure that there is no solvent or oil staining your wood or synthetic stock because these chemicals can be corrosive.
Step Six: Finishing Touches
Now that you’re done with the cleaning process let’s move to the fun part. Before applying the finishing touches to your shiny rifle parts, please take a moment to be proud of your work, as you’ve seen how it all started and where it’s sitting right now.
It’s time to get back to work! Apply a rust protector to all the metal parts of your rifle to ensure you don’t face any rust-related issues down the line. Then, by using a Cue-Tip, apply some lubricant to the spots where metal rubs against metal, like the trigger assembly system and the channel where the bolt slides.
Step Seven: Reassembly
You’ve made it, so let’s put everything back together! We’re sure you’ll start to feel how “new” your rifle looks as you assemble all the parts back in place. Dry fire your rifle to test that everything is working just fine, and you’re good to go.
When it’s time to store your rifle, keep it in a dry, clean area, preferably in its rifle case. These cases are designed to keep moisture out, which helps prevent rusting. They’re also useful in keeping the lubricant and oils from drying out.
Finally, to make your future cleaning sessions less tedious, consider attending to your rifle after shooting 50 or more rounds. This way, it’s always clean, and you don’t allow time for carbon particles to build up and become resilient and hard to scrub off.
Safety Precautions
Now that all your tools are in place, you have to consider some simple yet absolutely crucial precautions. Since gun maintenance is an ongoing process that you’ll need to repeat on a regular basis down the line, you need to set a safety routine to follow to ensure you and your loved ones are out of harm’s way. Let’s review the key points to keep in mind.
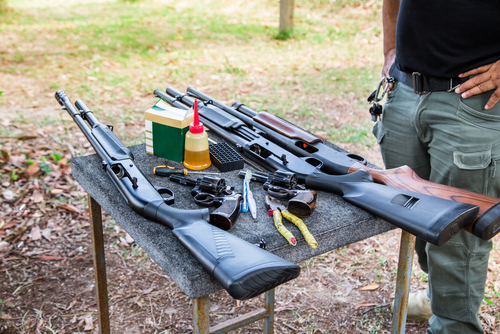
Working Area
Make sure you’re working in a spacious area to easily fit your rifle cleaning kit and have room to run the cleaning rod along the whole length of the rifle’s long barrel. A workbench in your garage or backyard can be the perfect spot to lay down all your tools in an organized, easily accessible manner.
Furthermore, some cleaning solvents or oils might come with a pungent smell, so working in a well-ventilated area should be a priority.
Personal Protective Equipment
The talk about a well-ventilated working area is the perfect segue to the importance of personal protective equipment. As many of the chemicals are toxic to breathe in or touch, your trusty goggles, gloves, and respirator have a major role to play. You don’t want to end up with skin burns or breathing problems after cleaning your rifle, so make sure you’re prepared.
Unload Your Rifle
We can’t stress enough how important this step is. Before handling your rifle, you have to make sure that it’s unloaded. Don’t take anyone’s word for it or depend on your memory that you left the rifle unloaded after your last trip to the range. You have to double-check for yourself; it’ll only take you a few seconds.
Point your rifle’s barrel in a safe direction, then open the action and check for any gunshot cartridges. If your rifle comes with a magazine, keep an eye on it as well before you grant yourself the clearance to proceed with the next steps.


step one should be to ensure your firearm is unloaded
Oh, totally agree with you!
I’ve only seen this mentioned one time, so it’s time to re-iterate. As you run your brush back and forth through the barrel, run the brush all the way through. You don’t want to reverse direction while the brush is still inside the barrel, for a couple of reasons. You want to clean the entire length, and you don’t want the bristles to ‘stand up’, as you pull the rod in the opposite direction.