


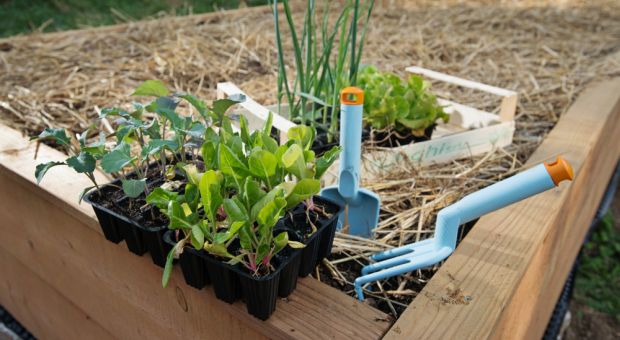
No matter whether you are growing flowers, vegetables, succulents, or herbs, they must all have the proper amount of water for their needs in relation to the area that they are growing in.
On the other side of the equation, watering all of your plants manually can be a time consuming task as well as one filled with errors if you forget which plant needs more water or less in comparison to others. Self watering gardens can make it easier to take care of a wide range of plants for survival as well as off gridding and even small scale sustainable food production needs. Knowing which methods will work best for different growing methods and plants will save you from making a lot of mistakes as well as give you a chance to optimize plant growth and overall health.
Advantages to Making a Self Watering Garden
Depending on where your garden will be located and the kinds of space limitations you are dealing with, it can be a bit expensive to set up a self watering garden. As a result, it is very important to understand what you will gain from installing a self watering system as well as the disadvantages.
This Device Easily Turns Air Into Water!
Here are some of the reasons why self watering gardens are more than worth the effort:
- If you are hiding a survival garden in a remote area, it will not be useful to wear a path to that location. Even if you approach the garden from different directions, there is always a chance you will be seen going to that location on a regular basis. When you use various methods correctly, you may only have to visit the garden every few weeks, or even only stop by when you expect something is ready to harvest.
- No matter whether plants are indoors our outside, most don’t like to be disturbed. If you do not have a lot of room, watering the plants will more than likely involve moving the containers around or disturbing leaves and vines. The less you have to water your plants, the less disturbance they will experience. Needless to say, if the garden is located outdoors, less watering also helps reduce soil compaction and the need to use hoes or other tools to increase air flow and percolation.
- Chances are you already know that many areas of the United States are experiencing droughts and fires, while others are flooding. In both cases, potable water or other water suitable for growing healthy plants may not be available in suitable amounts. The more you can conserve water needed for your garden, the better chance your plants will have of growing and thriving.
- If you are stuck using municipal water supplies, using less water will save you money. You will also reduce the amount of exposure your plants have fluoride and other toxins added to municipal water. This also includes pharmaceutical drugs, carcinogens, and other dangerous chemical that find their way into the municipal water supply if runoff from drainage and sewage systems are recycled and added back into the system. Since more than a few plants you may be interested in growing also have a reputation for cleansing water and soil, there is no point to growing them with contaminated water. Unless the plant actually breaks the chemical down into something that is safer for you to consume, you will wind up being exposed to the toxin when you consume the plant. At the very least, if you cannot purify the water before watering your plants, at least you can limit the amount of water, and hence the number of chemicals the plants are exposed to.
Problems You Must Account For
Even though there are many advantages to having a self watering garden, there are also some limitations that you should be aware of. When designing your system, it may or may not be possible to fully overcome them.
- More than a few people that don’t have much experience with indoor or outdoor gardening tend to jump to the idea that “drainage” or runoff is the biggest problem when it comes to water conservation. Unfortunately, if you don’t provide proper drainage for the plants, their roots will rot. To add insult to injury, excess stagnant water is always a breeding ground for bacteria, fungus, and other pathogens that may be dangerous to you and your plants. Therefore, when considering how to set up a self watering garden that conserves water, you must consider carefully how you will manage drainage. One possible answer, especially with indoor gardens is to have all of your plants drain into one trough, and then pipe the water into a tank so that it can be recirculated back onto the plants. Aside from recapturing the water already expended, you will also be putting the minerals and other nutrients that were leached out of the soil along with the water.
- There is no such thing as a gardener that wouldn’t like to be able to pack more plants in a smaller amount of space. It should come as no surprise that people try to use smaller and larger plants together in order to reduce the surface area that water can evaporate from. Unfortunately, no matter where your garden is, this is a recipe for disaster. Air flow around the plants and into the soil is one of the most important ways to control infections, mold, and mildew, that can harm or kill the plants.
- When building a self watering system for your garden, it is also very important to be able to adjust the amount of water going into the system. Unfortunately, equipment can fail, or the electricity required to run more complex systems can spell disaster. No matter whether you are considering using some form of drip irrigation or anything else that requires a pump, it is important to set up appropriate regulation methods and alternative power sources. For indoor gardens, you can use solar powered pumps as well as create smaller systems for plants with different water needs. This will also make it easier to power the system since there may be other methods that you can utilize such as gravity fans, earth batteries, or even power generated from motion. Insofar as outdoor gardens, see what you can do with the topography of the area in and around the garden. If you have enough room, developing some kind of stream might work well along with an Archimedes’ Screw or a Ram Pump.
Building a Soil Moisture Gage
Considering how important proper moisture levels are, it should come as no surprise that you can purchase a fairly cheap moisture gage. On the other hand, that initial cost may not be so cheap when you consider how many plants you have to monitor, or the area you must cover. For example,if you are able to develop a sustainable indoor garden for food and health related needs, you are likely to have between 150 and 200 containers. Realistically speaking, sticking a single gage into 200 pots can be an awful lot of work! You will be much better served by making gages that you can leave in the pot as well as considering electronic enhancements that will allow you to monitor the gages from a distance. Here are a few ways to build the sensor as well as some ideas about what it would take to build an integrated electronic monitoring system.
- To begin, most soil moisture gages are little more than two pieces of conductive metal that are stuck into the ground[1]. From there, all you need to do is use something like a multi-meter to measure the resistance between the two pieces of metal in order to determine the amount of moisture in the soil. Since there are an endless number of items you can use (anything from nails to bolts or other materials), you will need to test the sensor out in soil with different amounts of moisture in order to estimate how much moisture is in the soil based on the readings you get. In order to keep these sensors working properly, you will need to monitor them to see if rust or other signs of oxidation are building up. For a longer lasting option, try using graphite instead of metal for the conducting parts of the sensor.[2]
- While you can use a multi tester to asses resistance fairly quickly and easily during the building stages, it is best to move to an arduino based system for actual monitoring. This will enable you to hook up dozens to hundreds of sensors to a single controller. If you add connectivity and a means for the arduino controller to broadcast the information to your computer or cell phone, you will be able to monitor the system from just about anywhere in the world. No matter whether you have hundreds of indoor plants to monitor or a vegetable patch located deep in the woods, the arduino controller can help you monitor them easily from a distance. If you are looking to prevent electronic snooping on remote gardens, it is very important to consider how you will send and receive the data as well as how to encrypt the location information. Given the flexibility and number of options available with arduino, there is a chance you can either find something already built, or develop something on your own.
- When building a soil moisture gage, it is also important to realize that an arduino system can also help you take the information from the readings and use it to determine when more water will be delivered to the plants, and then control the pumps and motors used to achieve the job.
Delivering Clean Water to Your Plants
Now that you know how to make sure there is the proper amount of water in your self watering garden, it is time to consider water delivery methods. Regardless of the method you choose, do not forget about integrating water purification methods. If you are going to go through all the work and effort to create a safe food supply or a safe supply of herbs for health needs, it makes no sense at all to ruin your work with contaminated water. Regardless of the method that you choose, you will more than likely need to use activated carbon and bone char in the purification system. Depending on the size of your garden and the amount of water going through it, you may need a fairly large filter as well as a storage tank so that there is plenty of time for the filter to process enough water over time.
If your garden is located outdoors, you will have a difficult time, at best in terms of preventing contaminated rain water as well as underground runoff from other locations reaching your plants. You can control underground runoff to some extent by digging down 3 – 4 feet into the soil and placing a waterproof liner in the basin. If you dig down an additional foot, this may also be the perfect time to lay down some metal that will work for an earth battery, and then place the liner over the area where the metal is buried.
Insofar as protecting your outdoor plants from contaminated rainwater, canopies may be of some use. Just make sure they are easy to roll up or put back in place so that your plants get as much sun as possible when it is not raining. Once gain, an arduino based controller can be very useful for monitoring the weather and activating motors required to put canopies back in place or roll them up as needed. Unfortunately, if your garden is supposed to be a secret one or disguised in the woods, it may not be possible to protect it from rainwater. You can try disguising the canopy with leaf cover or something that looks natural, however it will take a lot of effort.
As a final thought on integrating water purification systems for a garden, you will find that it is somewhat different from building one for drinking water needs. In both cases, it is important to keep natural minerals in the water since your plants need them as much as your body does. Your plants also benefit from additional nitrogen from the water. If your filtering system eliminates nitrogen, do not forget to add it back in via compost tea or some other nitrogen rich additive.
Drip Systems for Vertical Gardens
Basically, drip systems make use of a porous hose that drips water onto the soil surface over a period of time. You can set them to water for a set period using timers, or you can use an arduino based controller to start and stop the delivery of water based on the input from the sensors. Many plans available for drip watering systems for vertical gardens introduce the water at the top level and then let it drain down to the bottom rows. While these systems are relatively simple and effective, they don’t give you much control over patches in the vertical garden that dry out faster than others. They also don’t make it very easy to manage plants that may be having growth spurts, and therefore require more water.
Based on my personal experience with developing drip systems for vertical gardens, I recommend making sure that each layer of the frame is independent insofar as water introduction and drainage. You can still drain water into a single reservoir from each layer, however it should not interfere with other layers. You can still use drip piping in each layer, and simply add a controller mechanism to each row so that water is released into the proper level.
Drip Systems for Containers
Even though they may seem small and simple, it is a bit harder to use a drip system with individual containers. This problem can be even more challenging if you must keep seedlings at the proper moisture level or you are using smaller pots. In my own experiments in this area, I found that punching holes in aquarium tubing worked better than commercial drip hoses.
To make my drip hoses, I simply cut the aquarium tubing so that it is large enough circle once around the inside of the container. If you choose this method, you can also add more loops for larger or deeper pots. After punching in the holes, I use three way connectors to complete the circle and create an opening for water to flow in. As with vertical gardening drip systems, I also found that I needed valves leading into each container. At this time, I am still testing out different valves and DIY options. Depending on your budget and the number of plants you need to provide water for, valves can easily be the most expensive part of your plans.
Drip Systems for Outdoor Gardens
If you have a garden of any decent size, then you probably already know there are all kinds of drip watering systems for outdoor gardens. While ease of installation varies considerably from one product to another, you won’t save much by trying to build your own from other kinds of materials. That being said, you will still need to do some customizing to the overall system to get the most of it for a survival garden. Here are the main adjustments:
- First, and most important you will need to find some way to get the water from somewhere other than the local municipal water supply. Since you will need to filter the water regardless of where it comes from, rainwater capture systems will work best. Depending on how you arrange the tanks, you may or may not need a pump to propel the water from the storage tank into the garden. For example, if you elevate the tank above the ground, then you can use gravity to help move the water into the soaker hoses.
- As mentioned earlier, all water sources for a survival garden need to be filtered to get rid of heavy metals, radioactive debris, pesticide, herbicide, pharmaceutical drug, and other toxic contaminants. Activated carbon will get rid of most chemicals, with the exception of some heavy metals. As with filtering water for drinking needs, you will need bone char to get rid of the heavy metals. Remember, boiling water does not get rid of chemical toxins. All it does is release steam into the air (which is actually pure water), thus leaving behind all the contaminants in a more concentrated form. Unless you are dealing with some kind of biohazard situation, there is no immediate need to be concerned about microbe contamination in the water. That being said, if you want to build the most comprehensive water purification system for your garden, then simply add a means to boil the water before it is applied to the plants.
- During the process of selecting seeds for a sustainable garden that will meet all your nutritional needs and most (if not all) of your medicinal ones, you will find that it takes a lot of different kinds of plants. As a case in point, my herb garden alone contains 25 different plants and I am keen to add about 5 more (like vanilla bean orchids) to meet all my cooking flavoring needs. On the food production side, I have over 50 different kinds of plants, including a diverse number of beans and different kinds of tomatoes. No matter whether you plant indoors or outside, this many plants are bound to have different soil moisture level needs. Unfortunately, regulating the amount of water from soaker hoses can be difficult if they all run off just one water source. Fortunately, if you start off with tanks from the beginning, you can also install different tanks for each part of the garden. Later on, as you rotate the crops, all you would need to do is adjust the timers or soil moisture gages for each tank. This method requires about three separate systems – one for dry, medium, and relatively wet soil.
Natural Landscaping Drainage Methods
It is a sad fact of reality that in the modern world you cannot have anything growing outdoors without having some concern over polluted water. On the other side of the equation, it will not be practical at all to ignore all the water you can obtain from creating natural hills and valleys to capture rain water and underground water that can be purified before introducing them into the garden.
In order to take advantage of landscape features, start out with the understanding that higher elevation areas will not hold water as long as low elevation areas. The water will simply flow from higher elevations to lower ones. As simple as this rule may seem, many people have a hard time figuring out how to lay drains in their yard for the purpose of optimizing water runoff[3]. If you have natural slopes in your yard, there are some ways to optimize them so that you can easily direct water from one area to another using French drains that include perforated pipes.
If you have wet spots in your yard, then you may already have dug trenches and pits that lead to another area that is more convenient. If there is a lot of runoff, some people install underground dry wells[4]. Basically, this is a tank with holes in it that fills up as the water flows in. As the ground around the tank dries out, the water inside simply percolates out through the holes. You can easily modify this system for use in a DIY self watering system for your garden. All you have to do is build the drainage system as normal, and then install a tank without holes in it. Simply add a filter either before the water enters the tank or after it leaves the tank and is on the way to the garden for purification needs. This method can be used to provide water for just about any location. No matter whether you want to reclaim water from roof runoff or sloped areas of your yard, this system is relatively easy to install and budget friendly. As an added bonus, you can also use this system to provide a secret source of potable water.
Using Soil Additives and Covers
One of the most important parts of a DIY watering system is reducing the amount of water that needs to be added in the first place. In many cases, this means that you have to find some way to keep the moisture in the soil without creating a situation where it drowns the plant roots. Here are some soil additives that will hold water in the soil without creating a problem for most types of plants:
- Straw – this is easily one of the oldest and most reliable methods for reducing the amount of water required in the garden. Simply place the straw around the plants and water as you normally would. The straw acts as a ground cover that prevents the water from evaporating back up into the air. At the end of the season, simply dig it back into the garden so that it will feed the next year’s crop of plants. You can also mix grass clippings into the soil to improve water retention.
- Compost – compost and manure are both considered organic additives that will improve water retention. They will also provide necessary nutrients that will improve plant growth and biomass production.
- Spaghnum Peat Moss – this is another organic additive that can be used to improve soil quality as well as improve soil retention. Peat moss will store the water up and then release it back into the soil as it dries out.
- Polymers – it should come as no surprise that polymers are rapidly becoming the choice of farmers and others looking to increase water retention in depleted soils. Even though these polymers are effective, I do not recommend them for survival gardens because there is insufficient data on their overall safety. If you are going to go through all the trouble to make sure your plants are getting clean water, there is no point to using toxic polymers in the soil that may pollute it for years on end. While organic matter may require a bit more work, it is still a safer option provided you use sources that aren’t contaminated.
Using Fired, Unglazed Clay
When it comes to simple, safe, inexpensive DIY watering systems, it is very easy to overlook all the uses for unglazed clay. If you have ever built a zeer pot, then you already know that unglazed clay pots easily leach water and move it from one place to another. In the instance of zeer pots, the motion of water from inside the pot to the outside serves to reduce the temperature inside the pot. When it comes to gardening, you will find that unglazed clay can be used to retain some water, and then slowly drain it out to the plants. Without a question, if you gave up on terra cotta pots because of their tendency to attract mold, moss and mildew, then you might want to go back and consider these options:
- Unglazed clay spikes – these are very simple devices that can be used in outdoor gardens as well as in containers. All you have to do is stick them in the soil and water using any method you prefer. The soil around the spikes will still dry out faster than the clay spikes. As the soil dries out, the water held in the spikes will diffuse into the soil. If you are going to use clay spikes in the garden, it is best to install them when the plants are still small so that the roots will not be disturbed when you install the spikes. This will also make it easier to ensure that the spikes are easier to find for the purpose of retrieval. As long as you do not break the spikes, they can be reused and should last for years on end.
- Ollas or Clay Pot Irrigation[5] – if you are looking for an effective irrigation system that has withstood the test of time in diverse areas, then Ollas will be of interest to you. These systems have been used for thousands of years in Africa and China. They can be used in desert conditions as well as areas where more water is available. The concept behind them is the same as for unglazed clay spikes. In this case, however, the Olla or unglazed pot is designed so that it has a deeply rounded bowl and a narrow neck on top. Once the Olla is fired and ready for use, it is buried in the ground so that only the opening is visible. To use the Olla, all you have to do is pour water into it. Depending on the size of the Olla and the surrounding moisture, all the water will leach out within 72 hours. As long as the Olla does not become completely empty, you will not have to worry about mineral deposits from the water building up inside the bowl. Unfortunately, these deposits will eventually impede the flow of water out of the pot. While you can replace the pots as needed, it is best simply keep them filled at least 50% at all times so that the minerals do not build up on the inner surface.
- Finally, you may also want to try adding unglazed clay beads or even broken terra cotta pots to the soil. Just be careful when working in the garden so that you do not wind up cutting your hands and feet on the buried shards. Clay beads can also break down in the soil and create hidden hazards.
Self Watering Bulbs for Containers and Vertical Gardens
As I mentioned earlier, elevating tanks used for storing water for the garden can be very useful if you want to rely as little as possible on pumps, or avoid them altogether. Interestingly enough, self watering bulbs for containers also make use of gravity to deliver water to the roots of your plants. Basically, these plastic bulbs look a bit like Ollas, only they are installed with the narrow part inserted into the soil.
You can buy self watering bulbs and install a minimum of one to each container. Once the bulbs are empty, you will have to manually fill them with water again. As a cheaper alternative that allows for less manual labor, consider the following adaptions to DIY watering bulbs[6]:
- Take a glass bottle and use a glass cutter to make a hole in the bottom. If you have made lamps from glass bottles, then you will already know how to go about this step.
- Next, take some tubing and insert it in the hole. Make sure that the seal between the tube and the bottle is water tight. Later on, all you need to do is attach this tube to the water storage system so that you can fill the bottles whenever necessary.
- If you are already integrating an arduino controller to your garden, go ahead and include a sensor in each bottle that will detect when the level is low. From there, you can also use the controller to manage the motors and pumps that will release the water.
- Once the bulbs are ready, all you have to do is insert them into the soil at an angle that ensures the water will flow towards the roots of the plant. Use the same method that you would use for pre-fabricated watering bulbs.
If you find that self watering bulbs are useful indoors, you may also want to consider creating a similar system for outdoor gardens. In this case, I recommend attaching a soaker hose at the bottom of the bottle so that it can be used to water more than one plant in the garden. Even though the bottles will have to be refilled faster, it is an ideal way to deliver water beneath layers of straw and ensure that it gets to the roots of the plant where it is most needed. As an added bonus, the gravity fed nature of the bottles can also help you with developing pump free systems for outdoor gardens regardless of their location.
Central Core Self Watering for Containers
This is actually a system that I have been working on for some time based on systems used to optimize tomato plant growth[7]. While those systems are usually used in a regular garden setting, mine can be used in containers. The idea behind these systems is fairly simple:
- To begin, your plants will grow along the outer edges of the container. Since the plants are located further apart, you can fit two to a container that would normally only fit one in the center area.
- The key to this system is the central core or column where the water enters the system. While the original system simply used a plastic garbage can with holes in it for leaching, a container requires something that will release the water on a much slower basis. I also found that it was best to have something that the roots of the plants could grow into in order to optimize the room in the container as much as possible.
My best results were with luffa gourd sponges which held the water and are also fairly easy to grow in a home garden. I was able to use the sponges with and without an aquarium tubing “soaker” insert in the center of the sponge. The soaker element did make it a bit easier to avoid manually watering each container. My worst results were with using plastic screen material and compost set into the bottom of it. Not only did the water not disperse correctly, I was also very unhappy with the overall plant growth. Insofar as future plans on this one, I am also considering making sustainable paper cups in two sizes, and then adding compost between the walls similar to the way a zeer pot is built. From there, I should be able to add the water into the center cup and have it leach out into the root area along with the nutrients from the compost.
5 Gallon Wicking Container
This system was originally created for tomato plants, but can be used for many other kinds. It is also suitable for indoor and outdoor plants. The basic steps for building a self watering 5 gallon container are as follows:
- To start, you will need 2 five gallon plastic buckets. While you can start off with ones found in most hardware stores, eventually it will be best to look for food grade plastic or buckets made from something that won’t leach contaminants into the soil.
- Get the first bucket and drill holes in the bottom. Next, make a 2” diameter hole in the center of the bucket.
- Get the second bucket and drill a hole approximately 2 inches up from the bottom. This hole is used to allow water to drain from the bucket while still leaving a reservoir.
- For the next step, you will need some old towels or other materials that will wick water easily and two kitchen sponges. Cut the towel into 4 strips. You should have enough length on each strip to go at least 6 inches past the bottom of the bucket and then hang over the top of it.
- Next, cut a slit in each sponge so that the towel can be pulled through it.
- Take the towel strips and insert them into the slit in one sponge. Now place the shorter length of towel in the bucket and pull it through the 2” hole in the bottom. The sponge should sit on the bottom of the bucket with the strips pulled through the hole.
- Take the second sponge and put it outside bottom of the bucket. Pull the towel through the sponge in order to complete the wick.
- Now that both pails are ready, you will need to fill the bucket properly with soil so that the wicks are distributed throughout the bucket[8]. To start off, make sure that the strips are arranged so that they are separated around the interior of the bucket.
- Fill the bucket about halfway. Make sure there is at least some of each strip sticking up. The strips do not have to be laying against the side of the bucket, nor do they have to be aligned with the bottom. You can pull up on them a bit in order to have enough strip available for the next step.
- Lay the strip across the soil so that they are still separated. Place soil behind the strips so that they are not laying against the side of the bucket. Your goal is to distribute the strips through the soil so that the they can diffuse water into it from many locations.
- Once you fill up the bucket to within 2 inches, fold the strips over so that they are sitting on top of the soil. They should not be hanging over the pail as this will only allow water to evaporate from the fabric back into the air.
- Finish filling the bucket with soil. You should leave at least 1” of space on top so that you can add straw or some other covering that will reduce evaporation.
- Next, go ahead and plant seeds or transplant young plants that are ready to be placed in garden or container.
- In order to supply water the plants, you must fill the reservoir area in the second bucket. Place the towel extending from the first bucket into the water and stack the buckets together. From this point, you can water the plants using any method that you choose. Some improvements on this system include adding a soaker pipe to the side that extends from the surface all the way down to the reservoir.
There is no getting around the fact that growing a garden that will fill most, if not all of your nutritional and medicinal needs will take some time and effort. One of the most important things you can do is find ways to conserve water as well as eliminate the need to water your garden manually. Because modern water supplies are downright deadly, there is also no getting around the need for a water purification system for your plants. While you may want to use plants for cleaning up toxic soil, it is not likely that you will be able to consume them and get the benefits you were expecting. Once you are able to control water quality and deliver it in appropriate quantities to your plants, you will be well on your way to developing a sustainable garden that can be grown in just about any setting.
Resources
[1] https://makezine.com/2009/03/04/nocost-soil-moisture-sensor/
[2] https://hackaday.com/2017/11/16/sensing-soil-moisture-youre-doing-it-wrong/
[3] https://s3.amazonaws.com/academia.edu.documents/30557910/tucker-1998.pdf?AWSAccessKeyId=AKIAIWOWYYGZ2Y53UL3A&Expires=1537716188&Signature=hmRXx0HHK1vnJPINvyqU%2FpKAV5A%3D&response-content-disposition=inline%3B%20filename%3DHillslope_processes_drainage_density_and.pdf
[4] https://www.familyhandyman.com/landscaping/install-an-in-ground-drainage-system/view-all/
[5] https://permaculturenews.org/2010/09/16/ollas-unglazed-clay-pots-for-garden-irrigation/
[6] https://www.youtube.com/watch?v=1M5_DC3gMS0
[7] https://www.networx.com/article/one-mans-secret-for-growing-a-bumper-to
[8] https://diyprojects.ideas2live4.com/5-gallon-self-watering-tomato-container/


I did an into landscaping course quite a while ago.
The teacher stated they he recommended using a Kilt Pin (an overgrown safety pin) to puncture holes in the black thin walled irrigation tubing.
He recommended making the holes & leaving it in the sun for a few days.
Some holes will close up a bit & they can be enlarged with the kilt pin.
You can run water into the piping to check if the holes have closed up.
Regards,
Brian.