


If you’re like me and you love to spend time in the Great Outdoors, you probably learned by now that proper nutrition plays an important role in the wilderness.
Often times, I don’t really care about what season is upon us, and when I feel the call of the wild, I’m going to pursue it.
Winter doesn’t pose a problem for me, and I actually find that going camping during this time of the year is both a challenging and rewarding experience. Finding my place in the calm and white scenery is one of the most relaxing experiences I can think of.
If you like to go camping during the cold season, you should acknowledge that your body’s resistance will be affected during this time, and the outdoors activities will take a big toll on your energy levels.

In a cold environment, the body’s heat production is greatly slowed, and it can make survival a difficult task. If you have to move through heavy snow, you will need a proper intake of trail food to maintain an optimal body temperature of 98 degrees Fahrenheit.
Carrying heavy gear through snow and adding up cold air respiration makes a challenging effort. You need food with real nutritional value if you want to reach camp or go back to civilization. Since our body is composed primarily of water, keeping it warm during the cold season requires quite a large amount of energy.
To keep your body’s function from failing you, a high intake of calories is necessary to produce the right amount of energy. Nowadays, the average American has a daily caloric intake that reaches almost 3000 calories. However, when camping during the winter and working outdoors, your caloric intake must be two or even three times higher.
After years of spending time in the outdoors, both me and my friends (some with decades of experience in the wilderness), we agreed that what you eat is actually more important than how much you eat. We made a habit of having our own pre-made nutritious sources. The type of food trails that will keep us going regardless of how harsh the weather might be.
Here are my favorite trail foods and a few details on how to prepare them at home.
Pemmican
 I’ve first heard of Pemmican fifteen years ago from a close friend that has Native American origins. Only in the last years, it has become a “sensation” amongst preppers and survivalists. It is one of the trail foods that have resurfaced online, and people are rediscovering their nutritional value.
Pemmican is a nutritious, preserved food created by the women of Native American tribes. The term Pemmican is derived from pimii, the Cree-Chippewa word for fat. Pemmican consists of a mixture of cooked, dried, and shredded buffalo meat, or fish, which is combined with melted fat. The pemmican was tightly packed into a bag made of buffalo skin and used as a convenient type of long-lasting food.
To this day, it remains one of the oldest methods of preserving meat, and outdoorsmen love it. It’s high-energy, easily transportable, and long-lasting. We call it the fast food of the bushcrafter since you can eat it without cooking it and it doesn’t require any special preparation or cooking in the field.
Here’s how to make the pemmican (modern recipe):
Ingredients:
- Died lean beef, venison or buffalo
- Beef suet
- Seedless dried fruit (apricots, dried apples, etc.)
Preparation:
You will first need to grind the meat and drying using your oven or a food dehydrator, if available. The meat needs to turn crispy so that you can grind it into a powder.
Melt the suet until it turns into a golden-brown liquid. Pour the liquid onto the meat and fruit mixture.
Mix the composition. You can mix it best if the suet is warm and you will also use less of it.
Once the mixture is ready, you will need to lay it into a tin and press it using a spoon.
Let it cool in the fridge for a few hours (3-4 should be enough) and then get ready to cut the pemmican into bars the size of candy bars. Some people prefer to make pemmican balls while others will make small cubes and snack on them while on the road. It all depends on your liking.
However you decide to cut the pemmican, you will need to consume them with a minimum of 10 ounces of water per serving. It helps make them go down easily, and you will stay hydrated.
Jerky

There is a big difference between real jerky and all the commercial options available nowadays. To eat real jerky, you have to cut a chunk with your teeth after several tries – if you can. If not, you will have to use a knife to cut out a flake. Said flake would have to be soaked in your cheeks until it softens. If jerky isn’t that tough, it won’t keep!
In general, jerky can be made from venison, buffalo, or elk. Most jerky you can find today is made from beef, and flank steak will not work that great making jerky. However, if that’s all you have to work with, start by cutting the meat in long thin strips along the grain.
You will need to remove and trim away fat or gristle if present.
In the old days, the meat was sprinkled with salt and pepper, and some would also use a small amount of chili powder to improve the overall taste of jerky. Today, you can use pretty much all the condiments you want. Once you do that, simply hand the meat strips on wire lines, in the sun, to dry it properly.
Some folks will prefer to marinate the jerky to make it more flavorful, but that’s up to you. I personally make my own marinade by using 2 tablespoons of soy sauce and 2 drops of Tabasco cause (or replace it with cayenne pepper). I also add ¼ teaspoon of salt and one of ground pepper, topping it with a fresh glove of garlic, minced.
Now all that is left to do is place the meat and marinade in a Ziploc plastic bag and let it sit in the refrigerator overnight.
Once the meat marinates properly, drain it and place it on the oven racks to dry. Set the oven at 140 degrees, and don’t forget to leave the oven door partially open. I usually let it dry for six hours (sometimes even up to 8 hours). My advice would be to let it dry until the meat turns dark and brittle.
My super soup
This is a recipe I’ve stolen from my camping buddies, and I improved it a bit.
Ingredients:
- 1/3 cup barley
- 1/3 cup lentils
- 2 beef bouillon cubes
- a pinch of thyme
- 1/2 cup dry milk
- 1 tablespoon dried meat
- 1/4 cup instant potato powder
- 1 cup dried vegetables (sliced)
- 3 tablespoons butter
- 1/4 cup grated or cut cheese
- 1 cup biscuit mix packed in its own bag for dumplings
When you gather all the ingredients, you will need to put them all in the bag except for the butter (or margarine), grated cheese, and milk.
Preparation:
It’s easy to prepare the soup in the field, and all you need to do is follow these steps:
Put the soup mix into a pot and add 4 ½ cups of water. Bring it to a boil, and then simmer for half an hour.
During the last five minutes, stir in the pot half cup of dry milk and 3 tablespoons of butter (or margarine).
Add the cheese (cut or grated)
Now it’s time to make the dumplings by adding ¼ cup of water to 1 cup of biscuit mix to make a stiff batter. Form the dumplings into balls (size of your choice).
Float the dumplings on top of the soup and make sure to cover the pot so the dumplings can steam and cook until done. I usually do so during the last twenty minutes or so of the cooking time.
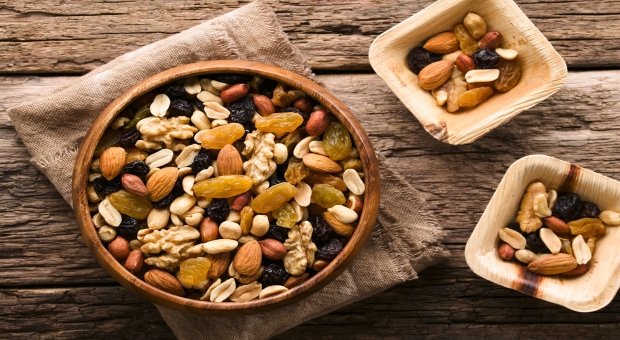
Winter trail mix
Both beginners and experienced hikers will often have trail mix in their backpacks regardless if the weather is kind or not. For most trail mixes, raisins and peanuts are the basis because raisins provide natural sugar, while the peanuts provide the needed fat for your body.
This may be a good combination, but I like to make my winter trail mix with some added supplements.
Ingredients:
- Coconut flakes
- Dark chocolate chips
- Macadamia or cashew nuts
- Dried cranberries
- Peanut butter chips
Each quarter cup of this trail mix should provide you with 200 calories and 14 grams of fat.
However, some people may prefer other nuts for their trail mix. Regardless of personal tastes, make sure they are low salt or salt-free. This will prevent you from getting dehydrated during cold weather.
I like to add coconut flakes to my mix because it provides me a good source of carbohydrates and fat.
This trail survival food is easy to make, it’s tastier than pemmican, and most importantly, kids love it. In fact, it is a perfect choice for every outdoor adventure.
Russian Black Bread
I’ve eaten this bread during my trips to Finland, and it’s one of the trail foods they “borrowed” from their nosey neighbors. It’s an ideal food for wilderness exploring.
Here’s how to make the Russian black bread:
 Ingredients:
- 1 cup bran flakes
- 1 cup cornmeal
- 2 envelopes dry yeast
- 1 square unsweetened chocolate
- 2 cups of water
- 1/2 cup warm water
- 1/4 cup oil
- 1/2 cup molasses
- 3 cups white flour
- 1 tablespoon instant coffee
- 1 teaspoon crushed fennel seeds
- 2 tablespoons brown sugar
- 1 tablespoon salt
- 2 cups of rye flour
- 1 cup whole-wheat flour
- For the glaze use 1 egg white mixed with 1 tablespoon water
Preparation:
You should start by melting the chocolate in two cups of water.
Pour the melted chocolates over the bran flakes and cornmeal in a large bowl and let it cool for a while.
Dissolve the yeast in 1/2 cups warm water.
Once the bran is cool, you can add the oil, yeast, molasses, brown sugar, salt, coffee, fennel, and 3 cups of white flour.
Mix well and add the rye and whole-wheat flours. You will need to add more white flour until you can knead the dough. Do so until it gets sticky. Often times, you will need to add more flour as you deem necessary.
Put the dough into a greased bowl, turn, and cover with a damp towel. You need to let it rise until it doubles in size. Punch the dough down.
Divide the dough in half and form each half into a ball.
Set the dough balls on greased cookie sheets, cover, and let rise until nearly double in size. It should take about 30 minutes or so to double its size.
Once the dough doubled in size, you need to brush the loaves with a mixture of egg white and water.
Bake the Russian bread at 375 degrees for 50 to 60 minutes. You should bake it until the loaf sounds hollow when tapped.
Once the crust turns very dark, you can get it out of the oven and cool it on racks.
Coconut spicy hot cocoa
I wrote about this favorite beverage of mine on various occasions and how I found out about its existence when traveling to Iceland. At that time, the guide that showed us the incredible landscape served us this delicious beverage. From what I learned back then, and over the years, this unusual beverage will warm your body in three stages.
With the first sips, the initial warmth comes from the drink itself. After that, the cayenne pepper will open your blood vessels, providing optimal blood flow. The last warming process comes from the sugar and fat metabolizing in your body.
The best part is that you can prepare coconut spicy hot cocoa mix at home, and while in the field, you will just need to add hot water.
Ingredients:
- 1 cup of cocoa
- 2 cups of brown sugar
- ½ teaspoon of cayenne pepper
- 2 teaspoons cornstarch
- 1 teaspoon salt
- Coconut oil
For an 8 ounce cup, I usually use two and a half tablespoons of mixture and tablespoon of coconut oil. You can experiment with the quantities and make the ideal ratio for your taste. Afterward you can easily establish how much ingredients to pack (depending on your stay).
A last word
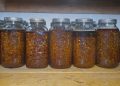
The trail foods listed in this article are my favorite, and it assures me an adequate amount of calories during cold-weather camping. They store great in your backpack or vehicle survival kit, especially if sealed in a vacuum packer.
Keep in mind that camping during the cold seasons requires more than just adequate food. This is just one part of the winter survival formula. Proper gear and clothing are crucial to staying longer outside during colder months without putting yourself at risk.


Hello, Bob. I have really been searching for some of this information. Thank You for providing it. Bill