


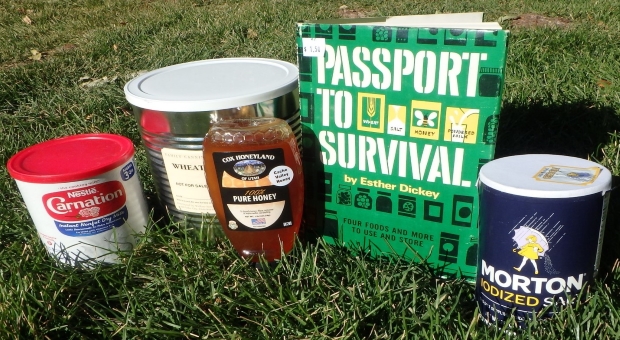
This is a follow-up to an article (so please take it in that context) on the four basics of food storage:
- Wheat
- Nonfat Powdered Milk
- Honey
- Salt
These four basic ingredients can be combined to make many different foods in a variety of pleasing tastes and textures. They also store very well. Wheat, honey and salt store indefinitely when stored properly and powdered milk will store for up to 25 years but packaged like it comes from the store and stored in a kitchen, it won’t likely last two years. These factors combine to make these the four basics of food storage and this article will include provide recipes for them.

Please do store other things in addition to the four basics. For starters, you’ll want a means to treat water, cooking catalysts such as cooking oil and dry yeast for leavening, a hand-powered grain mill, seeds & sprouting trays and fuel to cook with. That said, a family could live for a long time off just the four basics and a little of most of these can be stretched a long way. You’ll also need some recipes, so download the .pdf version of the article and print a copy to put with your food storage, or better yet, buy a few books on the subject to help you get the most out of your food storage. As with other investments, investments in food storage should be made wisely. Some books I recommend are:
- Passport to Survival by Esther Dickey
- Wheat for Man, Why and How by Rosenvall, Miller and Flack
- Making the Best of Basics by James Talmadge Stevens.
Recipes that Use the Four Basics
Wheat Sprouts
Many seeds, grains and nuts can be sprouted, so don’t just limit sprouting to wheat. Just don’t sprout potatoes since sprouting and exposure to sunlight turn potatoes poisonous.
When seeds are supplied with warmth, moisture and air, the life dormant in the kernel uses nutrition supplied by the kernel to kickstart it’s growth. When this happens, the growing plant engages in various chemical processes, multiplying the health benefits provided by seed. In the case of wheat, sprouts increase protein by 300%, which is imperative in survival situations to boost energy, maintain stable blood sugar level and suppress hunger. Vitamin density is also improved. Three-day old sprouts have increases of 1000% the vitamin B content, 600% the vitamin C, 300% the vitamin E and 100% increase in vitamin B17.
Sprouting wheat is an easy:
- Place 2/3 of a cup of wheat berries in a bowl or tray and add a cup and half of cool water (below 70 degrees Fahrenheit or 21 degrees Celsius), moving the seeds so they are all in contact with the water.
- Let soak for 6-12 hours.
- Drain the water. Rinse the seeds with cool water and allow to drain.
- Set the spouts in an area of the home that is as close to 70 degrees Fahrenheit (21 degrees Celsius) as possible, shaded and has good air circulation. (Wheat doesn’t need sunlight to carryout photosynthesis until it has grown into grass.)
- Rinse and drain every 8 to 12 hours.
You can begin eating the sprouts right away if you like, but the greatest increase in nutrition occurs during the third day of germination. Esther Dickey recommended eating sprouts when the length of the sprout reached the length of the kernel or about ¼” (6mm).
Wheat sprouts are good on sandwiches, in omelets, in scrambled eggs, in casseroles and even sautéed in butter. They can also be used in Tacos,
Thin Sprouted Wheat Bread
- 2 cups sprouted wheat
- 1.5 tsp. salt
Combine and grind in a hand grinder, blender or juicer. Spread 1/8” thick on a cookie sheet. Partially bake below 120 degreed Fahrenheit, then score in squares. Return to over and bake at less than 120 degrees until dry.
White Magic Sprouts
- 48-hour old Wheat Sprouts
- Powdered Milk (not instant)
To make a breakfast cereal from wheat sprouts, sprinkle powdered milk over the sprouts and serve immediately in liquid milk with honey.
Toasted Sprouted Wheat
Toast in oven and then grind fine.
Mock Chocolate
- ½ cup parched wheat sprouts
- 1tbs. tea granules
- 1 cup water
- ½ tsp. honey
- 3 tbs. powdered milk
Mix the sprouts and water in a blender. Strain. Add dry milk, blend and heat. Add remaining ingredients and then serve.
 Honey Drop Cookies
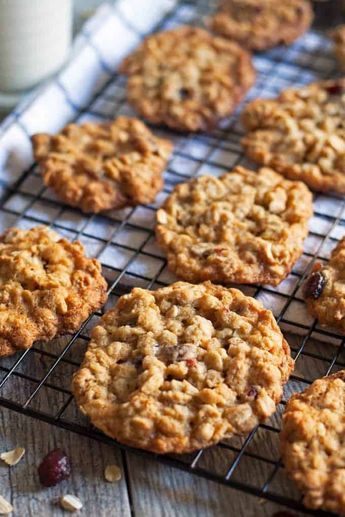
- ½ cup ground wheat sprouts
- ½ cup water
- 1 cup flour
- 1 ½ tbs. dry milk
- 1 cup flour
- 4 tbs. honey
Mix well. Drop teaspoons of mixture on a cookie sheet and flatten out. Bake 20 minutes at 350 degrees Fahrenheit.
Sprout Cookies
- sweet base of milk & honey
- sprouted wheat
For “Sprout Bundles”: Roll sweet base paper-thin and cut into 1 ½” squares. Place 1 tsp. wheat sprouts in center of each and pinch two opposite corners together.
For “Sprout-filled Cookies”: Place sprouts between two small circles cut from sweet base. Press edges together with fork indentations.
Sprout Crisps
- 1 ½ cups wheat sprouts
- 2 tbs. honey
- ½ cup water
- ¼ cup powdered milk
- 1/3 cup flour
Mix water and wheat sprouts in blender on low speed. Blend to a mush and add remaining ingredients. Spread tablespoons of batter as circles on a cookie sheet. Bake at 300 degrees Fahrenheit for 40 minutes. Makes 12 large or 30 small cookies.
Cracked Wheat
- 1 cup cracked (coarsely ground) wheat
- 3 cups water
- 1 tsp. salt
Bring water and salt to a rolling boil. Sprinkle wheat into the water to avoid lumping. Cook in the top of a double boiler for about an hour.
Wild Yeast
- 2 cups flour
- 2 tsp. honey
- 2 cups warm water
Mix well and place in an uncovered bottle or crock. Allow mixture to ferment in a warm room for five days, stirring several times per day. The batter must be aerated for the mixture to activate. It will begin to smell faintly of yeast and small bubbles will rise.
Use in recipes for bread, rolls and hot cakes. On the fifth day after using a portion of the yeast, “feed” the starter with equal parts flour and water or potato water. This is done to replace the portion used in baking. 24 hours later, the yeast will foam and be ready to use again.
Store the unused portion of the starter in a refrigerator in a lidded glass jar or crock. Shake often to aerate. To activate before use, add 2 or 3 tablespoons of flour and an equal amount of water, then stir.
Bread, Batter & Dough
 Sourdough Bread
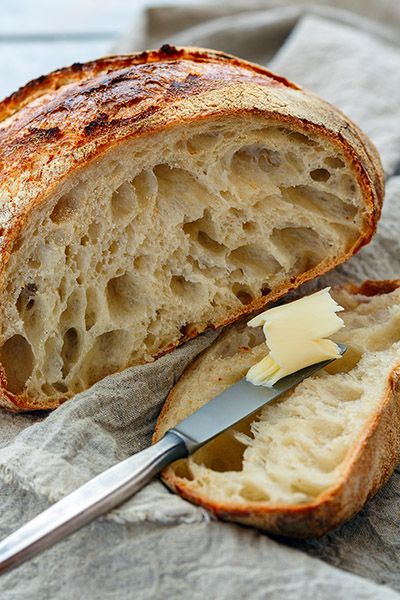
- 1 cup wild yeast starter
- 2 tsp. salt
- 2 cups warm water
- 2 tbs. powdered milk
- 3 ½ cups flour
- 1 tbs. honey
Mix well. Place a ball of soft dough in a nest of flour. Knead in just enough flour to keep the dough from sticking. Knead and pound for 10 minutes. Place a smooth ball in a warm bowl and cover the bowl with a hot, damp towel. Allow dough to rise for about 5 hours at room temperature (72 degrees Fahrenheit/22 degrees Celsius) or until it doubles in volume. (Sourdough bread made with wild yeast takes longer to rise than with modern dry yeast.)
Shape into three loaves and allow to rise again for approximate three hours. Bake at 325 degrees for about an hour in a greased or well-floured pan.
Thin Batter (Unleavened)
- 2 cups flour
- 1 tsp. salt
- 2 cups water
Mix lightly with a spoon until free from lumps. Do not over-beat. Pour directly onto a cookie sheet. Use ½ cup of dough on a 12” x 15” cookie sheet. Tip the sheet back and forth to cover the entire surface evenly. Drain excess off a corner, leaving a thin layer. To make shapes, bake at 375 for 15 minutes, then peel the dough off the cookie sheet before it dies completely, shape it and return to the over.
Batter makes crisp, thin snacks, cereals and pastries.
Thick Dough
- 1 ¾ cups flour
- ½ tsp. salt
- 1 cup water
Mix lightly with a spoon. Spread the rough dough 1/8” thick on a cookie sheet. Bake at 350 degrees for approximately 45 minutes, until brown.
Bread Sticks
- 6 cups liquid milk
- 1/3 cup oil
- ½ cup honey
- 2 tbs dry yeast
- 2 tbs. salt
- 12 cups flour
- egg yolk or canned milk
- sesame seed
Dissolve yeast in ¼ cup warm water with 1 teaspoon of honey. Mix with milk, oil, salt and the remaining honey. Stir in approximately half the flour. Put portions of dough in nests of flour on a board, ¼ of the dough at a time. Flour hands. Using as little flour as possible, shape the dough into four round balls that are not sticky.
Combine the four balls and knead and pound for 10 minutes until the dough is springy, sooth and elastic. Put the ball of dough smooth side up in a warm, lightly greased bowl and keep warm until the dough doubles in volume.
Roll the dough out on the bread board, 1/2” thick. Cut with a circular cookie cutter and cut each circle into semi-circles. Roll each of the semi-circles into an oblong shape. Dip in egg yolk or canned milk and roll in sesame seed. Allow to rise again until dough doubles in volume, then bake at 400 degrees until golden and crisp. Makes about 100 bread sticks.
Economy Bread
- 6 cups warm water
- 2 tbs. salt
- 2 tbs. dry yeast
- 18 cups flour (approximately)
- ½ cup honey
Dissolve yeast in ¼ cup warm water with 1 teaspoon honey. Add remainder of water and honey and the salt. Stir in 12 cups of flour, which should be loose, warm and freshly ground. Put 4 cups of flour on a mixing board. Place about 2 cups of the soft dough at a time on the nest of flour and knead in just enough flour to keep the dough from sticking. Repeat until all dough used, then add 2 more cups of flour on the board and knead and beat all of the dough together for 10 minutes.
Place dough in a lightly greased bowl or pan and set in an unheated oven with a large pan of water heated to 140 degrees Fahrenheit underneath the dough and a hot, damp towel over the dough to provide humidity. The dough should double in volume in 45 minutes. Divide the dough into portions that fit your pans. Let dough rise in pans until it doubles in volume again and then bake at 350 for about an hour for good, light bread.
Honey Caramels
- 1 cup honey
- ½ cup water
- 1 cup dry milk
Mix until free from lumps. Cook in the top of a double boiler for 45 minutes, stirring often.Coo and knead dry milk into the syrup to desired consistency. Roll in 1/2” roll and cut 1” pieces, then shape into squares.
Honey Taffy
- 1 cup honey
Cook to hard crack stage at 285 degrees. Stir occasionally. Remove from heat and pour onto a buttered platter. As outside edges cool, fold to the center and stretch while still hot. Pull until light and porous and until small strings develop.
Discover How To Actually Use The Four Basics of Food Storage


All of this is well and good. However I’ve not seen anything that addresses the needs of people with celiac disease and others who can’t have gluten and/or wheat.
Ditt0 here, I need these recipes for Gluten Free situations!
AND as always, I would prefer to pay for hard copies of books. An EMP could totally destroy all eBooks,!
Thanks for making a change of your offerings, so that there is a choice to order hard copies, if a person wants those. Tks.!
Joyce S.