


The ability to create fire was the primary skill that helped humanity evolve. Our ancestors stepped into this modern world thanks to the developments made possible by fire. Our fascination with fire is still deeply embedded in our DNA, and socializing around a campfire helps us develop social relationships even today.
In the wilderness, a campfire will provide you with warmth, it will help you cook your meals and purify water, but it will also provide you with an indispensable resource, light.
A brief candle history lesson
To maintain a campfire for hours is usually tedious work since you need enough fuel to feed the fire, and you also have to control it to make sure it burns for as long as you need. So our ancestors learned that to keep the light in their homes or improvised shelters, they would often require a better alternative. That’s how candles were born, and in fact, their history is much older than people know, with evidence of stone lamps containing animal fat dating back to 40 000 years ago.
Scientists agree that we couldn’t have developed as a species without the help of candles and lamps since these primitive tools provided access to areas that would otherwise have remained undiscovered and undisturbed by human presence. Even more, the presence of light in common homesteads prolonged our capability to socialize for extended periods and make plans for the future.
Lamps with animal fat were found deep in caves, near passing places, rock shelters, and many other locations. However, it was not just about fat lamps, and even if these were widespread in Europe back in the early days of humanity, in North America, bark-based torches were widely used. Some of these torches date back to 8000BC.
Evidence was found throughout the world that suggests the human story’s interlinking with candles, lamps, and torches. This relationship continues today since many of these items are used in religious ceremonies, rituals, wilderness, and even aesthetic purposes.

A simple bush candle allows you to move in and from the area where your central campfire is located in the wilderness. Some candles can protect you from insects, while others can warm an enclosed shelter or provide a natural light that gives a comforting touch to your temporary home.
Learning how to make a candle in the wilderness is a great skill to own since even a simple candle can save your life in an extreme survival situation. Manufacturing candles is relatively easy, and as you will see, you can make fat-based candles or use some woodland materials alternatives if available.
How to make fat-based candles
To make a fat-based candle, you need to start by finding a container that can hold a suitable amount of fuel. Archaeological records showed us that stone-based containers were the leading choice for early humans, and you can use the same approach for your candle.
Chances are you will be able to find a rock with a natural recession within, and there will be no need to look further for other containers. However, if you don’t have that luck, you will need to scrape away a depression. This can be done using a more complex rock onto a softer one.
Even so, you need to make sure you pick the suitable stone for your fuel container. The stone should not be porous since it will absorb the fuel, and it also shouldn’t efficiently conduct the heat.
Keep in mind that you are not restricted to stone alone, and you can, for example, use a shell, or you can carve a container from wood.
There are multiple choices you have out there in the wilderness, and unfortunately, the human reach made it possible even to use rubbish to improvise a candle. Even in the most remote areas, you will find windblown rubbish, and deep in the woods, you will often stumble upon a rusting can of soda that can make a great candle container.
Note: Regardless of what container you decide to use for your candle, make sure it won’t conduct heat to burn the surface it is resting on or your skin when handling it.
When it comes to manufacturing the wick, the main thing to remember here is that everything that can draw fuel up through absorption or capillary action will work. Therefore, you can experiment with various materials such as moss, soft rush, cotton, sisal, and even toilet paper.
The wick you improvise will not burn away if enough fuel keeps it cool. It may sound clashing, but the evaporation of the fuel cools the wick as it becomes warm.
As for fuel, animal fat is perhaps your main option in the great outdoors as long as you can procure it. Animal fat provides you with light, but it gives a distinct smell and smoke. You can also use vegetable oil since this fuel offers more light than animal fat and less smokiness.
How to make birch bark candles
This is an option preferred by bushcraft enthusiasts since the materials to make the birch bark candle can be obtained entirely in the woodland. At first, you will have to pick a piece of green timber the length of your shoulder to fingertip.
I recommend this length since if you pick something more extended, it will be too heavy and unmanageable to handle, and if you pick something too short, it will get too warm to be held.
The size of the material you manage to gather should be a little thicker than your thumb, and the section you pick should be straight. Once you order to find that perfect piece of wood, split it from the thinner end. Keep in mind that you need to employ a technique that will prevent the wood from being divided from one end to the other, as you need just a small split with enough tension to grip the birch bark.
Once you manage to do the small split, you can place a point on the other end to help you drive your candle into the ground. Now you need to gather a large quantity of Birchbark, and you should get some only from fallen or dead trees. Get a complete section rather than cutting some bits and use your knife to dig in the bark, like peeling a long section.
For a successful Birchbark candle, the volume of the birch bark and how it is laid plays an important role. If you stuff the bark into the split you made on the stick, you will indeed have light, but it will not last for long.
To make sure your candle burns for a long time, you must lay the birch bark on the ground and then roll it together tightly. It should resemble a concertina (that small accordion). Once you manage to fold the bark onto itself to obtain the concertina pattern, you can slip this arrangement into the split you made in the timber. Light one end of the concertina (the folded bark), and your candle will last longer as the bark burns.
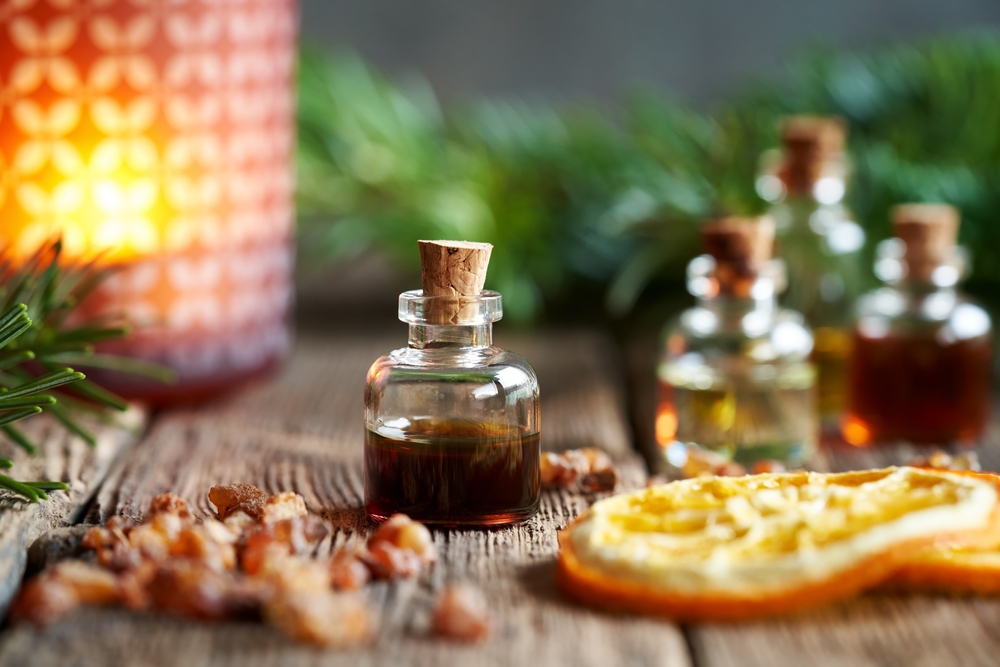
How to make resin candles
During my camping trips throughout the country, I’ve encountered experienced woodsmen, and I’ve learned from them how to make a resin candle, or the “woodsman’s candle” (although none of them knew why it was called like that and the origins of this name remain unknown).
A resin candle will provide you with a longer burning time than the birch bark candle if you build it correctly. Just like in the other candle-manufacturing examples listed above, attention to detail is critical here, and it makes all the difference.
To make a resin candle, you first need access to coniferous woodland and the time required to gather as much resin as possible. Just like in the case of a birch bark candle, find a piece of green timber and split it again, but instead of a single split, you should make a second one to form a cross split.
Once you manage to do the cross split without breaking the piece of green timber from one end to the other, you will need to find a handful of dead twigs. Set these aside as they will serve as wicks for your candle.
Now to the tedious step, collecting the resin. Start by looking out for recently cut tree stumps or wounded trees. Resin can be gathered all year round and you can either find a clear liquid slowly dripping from freshly injured trees or a white solidified substance (older resin). From experience, I can tell you that you will find white resin more often than the clear one.
Once you find the resin, you need to manufacture a collecting tray and a scraping twig. You can use a simple piece of bark for the tray, but the scraping twig should be sturdy (as thick as your little finger). Next, make a chisel point on one end of the scraping twig using your knife.
With the chisel point, push the twig into the white resin mass and scrape it upwards to release the resin that holds on the trunk. Make sure your collecting tray is placed underneath the scraping twig to collect any excess that falls.
Tip: don’t use your knife to collect the resin as you will make a mess, and it will be troublesome to clean your knife. Another tip that I can give you is to store some resin (if you find enough of it) for later use. You can roll up the resin into a ball and store it in a leaf to avoid gluing stuff in your backpack.
Once you manage to collect a palmful of resin, you can cram a little of it into the cross split you made in the timber. To make a successful candle, you will have to use a layering system so once you place the resin, take some of the twigs you set aside and lay some on the resin. Add another layer of resin and add some twigs at a 90-degree angle. Add more resin, then at 90 degrees lay some more twigs and so on. The more resin you will use, the longer your candle will burn. My record is 63 minutes of burning time for such a candle.
Concluding
After reading this article, you should go out in the field when you get the chance and put this knowledge to the test. You have all the essential info to help you experiment with various natural materials to make your own candles and produce that needed light when exploring the great outdoors.
Making candles in the wilderness is an ancient skill that is worth learning, and you will soon see if you can outsmart our ancestors in creating light or if you are forced to stick to your camping lantern.


pictures would have been nice to follow this… maybe it is just me but I got lost in the directions!
Me too!
As Mr. Rodgers so aptly pointed out regarding the resin from coniferous trees (we’ve always called it pitch) it burns very nicely and readily and is also an absolutely astounding way to start a fire. Pitch or resin will burn whether wet or dry and will begin to burn with the use of one single match (provided the match is protected from being rained on). It doesn’t take much pitch or resin to get the fire started and self sustaining, so if you have extra collected for making a candle, you also have another use for it. A third use for pitch is for healing scratches and minor wounds. Clean the wound and use the pitch or resin as an antibacterial ointment. A thin layer is all that is required to do the job. A clean leaf, clean bandana or piece of cloth can be wrapped around the wound to keep the pitch in place.
A video of the resin candle would be great to see and easier to follow than the above instructions.