


When it comes to learning new survival skills, there are several things that many think of as sporting or hobby techniques as opposed to something that can save your life in a crisis.
For example, many think of rappelling as a hobby for people interested in the outdoors or mountain climbing instead of something that may be needed to escape an inner city skyscraper or some other area where great heights are involved.
Keep reading and you’ll see what you’re missing!
Before you begin learning how to rappel, it’s important to get good quality gear and know how to tie the basic knots used in this activity.
Remember, no matter where you are rappelling down from, you will be relying solely on your equipment and proper technique. If the equipment or your knots fail, the odds are you will die.
Mandatory Equipment You Need for Rappelling
Gloves
Having and wearing good quality leather climbing gloves is a good idea when rappelling. They will protect your hands from rope burns (especially if you are moving down the rope too fast) as well as from getting dirty from contact with the rope.
Ropes
Actually, this should be the first to mention. The next questions is, what kind of rope should you use? If you climbed a mountain to reach a point to rappel down from, you will more than likely use the same ropes that were used during your ascent.
Before rappelling with these ropes, check them over for signs of stretching, cuts, or other damage that occurred while climbing. I’s always helpful to keep a spare set of unused ropes that you can use for rappelling in case the first set is damaged. Use different colored ropes so that it is easier to figure out which one to pull on.
In the US the standard length of rope for rappelling is 200 feet long. If doing a long rappel two of these ropes must be used. These two ropes are joined together by one of four rappelling knots.
If you are doing a short rappel of under 100 feet, then double back the rope on itself to allow for the 100 foot rappel.
It is safer to use ropes with a 10mm to 11mm diameter. This diameter rope will give more friction when they feed through the rappelling device than smaller diameter ropes. Also, the thicker ropes are less likely to be burned or cut than the thinner ropes.
Safety note: Never tie a thick cord to a thinner one. There is a chance that the knot might work itself loose and create a situation where you will fall to your death.
Rappel anchors
For your safety, a minimum of two anchors are needed to rappel off a cliff. Some people consider three anchors a redundancy, however it never hurts to use one more just in case a problem occurs with the other two.
Anchors can be bolts, pitons, cams, trees, or tied off boulders.
Rappelling ropes
Are always threaded through metal anchor material such as screw quick links, steel descending rings, carabiner.
Never, under any circumstance, use nylon slings as an anchor. These slings can melt, break, or fail if they come into direct contact with the rope and the friction it produces as you are rappelling.
Rappelling device and locking carabiner
The choice of rappelling devices depends on the situation. To help cut down on your climbing weight, it is best to pick a rappelling device that could also be used as a belay device.
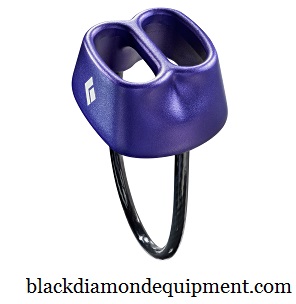 Black Diamond ATCs and Trango B-52s are excellent choices for rappelling devices.
Some climbers like to use the Figure-8 descender because it is easy to use and gives the individual a fast smooth ride down.
On the down side, the Figure-8 descender can put kinks in the rope and cause a twisted mess to uncoil that will have to be fixed before you can finish a safe rappel to the ground.
Safety note: Be sure you have a sturdy extra large auto locking carabiner to attach the rappelling device to your harness. A screw gate carabiner will work, but bear in mind it can unscrew and open under load causing serious safety issues.
Harness
Safety note: Always use a climbing harness when rappelling.
A harness forms a comfortable seat for rappelling. The harness is fitted around the waist and upper legs. It is very important that the waist belt fits tightly, has no cracks or worn spots, and has a belaying loop on the front.
If you don’t have a harness, you can make one from webbing.
Personal anchor tether
If you are going from rappel station to station or plan on multiple rappelings, you will need to immediately clip yourself into the anchors at the bottom of each rappel.
If you have already rigged a personal anchor tether on your harness, then it is possible to clip into them as soon as you reach them. Now that you are safe, you can unhitch from the rappelling device and ropes to let the next person rappel down to join you.
Important Rappelling Knots
The autoblock knot
When rappelling, safety must always be your first consideration. As a safety back up, always use an autoblock knot.
This knot is tied below the rappelling device and will prevent you from sliding all the way down the rope if you happen to let your hands go from the rope, you lose control of the speed of descent, or you need to stop traveling downward.
If you stop, this particular knot will tighten automatically and prevent you from rappelling further.
The autoblock knot works well for rappelling because you can loose it and tighten it easily as you move down the rope. It will lock and release while under a load and remain safe. This is also one of the easiest friction knots to tie and remember how to use.
Video first seen on REI.
You are always in control when using an autoblock knot. It allows you to stop and hang to do the following without endangering yourself:
- Clear rope snags.
- Toss a rope farther down a cliff.
- Free twists and knots from the rope.
- Keeps you from losing control on free or overhanging rappels where you can’t touch the rock.
- Stops you if you get hit by falling rocks.
- Prevent you from falling if you feel sick, or something else causes you to need to stop unexpectedly.
Safety note: If you need to stop make sure you let go of the knot. Beginners have died because they gripped the knot, which can cause it to slips and fall apart. Remember to let go and let the knot do its job and lock.
How to keep the autoblock knot from jamming
To keep the autoblock knot from jamming, make sure the cord or sling that forms the autoblock isn’t too long. If it is too long, then the knot can jam in the rappelling device when you stop.
To avoid problems make sure the sling is short enough before rappelling. If it’s too long, tie a knot in the end of the sling to shorten it, or extend the rappelling device from the harness by attaching it to a sling.
Safety note: Always get in the habit of using an autoblock knot whenever you are rappelling.
Stopper Knot
For safety sake always use a stopper knot on the ends of both rope ends to keep you from rappelling off the rappelling ropes.
Video first seen on Gearaholic.
The actual knot configuration is a matter of personal choice. An overhand or a figure eight knot will do well, and is preferred by many rappellers.
4 Important Knot Configurations
The following four knots are the most commonly used and are the best knots for tying your rappelling ropes together. All of these knots are good strong knots.
To work right, however, these knots must be tied right. Your life depends on it. Take the time to practice these knots until you can tie them in the dark, without looking at them, even if you are very tired and exhausted. The more you practice tying these knots, the better chance you will have of tying them correctly in time of need.
The knot you use to tie your rappelling ropes together is a personal choice. It is to your advantage to pick one knot and use it every time you rappel.
Whichever knot you choose, you must be very familiar with it. You must know how to tie it, untie it, and know how much tail to leave at each end to tie the backup knots.
Safety note: All of the 4 rappelling knots except the double overhand knot must have a fisherman’s knot tied on either side for safety.
1. Double overhand knot
This is the fastest and easiest knot to tie of the four rappelling knots. It has less bulk which makes it less likely to snag or get stuck on the surface you are descending.
Safety note: Warning do not use on ropes of different diameters because the knot can untie with very little tension.
2. Double figure 8 fisherman’s knot
This is the usual way to tie rappelling ropes together. It is the strongest of the four, and if tied correctly, will not come undone. It is easy to visually check, and can be used to tie ropes together of unequal diameters.
It is also fairly easy to untie when weighted. On the downside, this knot is quite bulky and can get caught in cracks or other features of the surface you are rappelling down from.
3. Square fisherman’s knot
Of the four rappelling knots this not is the easiest to tie and untie. This knot is just a square knot backed up with double fisherman’s knots on either side.
Safety note: When using this knot always use the back up knots. It is possible for this knot to come untied without them.
4. Double fisherman’s knot
This was the traditional knot to tie two different diameter size ropes together before other knots became more popular.
This knot is hard to visually check, and very hard to untie when wet or being weighted. Today it is used more to tie thinner pieces of accessory cords together.
Even though rappelling equipment isn’t especially complicated, it is still very important to choose good quality gear. When you aren’t using the ropes and other equipment, make sure that it is stored in a clean, dry place.
Do not forget to examine your ropes often and always make sure they are in good condition. No matter whether you are rappelling from a skyscraper or a mountain cliff, it will do no good if the rope has been rotting for several years before you actually need it.
As with many other aspects of prepping, maintenance of your rappelling gear is every bit as important as knowing how to use it. And remember that skills and training are much more important than any gear you might have, becausethey are making the difference between a victim and a survivor!
This article has been written by Fred Tyrell for Survivopedia.


Comments 1