
Who doesn’t love jams, jellies, pickled beets and other sweet goodies, especially if they’re homemade? As homesteaders and preppers, we’re all about storing our own foods.
Different types of foods require different techniques. Home canning sweet foods is no different.
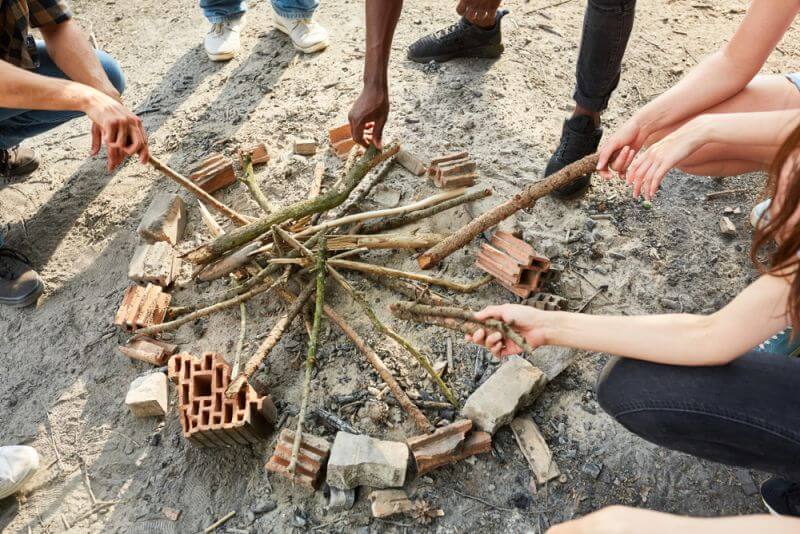
The thing about sweet foods is that they’re likely acidic. Nearly all fruits are high in acid, which makes them easy to can, even over an open fire. You don’t have to use a pressurized canner like you would with meats or low-acid vegetables, but you do need to take some extra precautions because mold and bad bacteria like sweet stuff.
Since you may want to can sweet foods in different forms (whole, jellied, etc.) we thought it might be a good idea to touch on some of the special needs of these particular foods.
The most important key to successfully canning anything is to hygiene. All utensils and jars have to be thoroughly cleaned and as sterile as possible so that your products don’t go bad. With fruits, you always want to use a ripe product, with no bruising.
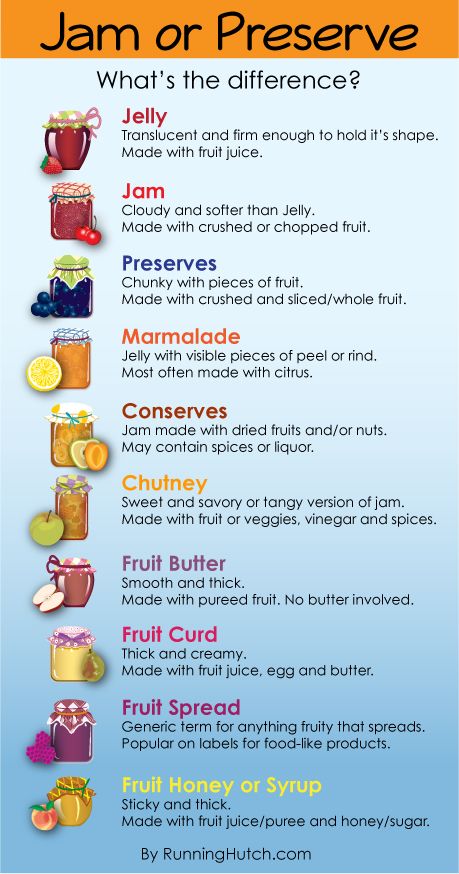
Canning Jellies and Jams
There are two primary concerns when you’re canning jellies and jams: getting them to seal, and getting them to thicken. The sealing part is an easy fix, though if you’re a first-time canner, you want to be extra careful so that you don’t ruin all of your hard work just to find that you didn’t get a good seal.
Getting Canned Jams and Jellies to Seal
The first key is to use good quality jars that have no chips or cracks on the rim, or on any other part of the jar for that matter. You can check this off by visually inspecting the jars.
The second reason that your jars may not seal is because you didn’t get all of the juice off of the rims of the jars before you put the seals on. This is a bit harder to fix, but you just need to be thorough.
Use a clean damp towel to wipe each rim well. I usually do this twice, with two different towels, to make sure that I get them clean, then I follow up with a dry towel. My mom, whose been canning for upwards of 50 years now, calls it overkill, but after one time of re-canning an entire batch of jam so that it wouldn’t go bad, I’d rather take the extra steps.
Finally, to make sure that you get a good seal, heat your seals in warm water, if you’re using the standard kind. This makes the seal a bit gummy so that it adheres and seals to the jar better. Make sure that the water that you heat them in is clean.
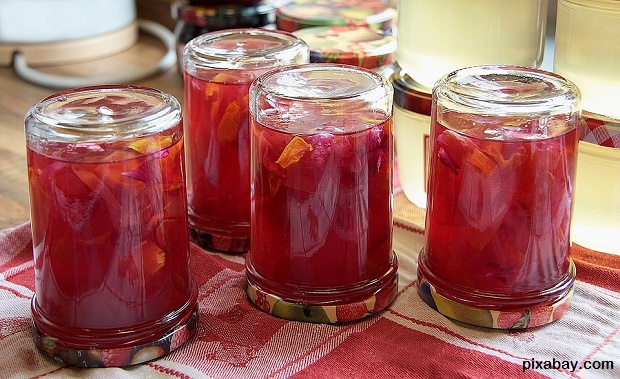
Note: Completely off topic, sort of, but I recently discovered how to make rose jelly, which is absolutely delicious as well as beautiful. I didn’t even know that roses were edible until I stumbled upon the information via a friend.
How to Make Jams and Jellies Thicken Properly
This is another stumbling block for many new home canners. Nothing is more disappointing than to open up a beautifully sealed jar of jelly to find that it’s more juice. You can also go the other direction and cook it too long so that it’s more like taffy. There are two components to thickening: sugar thickens it and pectin gels it. Getting your jams and jellies just right is easy as long as you use the right amounts of sugar and pectin and you pay attention.
- Pectin is a natural fiber found in fruits and vegetables that give the cell walls structure. Some fruits, such as blueberries, cranberries, and apples have enough pectin in them that you don’t need to add extra. Low-pectin fruits such as strawberries and pears either need to be canned with high-pectin fruit or have pectin added to them so that they gel.
- Use the spoon method to tell when your jams and jellies are done. While you’re cooking your jellies, do the spoon test. If your sauce runs off of your spoon easily, it’s not done. If it drips slowly off and forms a drip off of the bottom of the spoon that drips off slowly, it’s either done, or super close to being done.
- Use the freezer method. This isn’t one of my favorite methods because if your jelly is done, you’ve overcooked it by the time the test is done, but here’s how to do it. When you put your fruit on to cook, put a couple of saucers in the freezer.
When you think that it’s almost done, pull the plate from the freezer and put a blop of jelly on the plate. Stick it back in the freezer for a couple of minutes and if it’s jelly consistency, it’s done. Cut the heat on your jelly while you’re waiting.
- Use a candy thermometer. This is my preferred method because it keeps me from overcooking my jams. Sugar is able to bind with pectin, both naturally present and added, at 220 degrees F. Use this in conjunction with the spoon method and you’re much more likely to end up with a good consistency.
- Don’t freak out if your jelly isn’t firm as soon as it comes out of the canner. It can take a few days for it to set properly.
- Don’t go the other direction and cook it too much either, remember, sugar is the main ingredient in candy and the last thing you want is strawberry candy instead of strawberry jam!
Canning Whole Sweet Foods
Jams and jellies are only the tip of the iceberg when it comes to home canning sweet foods. What if you want to preserve those beautiful peaches and pears so that you can eat them or bake with them throughout the year? Again, it’s a lot of hard work but the process isn’t difficult.
Tip: Stone fruits are much easier to peel if you blanch them first. That just means dipping them in boiling water for a few seconds. Peaches, apricots, nectarines and plums that are blanched will slip right out of their skins, saving you time and waste.
There are a couple of different ways to can fresh fruit. You can hot pack them, or raw pack them. Which method you choose depends largely on the type of fruit and what you want to use it for. Usually, it’s just a matter of personal preference.
Raw packing is easier, but your fruit may turn brown because there’s a greater chance of air. Just peel them, remove the seed, and slice them (or halve them), then stuff them in the jar and add sugar water. Some people sprinkle sugar over them as they layer them in the jars, then just add hot water. It’s a matter of what you prefer to do.
Hot packing is more work but may end up with a fresher tasting, prettier product. Cooking the foods for a few minutes releases the air from the fibers of the fruit, shrinks the fruit, and helps with the seal.
If you want to make apple pie filling, you’ll want to hot pack them because you want to cook the apples so that the syrup thickens and the spices soak in. This means that you cook the apple pie mixture, then put it in the jars hot.
Here are some tips to help you successfully can whole fruits:
- If you’re packing the fruit in syrup, make sure that it’s a light or medium syrup because when canned in heavy syrups, the fruit will float to the top. This will also happen if the jars aren’t packed tightly enough.
- Another problem that you may encounter when raw packing is trapped air. We all know that air is not a good thing when canning. As a matter of fact, it contributes to several different situations in canned foods that can kill you. To help avoid this, slide a spatula or spoon down the insides of the jars to release any air pockets.
- As your fruit processes, the syrup is going to expand, so you need to leave a half-inch or so of headspace to allow for that.
- On the other hand, your syrup may cook down so that there’s not enough in the jar to cover the fruit. To combat this, make sure that you get as much air as possible out of the jar before sealing, and keep the jars covered with water while processing.
I hope that you’ve learned a bit about canning sweet foods that are delicious, nutritious, and beautiful. If you have anything to add, please feel free to do so in the comments section below.
And click on the banner below for more old tips on food preserving for survival!

This article has been written by Theresa Crouse for Survivopedia.


Pingback:50 Things To Stockpile On A Budget This Fall | Survivopedia | October 3, 2016
|
Pingback:Senior Preparedness: What Types Of Food To Store? | Survivopedia | November 2, 2016
|
Pingback:Survival Food: 5 Hearty Soups In A Jar Recipes | Survivopedia | January 25, 2017
|
Pingback:5 Classic American Recipes We Love | Survivopedia | July 18, 2017
|
Pingback:Urban Prepping: How To Plan Your Fall Canning | Survivopedia | September 5, 2017
|
Pingback:How To Wax Food For Long-Term Storage | Survivopedia | December 18, 2017
|
Pingback:When Canning Goes Bad: 9 Common Mistakes To Avoid | Survivopedia | February 12, 2018
|