


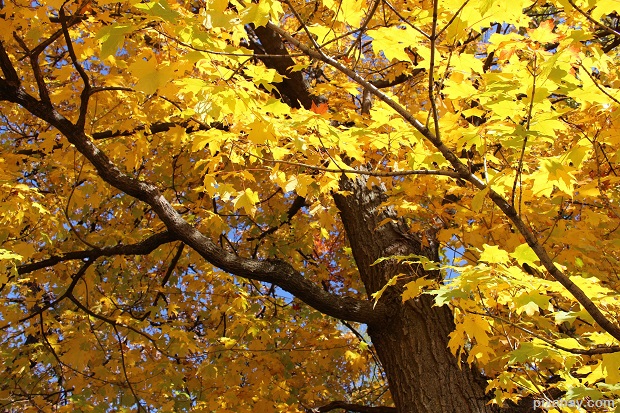
Maple syrup is delicious, mineral-rich and natural. It’s easy enough to make as long as you live near maple or birch trees and it stores extremely well – for years if you store it properly. It will also be an excellent barter item because not many people will have the tools or the knowledge necessary to make it.
Even if you never need it for survival, fresh maple syrup is a delicious delight to have around to use on pancakes, waffles or in recipes. Today, you’re going to learn how to make maple syrup from start to finish.
The first step in making maple syrup is to draw the sap from the trees. This process is pretty simple if you’re just doing it to make a few batches of syrup; if you want to go industrial, the process can get complicated but only because it involves a long series of pipes that run from each tap on each tree and run the sap downhill to a processing plant.
Old Days. Old Ways. But The Food Never Tasted Better.
If you’d like to learn about how to extract the sap from a tree, check out this article that I wrote on the topic. You’ll learn what types of trees give the best sap, how to tap them, and how to collect the sap.
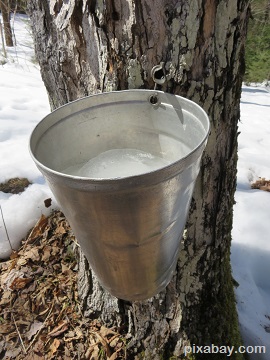
To recap the process for this article, you basically drill a hole in the tree and put in a tap that catches the sap that’s running in the tree and drips it out into a bucket. You can get around 3 gallons of sap per tap every day. That’s a good thing because you’ll need a lot of sap to make a little bit of syrup.
The Making Of
Now, let’s get to the actual process of making maple syrup!
 If you followed the directions in my article, your sap is stored in food-grade containers – most likely 5 gallon buckets. It should be stored at 38 degrees F or colder. This probably won’t be a problem because you’re collecting the sap in late winter/early spring and it will still be cold. There may even still be snow on the ground. Sap should be used within seven days of collection.
Just as a side-note, there are many cultures that believe that drinking raw maple sap has a wide variety of health benefits. Though it’s been done for centuries, it’s now recommended that you boil your sap before drinking it to kill any bacteria that may be in it.
Anyway, back to the topic at hand: making maple syrup.
You’re going to need 10 gallons of sap to make 1 gallon of syrup. If you’re going to make more than just a very small batch, it’s best to make the syrup outside. The reason behind this is that you’re going to be cooking off about 9 gallons of water per 10 gallons of sap and it creates a LOT of steam.
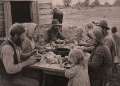
I came from the Appalachian mountains and we had a ton of maple trees; every spring several different families would get together and make huge batches of maple syrup; we even had a maple syrup festival a few towns over from where I grew up.
The sap would be poured into big copper kettles that held gallons. The kettles were suspended over a fire and long wooden paddles were used to stir it. This process is basically the same one that you’ll be following, but on a much smaller scale (maybe!).
Start by digging a pit and lining it with bricks. Dig the pit 3-4 feet deep because you’re going to use a lot of wood to do this and the ash will build up. Plus, you don’t want the sap too close to the fire or it will burn because of the high levels of sugar in it.
Once you have your pit dug, place a metal grate over it to set your pot on. A large stock pot or lobster pot works wonderfully. If you want to make more than one batch at a time, just build a larger pit and have more pots.
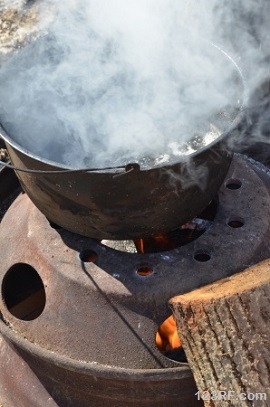 Don’t fill the pots much more than half-way full because the sap will foam as it boils. If your pot starts to overflow, rub a bit of butter or vegetable oil around the rim of your pot. That will help. As the sap reduces, keep adding more sap but try to maintain the boil.
You’ll reach a point where your sap turns a golden color but is still pretty liquidy. At this point, transfer it to a smaller pot and you can finish the process up inside the house. Because the syrup is still going to be foaming, follow the procedure from above and don’t fill your pot more than half-way full to keep it from boiling over.
Keep boiling the syrup, stirring frequently to keep it from burning. When it reaches the point where it sticks to a spoon when you stick it in, your syrup is done. If you want to be a bit more technical, you can use a candy thermometer and stop boiling it when the temperature of your syrup reaches 7 degrees F above the boiling point of water.
This may seem odd, but if you think about it, it’s logical. You want to boil MOST of the water out, so as you boil it, the amount of water will decrease and the temperature required for boiling will increase. There’s your science lesson for the day.
Since the boiling point of water is different at different elevations, look up what the boiling point of your elevation is. As a starting point, water boils at sea level at 212 degrees F. Mount Everest is about 29,000 feet above sea level and the boiling point of water is 71 degrees F. As you can see, this is a pretty big deal if you’re being technical about when your syrup is done.
Next, it’s time to filter your syrup. There’s a good chance that there may be debris from the tapping and outdoor cooking processes and you don’t want to pour that over your pancakes. Strain it through a food-grade filter.
If you only made a little bit, you can use a coffee filter and just squeeze it through. If you made a large quantity, you can use a wool or orlon filter. If you don’t have either of these, you can simply let the syrup sit in the refrigerator overnight and let the sediment settle to the bottom, then pour off the clean syrup.
If you’re going to use the syrup right away, pour it into a container and put it in the fridge. If you made a larger batch, can it. It will be an awesome resource for your survival stash!

This article has been written by Theresa Crouse for Survivopedia.


WHERE’S THE RECIPE FOR GRANOLA BARS MADE WITH MAPLE SYRUP–COULDN’T FIND IT?? THANX! LINDA
Here is the recipe, Linda: http://www.survivopedia.com/7-basic-survival-foods-for-vegetarians/