We use cellars because they maintain a more constant temperature than structures that are built above-ground. We use greenhouses to extend the growing season because they hold in heat. Well what if you combined a greenhouse and a cellar? You’d have a greenhouse that would allow you to grow plants year-round.
This type of greenhouse is called a geothermal, pit or, Walipini greenhouse, and is common in South America. ‘Walipini’ means ‘place of warmth’ in Aymara Indian, and it’s an apt name.
Basically, the idea is that once you get below the frost line (3-5 feet below the surface, the Earth maintains a fairly constant temperature. In the US, that temperature is typically around 45-50 degrees in the northern states and 50-70 in the south. That range makes for perfect plant-growing temperatures, especially when you add a covering to one side that sun can shine through and warm it up a bit.
You’re harnessing the existing geothermal heat by digging 6-8 feet underground and capturing and storing solar radiation in order to create a near-ideal growing climate that’s resistant to surface-level temperature changes.
Benefits of a Walipini Greenhouse
There’s the most obvious benefit – you extend your growing season, or even make it so that you can grow food year-round.
Another reason that this type of greenhouse may appeal to preppers is that, depending on how you build it, it’s not obvious what’s in it so your food will be better hidden.
I’ve even seen articles about Walipinis that are built in such a way that they are a self-sustaining unit containing animals, aquaculture, and hydroponic plants. That’s a bit complicated and beyond the scope of what we’re doing today, but it can be done.
If you live in a dry climate, another advantage is that your Walipini is going to hold moisture from the ground in. You can help this along by using water along the wall to help pull the heat from the earth. That way, you’re making the air warmer and moister. Plants will love you. Actually, take condensation into consideration when you’re building.
The final advantage that a Walipini or pit greenhouse has is that you can build the whole thing for just a few hundred bucks. Less if you already have the materials.
Learn from our ancestors the old lessons of growing your own food.
How to Situate your Walipini Greenhouse
The first thing you need to do before you start gathering materials is determine where you’re going to build. You need to know a couple of things when you make this decision:
- your local water table
- how large you want your greenhouse to be. The larger it is, the more stable the temperature will be.
Ideally, a Walipini greenhouse is built by digging into the ground so that 3 sides and the floor are underground, and the exposed side, which is covered with windows or plastic, is built facing the winter sun – south in the northern hemisphere – and at a 90-degree angle to the sun. Think digging into a hillside, then covering the hole with plastic, which is actually a pretty good description.
Of course, what’s ideal isn’t always realistic. We don’t all live in places that even have hills to dig into. You can also dig them so that they’re just a pit and the sun is directly overhead. Of course, you’ll see that you can use the dirt that you remove from the pit to build up the rear side of the pit both for better insulation and to give you that angle for your plastic that will both help with rain run-off and position your light better.
The important things are that you dig beyond the frost-line, provide good insulation that will pull the heat in, and make sure that you don’t dig below the water line. Obviously, that would be bad. You need to make sure that the floor will be at least 4 feet above the water line.
Now, if you live in an area where the water table is measured in inches instead of feet, (many coastal areas) that doesn’t mean that you can’t build this – it just means that you need to be a bit more creative and that most of your structure will be above ground and you’ll pile dirt around it.
Video first seen on Ben Green.
What do you Need to Build a Walipini Greenhouse?
At its most basic, all that’s needed is (maybe) wooden support beams (2x4s or poles), greenhouse plastic or windows, and insulating materials – natural soil may be used for the walls if it’s structurally sound enough to hold up – such as clay or mud bricks, clay, straw bales, earth bags, concrete, cinderblocks, or stone. Of course, you’ll need nails or screws for the support beams, and a door and door frame.
https://www.youtube.com/watch?v=YBCSo_0–4o
Video first seen on elicia clegg.
Digging out your Walipini
When you start to dig, save the topsoil to use as the soil in the floor of your Walipini because the sub-soil won’t be good for growing. You can use the remaining dirt that you remove to build up the back berm of the structure so that you have better insulation and a higher back wall.
Many people dig a drainage ditch around the Walipini to help the water flow around the greenhouse instead of into it.
Dig down at least 6 feet (8 or 10 feet is even better) as long as you’re maintaining your distance from the water line. If you’re building into a hillside, you’re literally going to scoop a section out of the hill so that the back wall is vertical and the floor is horizontal.
If you’re building a pit, pile the soil that you’re removing so that it creates a berm behind and on the north side of the hole.
Remember when you’re digging that you’re going to be insulating the walls and floor so you’ll be adding at least a foot or so back to what you’re digging out. Account for that when you’re designing it.
There are so many different ways to design your Walipini based on your needs and geography that telling you where to put the door wouldn’t be of much help; just remember not to build one into your plans when you’re designing the Walipini.
Once you have your whole dug, reinforce your north, east, and west walls with whatever you chose as your insulator. Natural stone and brick are both great choices because they naturally pull the heat (and moisture) from the ground and into the greenhouse. Some people choose to line the floors with stones and some don’t.
Now, you have to decide if you’re going to plant directly into the floor or are you going to treat this as a standard greenhouse and use containers? I also saw a few great examples of container garden-type methods.
If you’re planting straight onto the floor, it’s a good idea to put a layer of gravel 6 or 8 inches deep under the soil to help with drainage and to pull more heat up from the ground. You can use compost or manure under the topsoil because it naturally generates heat as it decomposes and will help warm things up.
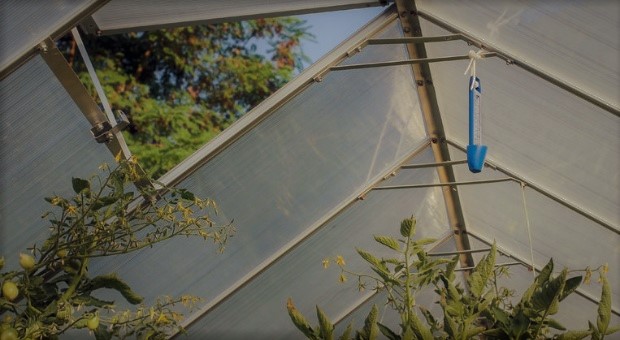
After you get your walls built, it’s time to cover the pit. I’ve seen several examples where people built a vent into the roof in order to let some of the heat escape. This may sound silly, but the inside of a Walipini can be as high as 100 degrees even in its below freezing outside – that’s no exaggeration.
So, either build in a vent or be prepared to leave the door open or cracked for part of the day in case it does get too hot.
The roof (cover) doesn’t have to be fancy. It can be clear plastic stapled over a wooden frame with braces every few feet.
There you have it – the basics on how to build a Walipini greenhouse. It’s a simple yet effective method to help grow plants during the winter or even in climates that aren’t typically conducive to gardening at all.
Click the banner below to discover the long forgotten secrets that helped our forefathers survive during harsh times!
Do you have a Walipini or pit greenhouse? If so, please share your ideas and experiences with us in the comments section below. Also, feel free to ask questions.
This article has been written by Theresa Crouse for Survivopedia.



























Can anyone tell me how to grow tomatoes in south FLORIDA ?
Well, you lost me when saying it would be “safe from looters” – it’s clearly visible with the plastic covering bc from necessity it has to be sun-accessible. Other than that, the warmth for growing nearly everything is great including citrus fruit! I’d been thinking about this very subject (without knowledge of Walipini greenhouses) how to grow below ground, like a basement, and wondered if grow lights, etc. would be enough for veggies and fruits. Before legalization…. a Lot of Pot was grown “indoors.” Do you think grow lights or even just tube lights would be enough?
Thanks!
Very few of these tips will work smack dab on the canadian border in north dakota where I live. The frost line is 6.5 feet, and the water level is above that.
I am in the beginning stages of building a walapini (sunken greenhouse) and it scares me to death. I had a 6′ deep hole dug x 10′ x 20′ and one moment I feel confident I can build this then the next I am wondering what the heck did I start here.
I figured I’d build a retainer wall around all sides in the pit then put a greenhouse (from kit) on top and anchor it to the retainer wall somehow then add rain gutters so water can be collected for the wintertime because I live in a cold snowy location and dragging a hose is not going to happen.
I feel foolish for jumping the gun without thoroughly thinking this through.
We are going to build a walipini about 6’ deep with cement walls poured. The structure above will be about 5’ H with polycarbonate panels. Sun should be coming in at all angles. Greenhouse will be 12X 16. Will the polycarbonate walls be able to provide enough sunlight to the floor 6’ below? Or will I end up with a lot of shade from side walls? 5’ might give us a better chance of the sun hitting all the way around, but we would lose the heat in the winter. Does anyone have experience with this?