Building techniques have developed considerably over the last couple hundred years. But in the case of a national emergency, and without access to all the technologies we’ve developed in recent years, how many people would be able to build a shelter in the same way our pioneers did?
When they first arrived in America, pioneers carried bare essentials and had minimal tools to hand. They are likely to have packed very similarly to the way most preppers pack their bug out bags – only with what is fundamental for survival.
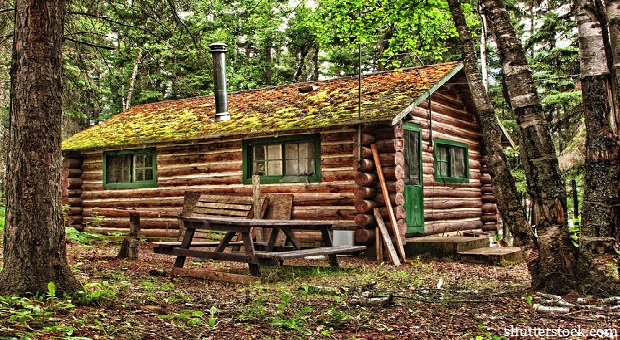
The earliest log cabins were built in the mid-1600’s in present day Delaware, by Swedish and Finnish settlers. They had already developed their skills through years of practice in their own countries, and they were greatly refined by the time they brought their log cabin building techniques to the US.
But how exactly did they build these simple, yet durable structures? As Preppers, it would be beneficial to learn how to build a cabin like the pioneers did. After all, if you find yourself living out of the forest, what better material to use to build a shelter, than trees.
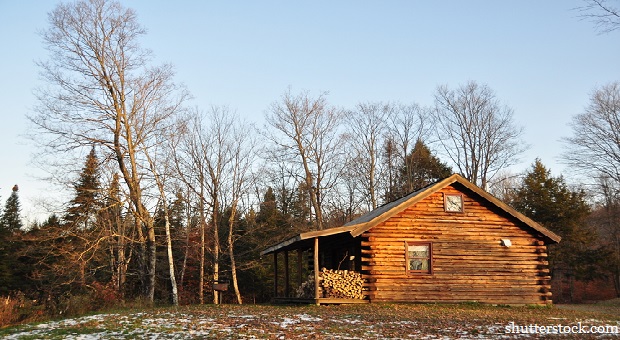
Most of the pioneer constructions would have consisted of a small one roomed cabin; around 16 feet square. You might decide to choose another size or design for your log cabin, but for the purpose of this article, let’s follow the same size build.
A log cabin build can be split into 5 steps; log selection, site preparation and foundations, walls, windows and doors, and roof. Pioneers would have had very basic tools such as an axe and a saw, so we’ll stick to only using those tools throughout this tutorial.
Log Selection
When the pioneers first built log cabins, they had the luxury of being able to cherry pick the best logs for their home. These old growth trees would have been straight, tall and wide in diameter, and would therefore have fit almost perfectly together, without the need for much chinking.
It’s likely that your area won’t have many old growth forests around, so your best option is to find straight, long trees that are around 10-12 inches in diameter. The species of tree you choose will depend on what is most widely available in the area you decide to build.
To build a 16 x 16 foot log cabin that is around 9ft high, you’ll need roughly 10 x 18 foot logs, for each of the four walls. You’ll also need an additional 10 logs of shortening lengths to create two gable walls. For the purpose of these instructions, we’ll use cedar trees. Cedar trees grow on average to 50ft, so you’ll need to fell approximately 15 trees.
The most effective way to fell trees is to make a cut in the direction the tree is leaning, just above knee height. Then make an upwards cut to take a wedge shape out of the tree. On the opposite side, just above your wedge cut; make another cut until the tree falls.
Once you’ve cut all your trees, you’ll need to debark them while they’re fresh. To do this, place your axe at 30 degrees to the bark, and chip away until you’ve taken all the bark off. Ideally you’d now let the logs dry out for a few months, so depending on how quickly you need your cabin, you may or may not do this.
Site Preparation and Foundations
To prepare the site, pioneers would likely have cleared the site from any trees, stumps, large pieces of rocks, debris, leaves and grass, and raked the ground over. There would have been no need for the heavy duty foundations we see in today’s log cabins, because the ground usually doubled as the earth floor of their cabin.
At this point, it would have been vital for the person building the log cabin, to think about which way to orient the cabin to make the most of the sun’s energy, and heat the cabin. This is something you’ll also want to take into consideration because it’s likely that if you’re building a similar shelter you won’t have access to grid power.
Even though the settlers’ cabins didn’t have sturdy foundations like the ones you’ll see today, they did use some form of foundation. Typically, four large flat stones would have been placed in each corner for the logs to lie on top of.
To place these stones, you’ll need to lay four of your logs on the ground, and see where they cross to put the stones in position. The bigger, and the flatter the stones the better, they’ll also need to be of similar height. You might also want to place some stones across the length of each log to provide extra support.
Walls
In today’s log cabins we have a wide range of log profiles (i.e. species and log shapes) and corner joins (i.e notches). When the pioneers settled, they normally used two types of notches. They would usually build a temporary home using round logs that they would saddle notch to join.
They would then live in this simple home whilst they built a more permanent home from square hewn logs which they would join with a more complex dovetail notch.
For the purpose of these instructions, we’ll opt for the simpler join – the saddle notch. The dovetail notch requires a lot of carpentry experience and is not ideal if you’re a novice, looking to put up a quick and simple shelter.
The first step in raising the log walls, is to choose four of your widest and straightest logs to act as your base. These are called your sill logs and they will sit directly onto your stone foundations, in a square shape. To notch each log, use your axe to remove a U-shaped chunk from the underside at either end of the log. This will allow the logs to join, and sit perfectly on top of the log below.
Once you have your basic sill logs in place, you can continue to notch each log and build the walls up until you have reached the desired height of your cabin (minus the roof).
Windows and Doors
Glass was not a common resource when the pioneers built the first cabins, and so usually there weren’t any windows in the building. If there were, they were typically made from animal skins. Alternatively, some of the early cabin windows were made from paper greased with animal fat which made them both waterproof and translucent.
To create any door or window openings, when you reach the height that you’d like the opening at, take your saw (or axe if that’s all you have) and create a vertical cut for as far down as needed. For example, if you’re creating an opening for the door, start making the cut around 6 ½ foot, and make a vertical cut all the way to the floor, and then make a parallel cut 3ft across.
The door will have been made from boards that will have been split from large diameter trees. It’s important to keep openings to a minimum – the less you have, the less you’ll have to worry about heating your cabin.
Roof
The most common way for pioneers to roof their log cabin was to use the purlin and rafter technique. This involves building two gable walls (i.e triangular shaped walls) that form the basis for supporting the roof.
To build the roof, you should build the gable walls, using logs that decrease in length, until you are half way up. Then, using the same notching technique you used on the wall, notch two logs which will join the two gable walls. Continue building the gable walls until you reach the peak, and then join the two walls with one last ridge log.
The pioneers actually used a very advanced and long-lasting method to roof their cabins. They would split logs to use as roof rafters and then create individual wood shingles which they would use to finish the house.
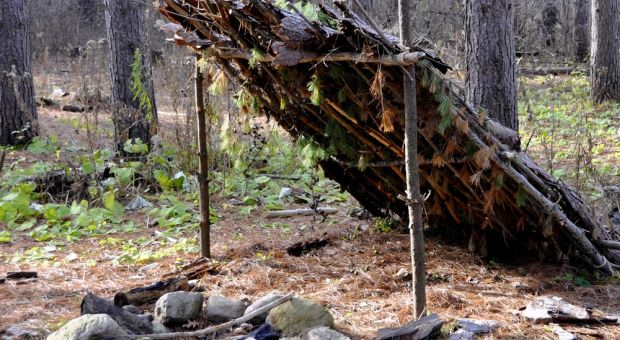
A much easier method would be to use smaller logs to create roof rafters, to which you would then lay branches, sticks, mud and leaves.
Finishing the Cabin
Most of the pioneers’ cabins will have been built with a stone or brick fireplace at one end. This provided a quick and easy way to heat the cabin which is essential in cold climates; it also provided them with a way to cook the food.
If you want to incorporate a fire place into your cabin, you’ll need to leave a gap in your roof that you can lead a wattle fireplace chute out of.
The last thing you’ll need to do to finish your cabin, is seal all the gaps between the logs. This is known today as ‘chinking’, and whilst we’ve developed many flexible and durable solutions to use on today’s age cabins, if you’re building a cabin in the same way as the pioneers did, using only the natural and basic materials to hand, you’ll need to make your own.
Larger gaps would have been filled with sticks or small rocks, and then sealed with a mix of clay (or dirt), water, straw and ashes. This would prevent any drafts from entering the cabin and keep all the heat inside.
Your Very Own Pioneer Log Cabin
You might have expected a pioneer log cabin to be basic and simple in terms of construction. Of course, compared to the milled logs that are used today to build 2,000 square foot cabins, these early cabins might not look as grand and glamourous, however they were built by masters of the trade and are not as easy as they look to replicate.
To build your own log cabin may be necessary if we ever find ourselves in a position of losing our homes due to a natural disaster, however you will most likely want to simplify the process as much as possible, and build a small yet strong structure such as the example we followed in this article.


R | February 22, 2018
|
Some early settlers also used the butt-and-pass type of joints for the corners of their cabins.
red | February 22, 2018
|
Where do you find good logs, these days? Mud and daub/Tudor is better. Frame with longs, making a lot of cross members, and weave branches in between the framing, then plaster with straw, clay, and even mixed manure. Where we are, it’s adobe and rock over these.
Bill in Idaho | February 23, 2018
|
Some well written stuff here . . . FIVE steps/ stages are crucial : 1.) Cut ALL of your Logs as near the Same Diameter as possible – at least for the “Wall” Logs. (Your Sill Logs can be somewhat larger.) 2.) Cut ONLY Semi-Circular Notches – other methods are too hard to get correct spacing, and Take up Way Too Much Time! 3.) If your Corners (CTC Spacing) are to be 16′ in length, you will need 18′ Long Logs. 4.) Make your Notches (Cylindrical Shape – EXACTLY 16′ CTC at the Center), as clean and True as Possible – to match the Next Log Dia. – the One just above (on top of this one). 5.) Alternate the large end of EACH LOG to be L-R-L-R- and so on (ALL Logs taper some). This from someone who has been there, Done That. Bill.
AgWeb | March 1, 2018
|
swac, I will say this: Gable, Hattie McDaniel, Frank Morgan, Una Merkel, Cliff Edwards, and Barrymore are all worth seeing. Walter Pidgeon is Walter Pidgeon, take that however you want. And Margaret Hamilton has an unbilled cameo and she”s great.
Clergylady | March 3, 2018
|
Homes here were either flat stone set with mud or Adobe. Roof was tree trunks with sticks CHEVRON style FILLIng in. then mud OR real clay if found. Roof edges had a stone edge with water CHANNELS draining the almost flat roof. A fireplace was originally fashioned into the WALL with a floor level opening and shaped chimney in the wall structure. It was Carried on higher than the roof by another few feet. The floor was mud smoothed and dried. Some added blood from hunts to the mud floor to make it last better. Water was stone depressions used as cisterns. Later fired pots. AN oven was built outdoors with either LAVa or volcanic sand in the base to hold heat and a mud dome. It was heated by building a fire inside the clean in it and putting the food inside and closing up the opening to retain heat.
FarahHammett | June 7, 2018
|
I enjoy what you guys are up too. This kind of clever work and exposure!
Keep up the awesome works guys I’ve added you guys to my blogroll.
jschuurmans | June 7, 2018
|
There’s definately a great deal to learn about this topic.
I like all the points you have made.