


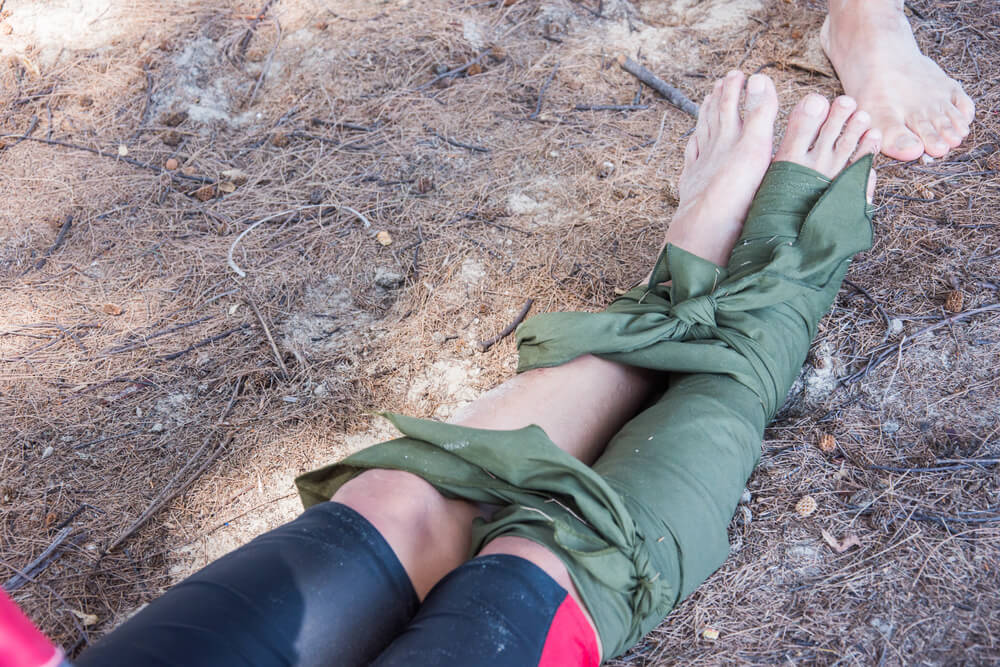
A lot of accidents happen in the wild, and many hikers end up with broken legs or arms.
I believe it is crucial to learn how to take care of yourself when exploring the great outdoors. When there is no doctor around, you should be able to patch yourself up in order to be able and reach the nearest sign of civilization.
In this article, we will give provide you with an introduction to splinting techniques and materials that should be used. This knowledge will be useful when you are forced to deal with fractures of the arms or legs.

The reason for splinting a fracture (or a suspected fracture) is for immobilization. The movement of a fractured bone is very painful. Proper splinting can relieve some of that pain, but most importantly, it will reduce the chance of further injury.
Deciding to splint or not
Before you decide that a splint is necessary, there are two questions that you need to answer.
- How do you recognize a broken bone?
- When do you apply the splint?
It is important to understand that fractures vary in appearance and is not just like in the movies when you see the bone puncturing flesh.
First of all, you should talk to the victim since the information they will provide will help you decide what needs to be done next. Second, you should note the certain signs and symptoms of fractures that can be applied to almost any case, even if the victim is unconscious.
Here are the things you can do to establish if you are dealing with a fracture or not:
- Look for obvious angulation or abnormality.
- In certain cases, the victim may have heard the bone break.
- In an open (compound) fracture, you can sometimes see the bone ends.
- Swelling or discoloration may occur in the affected area.
- You or the victim may feel the bone ends grating inside the skin.
Being on the safe side of splinting
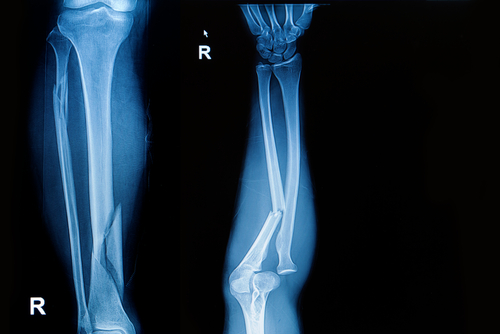
In general, you cannot have a definitive diagnosis of a fracture without an X-ray machine, and only experienced first-aid workers don’t need such a machine. However, in a survival situation, when no doctors and X-ray machines are available, it’s always a safe bet to apply a splint to a suspected fracture.
Do not attempt to set a fractured bone since this requires proper expertise. Even more, fractures can be set up several days later without major problems. If you don’t know what you are doing, there’s no need to risk potential nerve and blood vessel damage, and in some cases, the patient’s life.
General rules of splinting
1. Avoid moving the victim (unless it is absolutely necessary) until you have splinted the fracture(s).
2. Make sure you cover all the wounds on the injured limb with a dressing (bandage) before splinting.
3. Remove carefully (or cut away) all clothes that cover the injured limb.
4. Make sure that your splint immobilizes the fracture above and below the break.
5. Before, during, and after application of the splint, check the wrists or feet for pulses. Any changes in color or sensation of feeling are indications of circulation problems if the splint is applied incorrectly (too tight).
6. Whenever you are in doubt . . . splint!
Types of splints
In today’s medical market, there are many types of splints available. Some of these splints are specialized and, dare I say, too complex to be used by the average Joe. Some splints you apply may be as simple as a stick, while others may be high-tech ones like gel splints or inflatable ones.
Regardless of how the splints are made, they can all be divided into three main categories: rigid splints, soft splints, and traction splints.
How you apply each type of splint is slightly different. The only common thing that is done the same for each splinting situation is the principle of traction. To apply traction, you gently pull the limb in a straight line away from the body.
Traction is used to reduce the pain and lessen the chance of further injury. Even so, remember that traction is not to be used if there is a severely angulated fracture. Severely angulated fractures should be “splinted as they lay.”
For example, femur (thigh bone) fractures are best treated with a traction splint. If you do not have one, then splint it as it lays.
Rigid splints
The first type of splint is a rigid type. These can be made of any firm, non-flexible material. Commercially available types are the board splint, wire ladder splint, fiberglass, and cardboard splint.
In the field, you can improvise this type of splint out of a staggering variety of materials. Some examples of improvised splinting materials are newspapers, magazines, tree limbs, broomsticks, popsicle sticks (for fingers), or even a rifle (be sure it’s unloaded first!).
The rigid type of splint must be padded as it is applied for the support of the injury and comfort to the victim. Good padding can be made from rolled or folded sheets, towels, or rags. The padding needs to be placed between the splint and the injured limb while the splint is being applied.
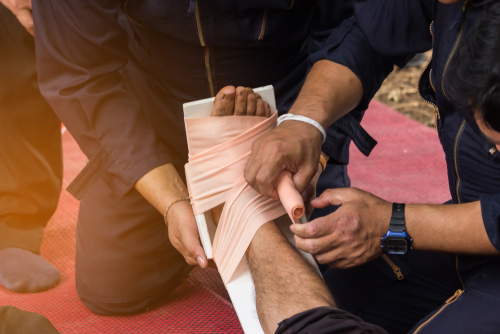
The basic principle for application of the rigid type is the same for both arms and legs. Having two people to apply the splint(s) is very helpful.
How to apply a rigid splint:
1. Apply dressings to any wounds on the injured limb.
2. One person gently supports the injured limb and applies slight traction.
3. The second person positions the splint alongside, over, or under the injured limb.
4. The second person places the padding between the splint and the injured limb.
5. The splint is securely wrapped. The second person begins at the end of the splint closest to the body and works toward the hand or foot. You can improvise the wrappings, but any roller gauze will do.
Soft splints

Soft splints are generally constructed of a heavy-duty double-walled, transparent plastic. They come in a variety of sizes and shapes. Some even have zippers for ease in application.
The air splints have some distinct advantages over the rigid types. They are very compact in storage, fairly light in weight, very comfortable to the victim, relatively easy to apply, and they can apply gentle pressure to a bleeding wound when inflated properly.
However, there are certain disadvantages and limitations to the air splint. Such a splint can be torn on sharp objects. It can leak when punctured, and it’s not usable on severely angulated fractures. Lastly, it is not easily reshaped, so you need to keep more different types on hand.
The air splint is applied differently than the rigid splint. Again, two people to apply the air splint works the best.
Air splints without a zipper:
1. Dress any wounds or bleeding on the injured limb.
2. The first person pulls the deflated splint onto and around one of his (or her) own arms to hold it open.
3. You then apply gentle traction while the second person supports the limb.
4. The first person then gently slides the air splint onto the injured limb. Remember to maintain traction and support.
5. The second person can then inflate the splint. Use only lung power. If you are using an air pump, you can overinflate the splint, and you will cause severe damage to the victim.
Air splint with a zipper:
1. Apply bandages to any bleeding wounds on the injured limb.
2. One person applies gentle traction to the injured limb while supporting the fracture site.
3. The second person then slides the deflated splint onto or around the limb.
4. The first person must then change hands from inside the splint to the outside, while the second person supports the fracture. Remember to maintain traction while changing hands.
5. The zipper is done up.
6. The splint is then inflated by the second person, by mouth.
When it comes to soft splints, the only ones we used very often were the full arm, half arm, and full leg and half leg. These seemed to do the job very well. If you feel the need for air splints, these four will do most any of the jobs.
Traction splints
Traction splints are a special type of splint. They have been around for quite a while, and the famous Hare traction splint is a modern version of the Thomas half-ring splint.
These splints were developed primarily to treat fractures of the femur (thigh bone). Although a lower leg (but not ankle) fracture can also be treated fairly well by their application.
What makes a traction splint so useful is its ability to develop a strong, even, steady pull, which is able to overcome very strong muscles in the thigh. This, in effect, separates and immobilizes the bone ends.
Traction splints are very complicated to apply compared to an air splint. If you plan to have one, you must develop a good technique. The only way to do this is to practice, practice, and practice some more.
How to apply a traction splint
Two persons are necessary to apply the traction splint:
1. Bandage any bleeding wounds on the injured leg.
2. The first person squats down by the victim’s foot. Place one hand under the ankle while the other hand goes on top of the foot.
3. The first person begins to apply gentle, even traction by slowly rocking backward.
4. The second person positions the splint with the padded collar against the hip. The newer types can also be adjusted for length. A good rule of thumb is to position the end of the footrest under the heel. It’s better to adjust it a little long than too short. Practice makes perfect.
5. Secure the splint using cravats or the straps that are provided.
6. Place the ankle hitch around the ankle and prepare to tighten up the ratchet.
7. Tighten up the ratchet. Keep tightening until the victim feels marked relief from pain. Never let the traction off once it is applied. (Traction is let off when the bone is set.)
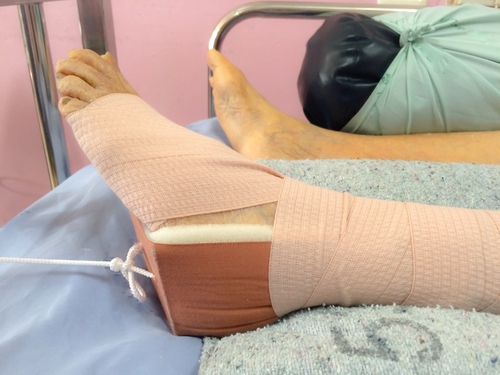
8. Check all the straps for tightness. Then elevate the splint three to five inches off the ground.
9. Check the foot’s pulse. Check the toes for color.
10. Seek some sort of medical aid.
This is a very serious injury, and it can be life-threatening. (Should the femoral artery be severed, a person could bleed out in a matter of minutes.)
The procedure for using the traction splint for the lower leg (but not ankle) fractures is the same, except the straps, are positioned in a different manner to better support the broken bones. When the traction splint is used correctly, the victim will go from a state of excruciating pain to one of near painlessness.
Dealing with transportation
When you manage to immobilize a fracture, the need to carry the victim to the nearest medical facility. Since an ambulance service or rescue team may be nowhere in sight, you will have to move the victim yourself.
While there are various states of the art stretches on the market, chances are not all folks could afford one. You may get some from a military surplus store and keep it in reach, but more than likely, you will have to improvise.
To be on the safe side, I advise you to read the Red Cross First Aid handbook to learn some good tactics for improvising with available materials. You can use a ladder, door, or even furniture if there are available. If not, you will have to make do with what materials you can find in the field.
Concluding
We have listed in this article the basics of applying a splint depending on its type. You will notice that every splint has its cons and pros. There is no one single splint that can cover all injuries, and you must mix and match them based on your needs. Remember that just reading about splinting techniques and having the right materials on hand doesn’t always assure success. You must practice, and I advise you to enroll in an EMT course to learn more about how you could deal with fractures in the field.


This is a great post that goes into a lot more detail than I’d considered (and I’ve even written my own post on the topic so it shows how much more I have to learn) about what types of splints to use and the do’s and don’ts involved, you’ve opened my eyes a bit here so thanks.