


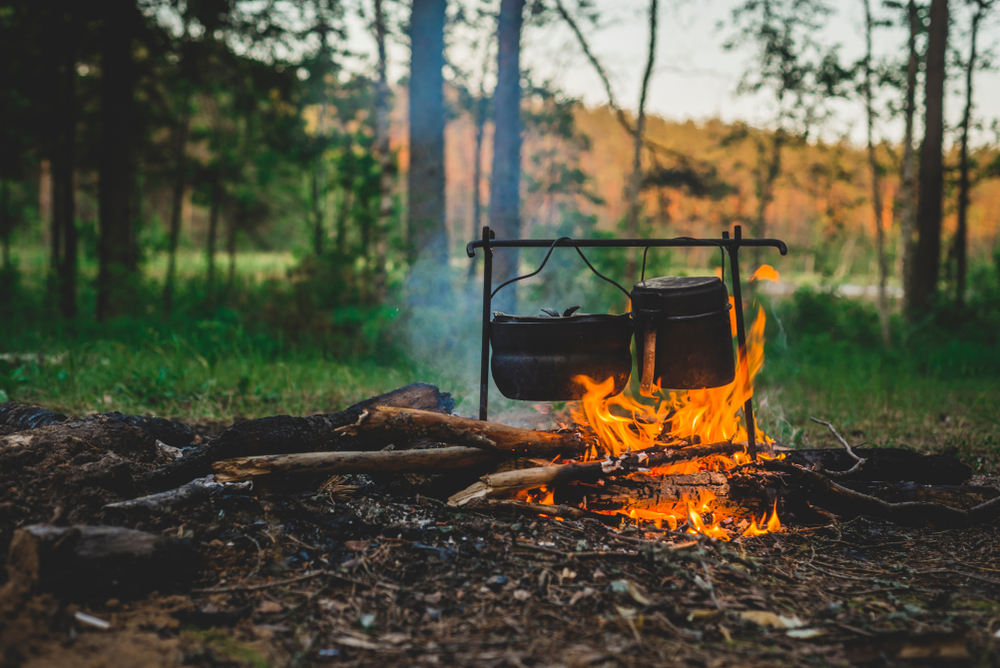
When you go camping, you pack a few steaks, some comfort foods like chips and sweets, and a case of beer or some soda pop.
Such foods are the first choice for many weekend campers, and it will keep them fed and happy during their stay in the wild.
However, if you’re constantly on the move because you were forced to evacuate, the food you’re usually packing during your camping trips will not keep your energy levels up. When bugging out, your expedition to remote areas needs to be sustained by proper food intake, and you have to rely on the survival foods you brought along.

Most people that build a bug out bag usually opt for dehydrated or freeze-dried foods since these are light and have a decent flavor (especially if you are willing to spend some good dollars for quality). However, the rest of us, the more frugal types, we usually go with foods that can be made easily at home.
From personal experience, I can tell you that eating store-bought backpacking or “survival” food isn’t as bad as you may think in the first few days. However, you can quickly develop what’s called appetite fatigue, and you will get tired of eating the same food over and over again. Everything begins to taste the same, and you won’t be able to tell the difference between food unless you look at the packaging.
Now don’t get me wrong, you will eat anything that is edible if you are hungry enough, but that’s not the point here. When you have to travel over long distances, you have to keep your morale high, and you don’t need to place yourself in a situation when you are “forced” to do something.
As a survivalist, you should be able to make your own food and supplement it with what Mother Nature has to offer. Before you start learning about foraging, I advise you to learn about how to make your own survival food. With proper planning and proper packaging, you will have tasty food, and you will avoid selling your soul for a steak.
Survival foods for bugging out scenarios
Jerky and Pemmican
Every discussion regarding survival foods lately starts with the mentioning of jerky or pemmican. The survivalism movement has brought these foods back into the spotlight. These are a good addition to any backpack regardless if it’s one that will help you discover the great outdoors or one that will keep you alive when things get rough.
You can find dried meat labeled as Jerky in most stores, and it has become a favorite snack of many. It is no longer the survival food that was developed by the Native Americans. It has become a commercial product that’s full of salt, seasonings, and all sorts of ingredients that might not sit well with your stomach when you’re on the trail. If you want to be on the safer side, I recommend using my recipes for making these old survival foods, and I guarantee you won’t be disappointed.
Jerky
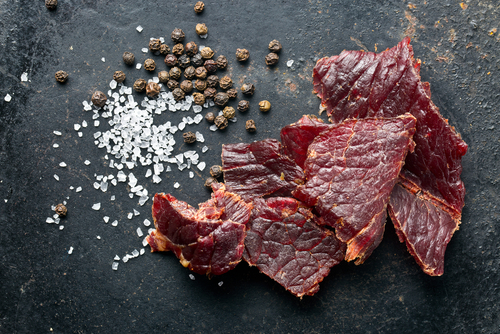
To eat real jerky, you have to first much off on a chunk with your teeth — if you can — or cut off a “flake” with a pocket knife. That’s only the first step, and then you need to soak that piece of meat in your cheek for a while until it softens. If jerky isn’t that tough, it won’t keep!
That being said, you should also know that jerky can be made from venison, elk, or buffalo. However, most commercial jerky you can buy today is generally made from beef.
A flank steak will work great for making jerky. Start by cutting the meat into long thin strips against the grain. Make sure to remove and trim away any fat or gristle if present.
The Cowboys used to sprinkle the meat with salt and pepper. They also used a small amount of chili powder to improve the overall taste, and they used to make various batches that had different flavors. Once you add your condiments of choice, simply hang it on wire lines in the sun to dry.
If you want a more flavorful jerky, you can marinate the meat in a solution of flavors. I use two tablespoons of Soy sauce, two drops of Tabasco sauce, or cayenne pepper to taste. I also add 1/4 teaspoon of salt, ground pepper, and one fresh clove of garlic, minced.
You will have to place meat and flavor juice in a Ziploc plastic bag and let it sit in the refrigerator overnight. After it marinates properly, drains the meat and place it on the oven racks to dry.
Make sure you set the oven at 140 degrees and leave the oven door partially open (if you don’t open the oven’s door, you will burn it). I usually let it dry for about six to eight hours. My advice is to let it dry at least until the meat turns dark and brittle.
You can make a marinade from other ingredients as well. I recommend red wine, wine vinegar, Worcestershire sauce, minced onion, a pinch of thyme and oregano.
Pemmican
Another star on the survival foods scene, Pemmican, was first created by the women of the Native American tribes. I’ve written about its origins and the terminology before, so let me just sum it up and say that original Pemmican is a mixture of cooked, dried, and shredded buffalo meat, which is combined with melted fat and sometimes berries. The Native Americans also used fish when buffalo meat was in short supply. Pemmican was the main survival food used to fuel warriors and hunters on the trail.
Coming back to these modern times, Pemmican has become the ideal survival food for preppers and survivalists due to its high-energy, long-lasting properties and portability. You can find a lot of recipes online for making Pemmican, but I’ll share with you the original recipe.
Indian pemmican
Native American women used dried buffalo meat to make pemmican. The method and recipe for making pemmican were as follows:
- The buffalo meat was first dried, and then it was heated over a low fire.
- The meat was beaten with sticks or stones into fine shreds so that it can be well mixed with the other ingredients
- Buffalo tallow was melted, and the shredded meat stirred into the hot fat to create pemmican
- The pemmican was 50 percent meat and 50 percent fat
- Berries and dried fruits were sometimes added to the pemmican
- The mixture was tightly packed and fastened into a bag made of buffalo skin
- The pemmican would then cool and harden
Pemmican would last for over a year, and it was often eaten dry or boiled in water.
Russian Black Bread

Although the origin of the Russian black bread was lost to time, the first mention of such food first appeared in 1917 after the October Revolution. Later on, the first official recipe was printed in 1933. Now regardless of its origins, black bread has played an important role in the life of the people struggling to feed their families. It was much cheaper and more nutritious than white bread, and it was the first choice of many when confronted with poor harvests.
Here is the recipe I’ve been using for years:
Ingredients:
- 1/2 cup warm water
- 1/4 cup oil
- 1/2 cup molasses
- 1 square unsweetened chocolate
- 2 cups of water
- 1 cup bran flakes
- 1 cup cornmeal
- 2 envelopes of dry yeast
- 2 tablespoons brown sugar
- 1 tablespoon salt
- 3 cups white flour
- 1 tablespoon instant coffee
- 1 teaspoon crushed fennel seeds
- 2 cups of rye flour
- 1 cup whole-wheat flour
- For the glaze, use 1 egg white mixed with 1 tablespoon water
How to:
I will have to start by melting the chocolates in two cups of water and then pour the melted chocolate over the bran and cornmeal in a large bowl.
Let it cool for a while, and in the meantime, dissolve the yeast in 1/2 cup of warm water. Once the bran is cool, you can add the oil, yeast, molasses, brown sugar, salt, coffee, fennel, and 3 cups of white flour.
Mix well before adding the rye and whole-wheat flours. You will need to add white flour progressively until you can knead the dough. Do so until it gets sticky. Afterward, put it into a greased bowl, turn, and cover with a damp towel. You have to let the dough rise until it doubles in size. Punch the dough down.
Divide the dough in half and form each half into a ball. Set the dough balls on greased cookie sheets, cover, and let rise until nearly double in size. It takes about 30 minutes or so to achieve the desired size.
Once it doubled in size, you need to brush the loaves with a mixture of egg white and water. Bake the bread at 375 degrees for 50 to 60 minutes. You should bake it until the loaf sounds hollow when tapped. Once the crust turns very dark, you can get it out of the oven and cool it on racks. You can then cut it and package it as needed.
Super soup

I’ve been making this soup ever since I can remember, and I got this recipe from some camping buddies a while back. If you make this soup, you will have a survival food that is packed with delicious nutrients and plenty of vitamins, carbohydrates, fats, and protein. As I was told, this was a poor man’s food, and it was made from the leftovers of other more refined recipes.
Over time, the recipe was refined to include dumplings, and you can prepare your own super soup as follows:
Ingredients:
- 1/3 cup barley
- 1/3 cup lentils
- 1/4 cup instant potato powder
- 1 cup dried vegetables (sliced)
- 2 beef bouillon cubes
- a pinch of thyme
- 1/2 cup dry milk
- 1 tablespoon dried meat
- 3 tablespoons butter or margarine
- 1/4 cup grated or cut cheese
- 1 cup biscuit mix packed in its own bag for dumplings
When you gathered all these ingredients, you can put them all in one bag, except for the milk and butter or margarine.
How to:
When you make camp, or you take some time to rest, you can put the soup mix into a pot with 4 ½ cups of water. Bring it all to a boil and then simmer for half an hour.
During the last five minutes or so, stir in ½ cup dry milk and three tablespoons of butter (or margarine). Add the grated cheese. Since milk does not boil well, you need to add it only in the last few minutes of cooking.
To make the dumplings, you will need to mix ¼ cup of water with 1 cup of biscuit mix to make a stiff batter. Form the dumplings into small balls (I make them the size of ping-pong balls) and float them on top of the soup. Cover the pot and let them steam and cook until done. I usually do so during the last 20 minutes of cooking.
Trail mix
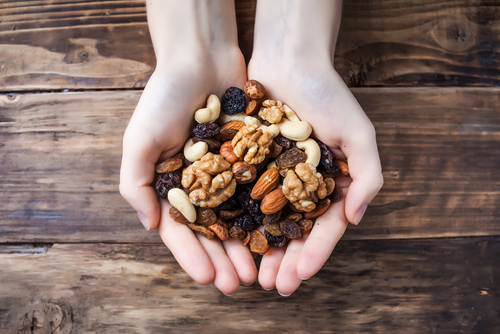
This is one of the survival foods I take with me during my winter camping trips. In fact, I’ve found variations of this trail mix in the backpacks of many outdoor enthusiasts, regardless if they had to face good or bad weather.
As you probably know, peanuts and raisins are the basic ingredients of any trail mix because they provide fat and natural sugar. This combination is good for all year round, but for my winter trail mix, I added some extra ingredients.
To make such a trail mix, you need to use equal measures of the following ingredients:
- Macadamia or cashew nuts
- Dried cranberries
- Coconut flakes
- Dark chocolate chips
- Peanut butter chips
Each quarter cup of this trail mix provides approximately 200 calories and 14 grams of fat.
You can use other types of nuts in the trail mix, but you must be certain they are low salt or even better, they should be salt-free. If you follow this rule, you will avoid getting dehydrated during your cold-weather trips. This is perhaps the easiest survival food to make, it tastes great, and everyone loves it, no matter their age.
Concluding
The survival food recipes listed in this article are an ideal option for those looking to pack nutritious and lightweight food when bugging out. There are many other trail foods you can make, and there are dozens of books out there teaching you how to make such food. However, these are the ones I’ve tried, and they never failed me. To be on the safe side, I recommend making and eating them at home before you decide to challenge your taste buds on the trail.


i started dryikng my own home made chili in a dydrator some years ago i had some in a back pack that sat there for years i pulled it out added some water boiled it for 4 minutes and it was still as good as the day i made it
Great article Bob, this one is a keeper for sure!
The soup seems more for camping than storage and survival. Has anyone made this with substitute ingredients for their BOB or other long term storage kit?