


Do you remember that old saying that one man’s garbage is another man’s treasure? The same principle applies to our daily wastes.
In case you did not know it, Americans are among the most wasteful civilizations in history. Actually, I would dare to say that we are the champions, my friends, and that’s nothing to be proud of.
We waste at an incredible rate: absolutely anything, including food, where we lead the world by a wide margin. Also, as a nation, the United States generates more municipal solid-waste per person/per day than any other developed/industrial country in the world, boasting 7.1 pounds of solid waste a day, per person.
If you crunch these numbers– 365 days a year x 330 million people x 7.1 pounds of solid waste – you’ll come up with astonishing numbers.
Putting Waste to Work for Energy
It was a Greek philosopher who once said 2000 years ago that nothing gets wasted – everything gets transformed, or something along these lines. To follow this guy’s axiom, we can transform waste into an excellent and basically perpetual source of energy.
We, the preppers, can help mitigate the “disaster” and put that amount of waste to good use, by making briquettes using daily wastes.
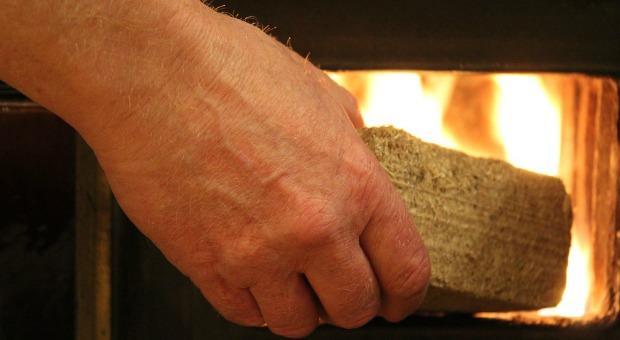
Briquettes are traditionally defined as compressed blocks of combustible material – usually coal dust, wood chips, paper, peat or sawdust – that are used to start a fire. The terms derives from the French language and it means “brick.”
Biomass briquettes are starting to become all the rage nowadays and daily waste is basically biomass. Traditionally, biomass briquettes are built from agricultural waste and they’re used as a “green” replacement for hydrocarbons (coal, oil etc) in all sorts of applications, including industrial stuff like heating boilers and whatnot.
Currently, almost half of the world’s population is using charcoal and/or wood for heating and cooking purposes.
Cutting the forest for subsistence farming or for cooking your food or heating your home is not a great idea if you have better alternatives, and that’s the whole purpose of technology: making the world a better place and improving the quality of life for humans, right?
Any household can reduce their need for charcoal and wood by creating their own fuel so to speak, by making “fuel briquettes” using waste plant material which is readily available in their own environment.
How to Make the Briquettes
So, what type of wastes can be re-used for making fuel briquettes?
- Paper
- Sawdust
- Leaves
- Husks
- Charcoal fines
- Any other type of agricultural waste.
It’s important to realize that not all waste is created equal, and this is where the calorific value of each type of waste comes into play.
As a general rule of thumb, the aforementioned materials are the best when it comes to DIY fuel briquettes (sawdust, paper etc), but you’ll have to use a home-made press for achieving legendary status, i.e becoming energy self-sufficient as much as humanly possible.
There are also commercially available presses. You’ll just have to look for them on the internet or in your local hardware store.
The fuel briquettes are being made around the world using mini Bryant and Peterson presses. You can also make them by hand or using a plastic mold.
Video first seen on The Do It Yourself World.
You can also use a plastic mold.
Video first seen on The Do It Yourself World.
Basically, you can use a plastic bottle or any other type of plastic container in order to shape the briquette. You’ll also need something that you can use as a piston that fits into the respective container to press it, in order to get the water out of the mix. You can use something like a tin can or a piece of wood as the piston along with a plastic bag, a knife and some wire.
Here’s a cool idea about DIY-ing a mold-press biomass fuel briquette using an old DVD container. The possibilities are basically endless.
Video first seen on nobodyprepper.
How to Make Briquettes in Easy Steps
Step 1 – preparing the briquette mix
For example, if you’re going to use waste paper and sawdust (the simplest to DIY and very efficient and cost effective), you’ll have to soak the paper in water for a couple of days in order to soften it and to allow the fibers to be released, as these fibers will later bind the materials together.
In the next step, you’ll have to thoroughly homogenize the soaked paper using your hands until the stuff reaches the consistency of porridge or mashed potatoes, i.e. no pieces are evident in the “soup”. This step is very important but it takes some time and you’ll have to do it well.
To speed up the process, you can use tools such as a mortar and pestle or a dedicated pounding tool for processing the paper mix quickly and more efficiently.
The simplest mix for homemade briquettes consists of one part soaked paper and 3/4 parts sawdust. You can also add pine needles, rice husks, chopped leaves/grass, charcoal fines and any other flammable materials you can think of into the mix, as they’ll add to the flavor. You’ll have to use roughly 20% paper though – that’s the lesson to be taken home.
You can alternatively swap paper for cassava peels/flour, which can replace the paper’s binding properties into the sawdust-mix. You’ll have to boil the cassava until it gets very soft, but in sufficient amounts, the cassava paste will successfully replace the paper for the purpose of binding the sawdust together.
In the next step, you’ll have to mix the paper or cassava mixture with the sawdust along with enough water. The mix must hold together if squeezed; that’s how you determine the ideal consistency.
Step 2 – prepare the press
This step depends on whether you’re using a cool home press or an improvised device. Let’s say you’re on the low-tech side and you’re using a plastic bottle mold as an improvised briquette-making device.
You’ll have to cut the upper quarter of the plastic bottle (a soda bottle will do) and perforate the bottom, making 10-12 drainage holes. You can use a hot wire to burn the holes.
Then you’ll require a thin plastic bag to be used as a liner to help you remove the finished briquette from bottle. Don’t forget to punch drainage holes in the plastic bag too, both on the sides and in the bottom, so the water can be expelled during the pressing process.
Obviously, you can use something bigger than a plastic bottle, like a plastic bucket or a plastic flower pot. Ideally you’ll have two of each: one for playing the role of the mold and the second to act as a piston. Don’t forget to put drainage holes in the plastic liner though – otherwise, the water won’t drain and you’re wasting your time.
Step 3 – press the mix
In this step, you’ll have to put a quantity of briquette-mix inside the plastic liner (bag) and then insert the bag into the mold. Then you’ll have to add more mix to the bag and press it with the improvised piston (a can, the other bucket/another bottle or whatever fits into the mold) so the water gets pushed out of the mix.
Push as hard as you can – the harder the better. Then you’ll have to pull the bag out of the mold and here’s your first briquette, folks.
Step 4 – dry your briquettes
But it’s not over yet. You’ll have to dry your briquettes for about a week outside in the sun. If they’re not properly dried, the briquettes will smoke when burned and that’s unpleasant to say the least.
If you can’t improvise a mold and/or a press, you can always make fuel-briquettes with just your hands, squeezing the mix in your bare hands and building fuel balls and you’ll have to dry these out too, obviously.
There are so many survival things you can do by yourself.

This article has been written by Chris Black for Survivopedia.


Thank you for this elaborate guide. I am actually going to try it out immediately. As an engraver, I have piles of sawdust and waste paper. So it’s going to be much easier since I am not going to look for them.