


Disclaimer
Before we get started, let it be known that any trapping of live animals outside the rules and regulations outlined by local laws is illegal and can result in heavy fines or worse. Traps are dangerous, and every caution must be taken to avoid injury to yourself or others. All traps discussed in this article are for instructional purposes only.
Genesis of Traps
In the beginning, there was nothing. Then one day, a hungry caveman spied a potential food source. It wouldn’t sit still long enough to catch, so the caveman picked up something large and heavy, waited for the food to hop closer, then dropped the heavy object onto the food. And there was much rejoicing. Although this anecdote is pure speculation, it shows how far traps have come over the years and that the deadfall is one of the earliest traps ever used. Deadfalls are most effective when humans are not around to scare off the intended target, so eventually, some entrepreneurial prehistoric hominid created an ingenious way to trigger a heavy object to fall. Enter the figure-4 trigger. Figure-4 triggers are relatively easy to make and are most effective if they are baited with something a creature may want to pick off the spikey end.
Simple Deadfall Build
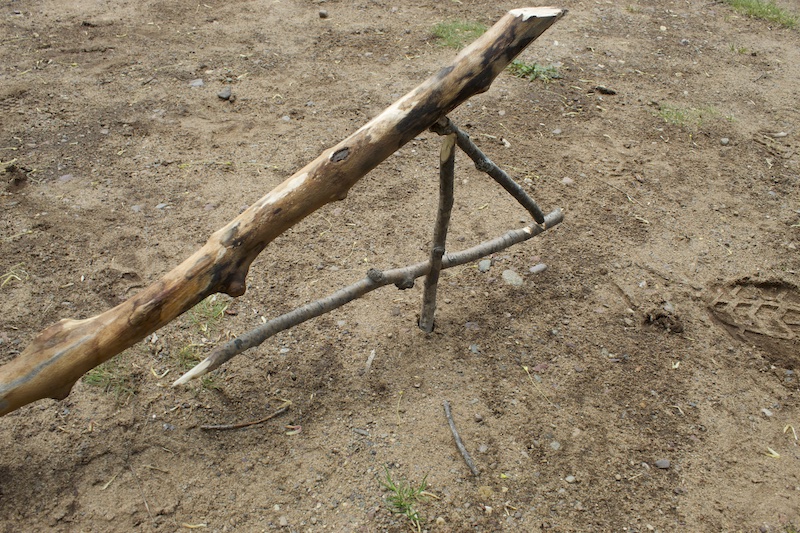
Start by finding three strong sticks (vertical support, bait spike, and release stick) and something heavy, such as a log or large rock. Strong simply means that the sticks are not rotted, crumbly, or have defects that would compromise their structural integrity. Wood in direct contact with the ground typically begins to decay quickly and should be avoided for the use of the trigger. They do not necessarily have to be perfectly straight either, but they must be large enough to properly support the weight of whatever is being used as the deadfall. Also, it helps if the stick with the bait spike is longer than the other two. This will increase the overall sensitivity of the trigger.
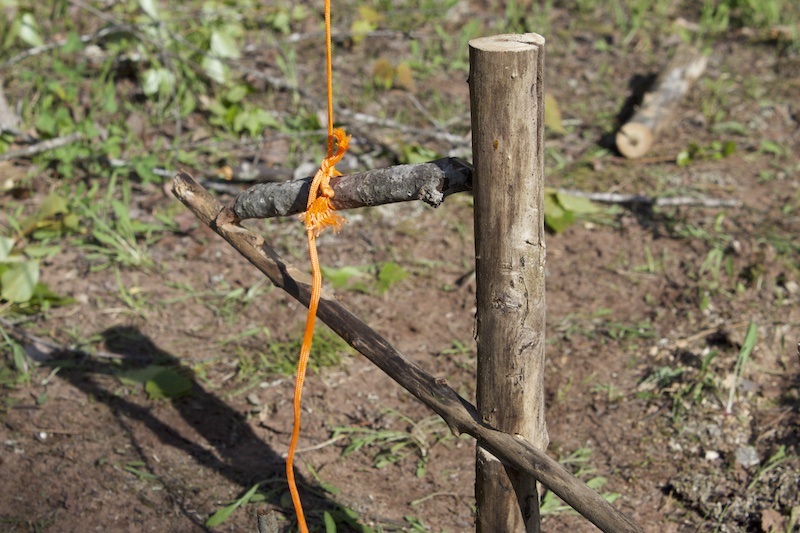
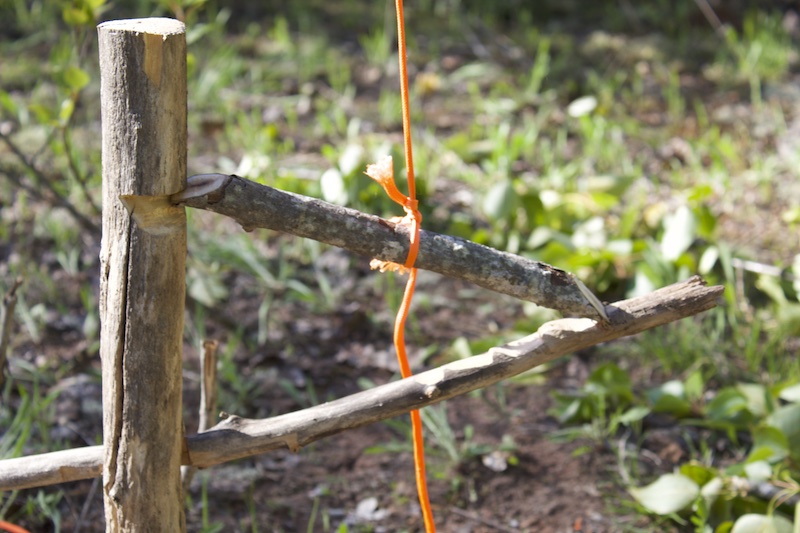
Once you have gathered three suitable specimens, it’s time to carve some notches. The vertical support and the bait spike must fit together to form a cross. It may help to place the support stick into the ground with the deadfall on top to see how high up the notch needs to be and if the bait spike needs to be longer or shorter to fit properly underneath. Where the crux of these sticks come together, carve square notches so that they interlock like a puzzle. The more shallow the notch, the more sensitive the trigger will be. If the notch is deep, the trigger will be more sturdy, but it will take more force to trigger the deadfall. In this way, the trap can be tuned to trap the intended animal. For example, if small rodents were the target, the trap would need to be more sensitive than something larger, like a raccoon.
At the top of the vertical support, carve the end with a bevel that faces the inside of the deadfall and a spike sharp enough to hold bait on the bait spike. Barbs could also be used so that the creature must work the bait more vigorously to get it off. On the back of the bait spike, there needs to be a notch with the bevel facing the sky and a groove approximately a ¼ inch deep. The function of this groove is to catch the third release stick. Something that I found useful was to carve several of these bevels in succession on the back of the bait spike. That way, no matter how I placed the deadfall, I could adjust my release stick to get the perfect fit. Finally, place the bait on the spike, and it’s almost time to set the trap.
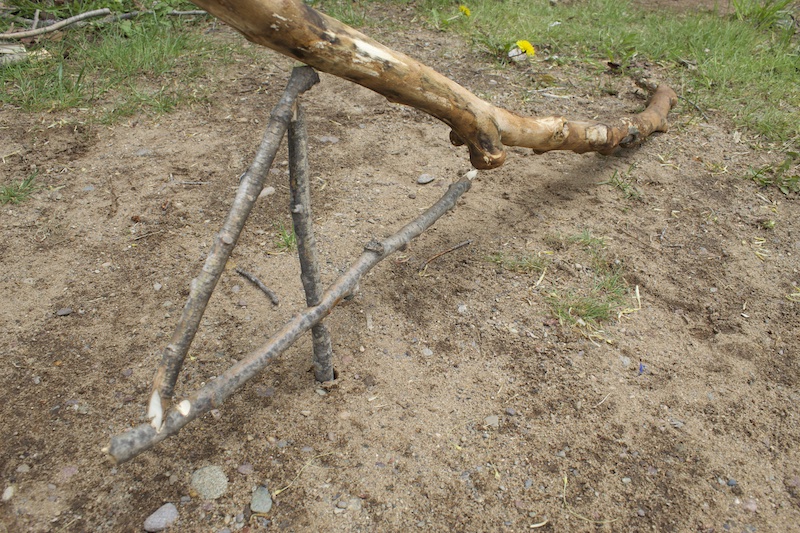
Of all the pieces of the figure-4 trigger, the release stick tends to be the most problematic. A groove on one end catches the bevel of the vertical support, while the other end is carved to catch the groove in the bait spike. If the trigger has been tuned to be very sensitive, trying to hold all the pieces together while simultaneously balancing the deadfall perfectly on top can lead to some serious frustration. It can be done solo, but having a partner to help makes a world of difference. With the deadfall balanced on top, the trap is now set and ready for action.

Simple Snare Build
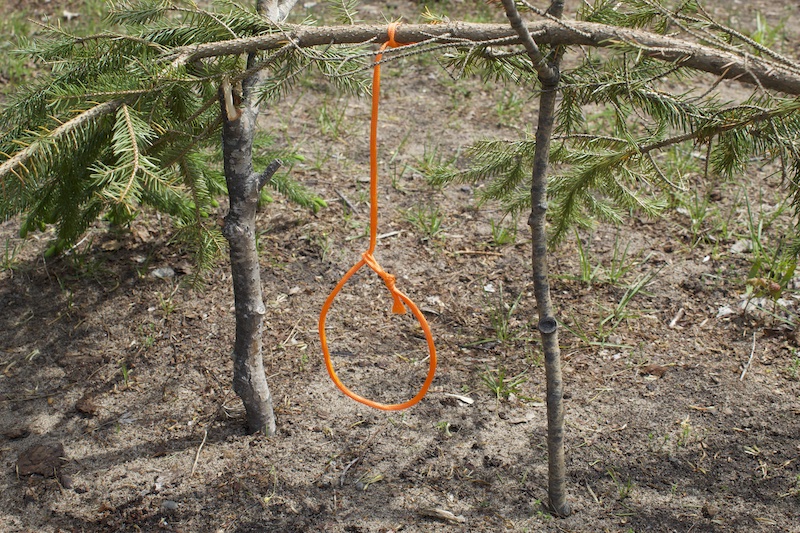
Snares alone are by far the easiest type of trap to set. Ideally, they are made by creating a loop with thin banding wire, but thicker threads and cordage can be used as well. Traditional snare materials are next to impossible to see in photos, so I’ve used a bright orange parachute cord for visual representation only. You want to make a loop on one end of the cord and pass the rest of the cord through, forming a noose-like design. The initial loop should be large enough for the cord to slip through easily but small enough to bind the cord as it tightens without loosening. This is why binding wire works so well as snare material. Binding wire can also be formed into a circle without going slack on the sides. Place the snare wherever small animal traffic may be occurring.
Spring Snare Build

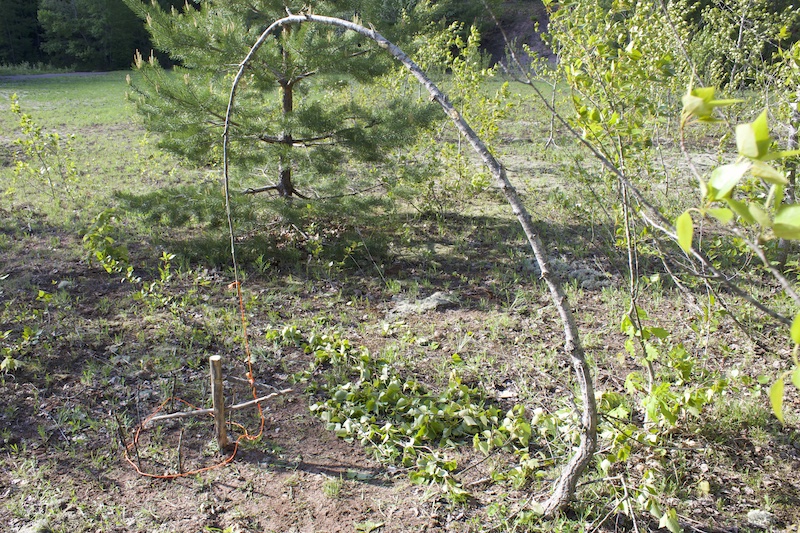
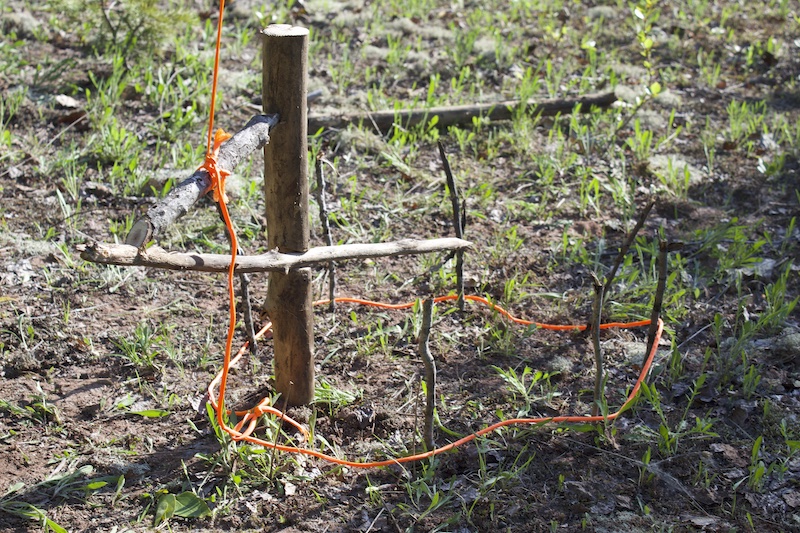
Sapling snare set and under tension. Use extreme caution when working near or around this type of trap. The trigger mechanism of the sapling snare is slightly different from the figure-4. It’s bait spike must be angled so the release stick can distribute tension properly. These notches did not line up appropriately the first time around and needed to be modified. Patience and perseverance will be necessary when building primitive traps.
Basic snares are very simple and straightforward, but there is another classic snare design that employs the use of a trigger mechanism. Sapling snares are under tension and have a better chance of trapping and holding on to the intended target. Numerous variations of the sapling snare exist, and it is interesting to discover how clever some of them can be. A word of warning, though, be extremely careful when setting the triggering mechanism, and keep your face away from the top of the trigger. If it goes off while you’re standing over the top, you will get whipped across the face with the business end of a sapling, as well as anything else the snare catches on its way up.
As the name implies, start by finding a live sapling approximately six feet tall. Aspen suckers are great for this type of trap, but any live, straight sapling will do. Clear off all the branches, so only the sapling pole remains. The next step is to find three sticks to make a trigger similar to the figure-4. Unlike the figure-4, the vertical support must be thicker, longer, and more robust. The vertical support will need to be pounded into the ground deep enough that it will hold the force of the sapling under tension without coming loose and flying out.
When carving the notches that tune the sensitivity of the trap, they must be angled, so the bait spike is pointing slightly downward. This downward angle will help the release stick maintain tension appropriately. Bevels and grooves are carved into the back of the bait spike in the same manner as with the deadfall, but you may need to experiment with the angle and depth of the grooves to properly catch and hold the release stick. At the top of the vertical support, instead of ending in a bevel, this one needs to have an embedded bevel that will face the direction of the sapling. The ends of the release stick should end in bevels that catch and hold both the vertical support and bait spike.
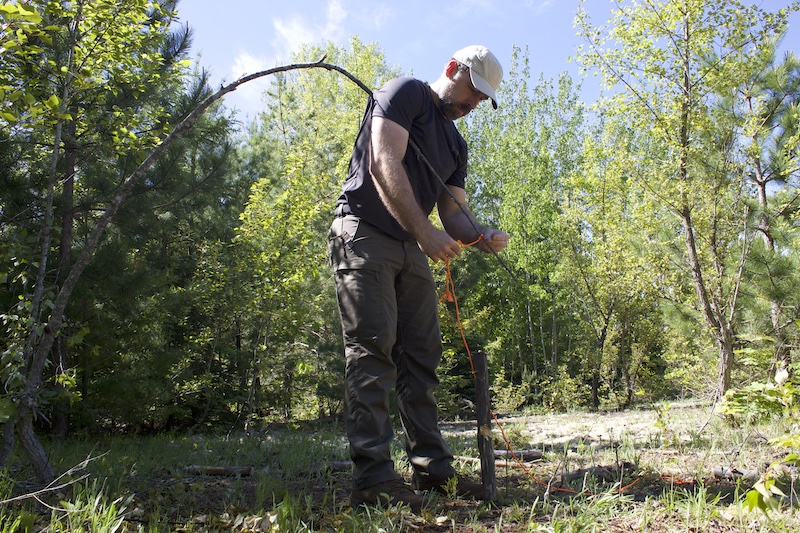
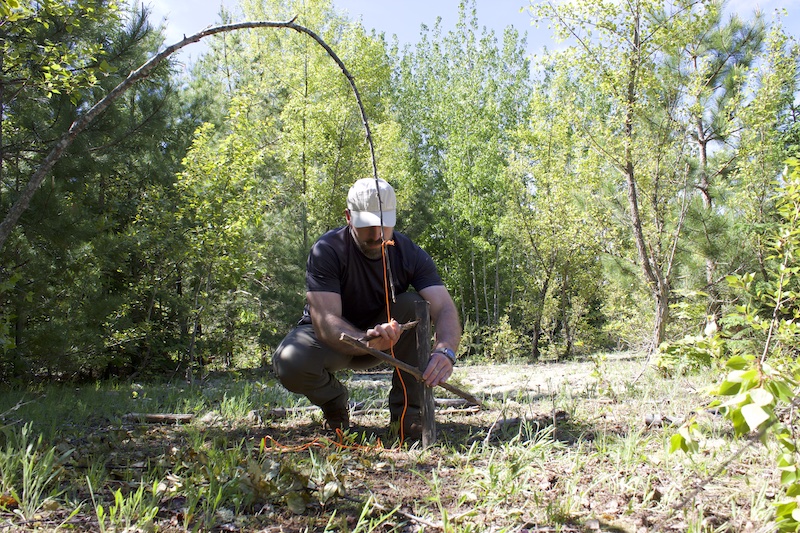
To set the trap, tie one end of a length of banding wire or cordage, approximately the length of a forearm, to the top of the sapling. Tie the other end to the middle of the release stick. This can be tricky to do solo if the sapling is tall since everything will have to be performed while it is under slight tension. Anchor the vertical support firmly in the ground about a step and a half away from the base of the sapling, ensuring that the embedded bevel at the top is facing the sapling. Using six to eight small twigs, make a circle in a direction away from the sapling by sticking them into the ground. The circumference of the circle will determine how large the snare will be and how large of an animal you can trap. These twigs do not have to be strong or securely anchored; they are just there to hold the wire in place. Form a snare large enough to fit around the circle of twigs with enough of a tail that it will reach a little above where the release stick will be.
Here comes the tricky part. Tie the tail of the snare just above where the cord is tied to the middle of the release stick. Keeping your face as far from the business end of the sapling as possible, pull the release stick down far enough that it can be set into the groves of the bait spike and the vertical support, and slowly let the trigger bear the tension. If the release stick is too brittle, the groves are not cut properly, or the vertical support is not anchored enough, you will know immediately. If such is the case, take a deep breath, and make the adjustments necessary for the trigger to hold. If it is holding the tension without your assistance, congratulations!..but you’re not quite done yet. Carefully set the loop of the snare outside the circumference of the stick circle and slowly back away. The sapling snare is set and active.
Recap
Deadfalls and snares are the basic forms of most primitive and many modern traps. Building them can be initially frustrating, but with some perseverance, it can be done. These traps are great for snagging food from the land, and in the third installment of primitive trap building, we will explore how they can be altered to trap creatures of the air and sea. Have you ever built either of these designs? If so, share with us what worked and what did not!


