


No matter when you look at the news these days, there are endless stories about food recalls as well as ones about people that can’t afford a decent meal.
Even as Thanksgiving approaches, millions of pounds of turkey may be contaminated with Salmonella. To add insult to injury, if you can’t afford a turkey, it is more than likely you won’t be able to afford getting sick because you consumed something contaminated with Salmonella or some other pathogen.
Here are some Thanksgiving options that you may want to consider.
Aside from being cheaper, they may be safer than going to the store and relying on food processing carried out by China or “migrants” working in the food industry here in the United States.
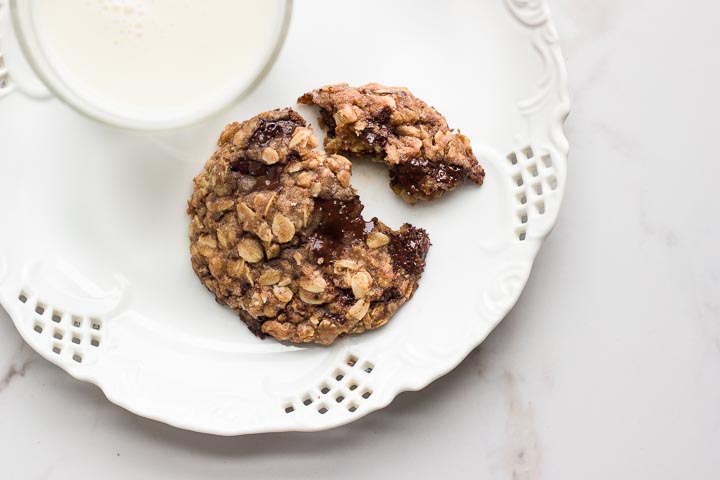
Maple Syrup Oatmeal Cookies
These delicious cookies are variation of the WWII Molasses oatmeal cookies.
It is a highly adaptable recipe that can be made mostly from ingredients found in nature. For example, if you do not have oats, go ahead and add walnuts, berries, or other edibles that you happen to find. Just remember, however, it takes some time to harvest maple syrup and then boil it down. If you want to use this recipe, allow yourself sufficient time to tap maple trees and prepare the syrup.
Ingredients:
- 1 1/2 cups unbleached wheat flour
- 3/4 cups margarine
- 2 eggs
- 1 1/3 cups white sugar
- 1/2 cup maple syrup
- 1 tsp baking soda
- 1 tsp baking powder (for slight additional leavening)
- 1/2 tsp salt
- 1 tsp vanilla (optional)
- 1 – 2 ½ cups quick oats
- Raisins, nuts, or other items you may have onhand (optional)
Baking Temperature – 350 degrees for 15 minutes or until golden brown.
Preparation:
- Start off by mixing together the sugar and margarine until smooth. You can pre-soften the margarine, however I don’t recommend melting it.
- Next add eggs, baking powder, baking soda, salt, vanilla, and syrup to the sugar and margarine.
- Add flour ½ cup at a time. Your goal is to make sure the flour is mixed in thoroughly without making lumps. As the mixture thickens, you will have to mix the dough by hand unless you have a mixer or food processor.
- After the dough is mixed, fold in the oats. They should be evenly disbursed through the dough. This is also the time to add raisins, nuts, or other similar ingredients.
Drop the dough onto cookie sheets in teaspoons or larger (depending on your preference). Do not forget to allow enough room for the cookies to spread out. Smaller cookies will cook faster than large ones.
After the cookies are baked, use a wire rack to cool them. Air should circulate evenly under the cookies as well as all around them.
Candied Squash Using Maple Syrup
Squash prepared in various forms has been a Thanksgiving staple since the beginning of the holiday.
This recipe utilizes just about any squash that you can obtain and then candied in maple syrup. No matter whether you use acorn, ring neck, yellow neck, or butternut squash, it is sure to taste delicious. If you have zucchini onhand, you can also try that, however you may or may not like the slightly bitter tone of the zucchini within the context of the maple syrup.
 Depending on where you live, some of your neighbors may or may not have extra squash that they can give you from their garden. There may also be a local farmer’s market or local farms where you can still buy squash at a lower cost than you would find at the supermarket. While it is too late to grow squash for this Thanksgiving, looking ahead you can figure on 60 – 90 days of growing time depending on the squash variety and the growing conditions. Since squash lend themselves fairly well to container gardening, you can also grow them indoors. Just make sure that children, pets, vacuum cleaners, and other foot traffic don’t interfere with the vines. You will also need to research different squash types in order to find out if they require pollination to produce fruit.
Ingredients:
- 1 – 1 ½ pounds of squash with seeds, and outer covering removed. Cut the squash into approximately ¾ to 1 inch cubes
- 2 tbsp of Maple Syrup or brown sugar (if maple syrup is not available
- 1 tbsp of vegetable oil or melted margarine
- A pinch of salt and pepper
Baking Temperature and Time: 400 degrees for 40 to 45 minutes.
Preparation:
- After the squash is washed, peeled, and cubed, place it in a bowl with the maple syrup, melted margarine, salt, and pepper. Stir the squash in the bowl until all the pieces are evenly coated with syrup and oil.
- Place the squash mixture in a roasting pan and preheat oven. Cover the squash with tin foil and bake for 20 minutes.
- To complete the cooking process, remove tin foil from the squash and cook an additional 20 minutes.
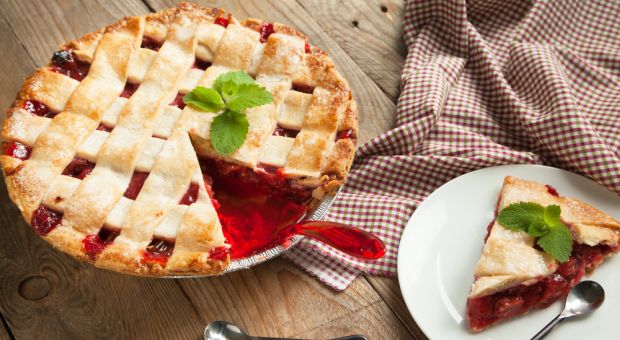
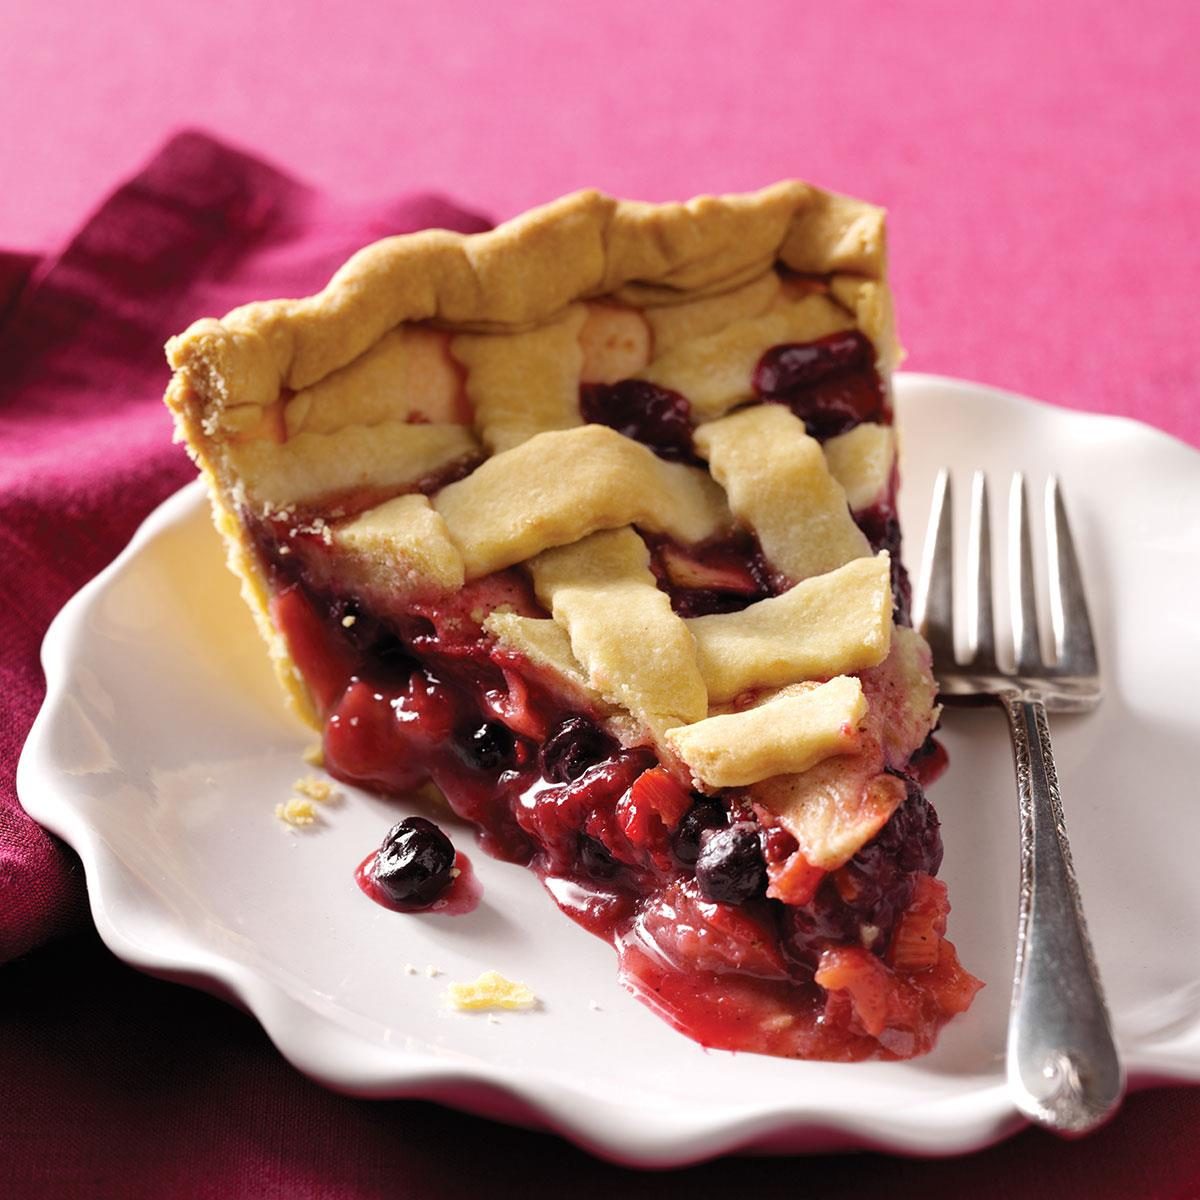
Rhubarb Pie
If you are looking for a bit of zing for your Thanksgiving meal, Rhubarb pie is sure to deliver what you are looking for.
Rhubarb grows wild along the edges of woods, roadsides, and in pastures. Therefore, if you live in a small town or along roads with grass and weeds along the shoulder, there is a chance you will find some wild rhubarb. This perennial plant is also very easy to grow in the garden. As long as you pick the Rhubarb before it has been exposed to freezing temperatures, the stalks will be safe to eat.
Never consume the leaves or flowers as they contain oxalates and are poisonous.
It should also be noted that Rhubarb can easily be confused with Burdock. When looking at the plants, Rhubarb has a smooth stem and underside leaves, while Burdock has hairy stems as well as on the underside of its leaves.
If you slice into Rhubarb stem, you will also see that it is solid while Burdock stem is hollow.
 Ingredients:
Pie Filling:
- 4 cups chopped rhubarb stalks
- 6 tbsp flour or corn starch
- 1 tbsp butter or margarine
- 1 1/3 cups sugar or ½ cup of maple syrup
- 4 cups strawberries (optional).
- 1 – 2 tbsp water
Crust:
- 2 cups flour
- ¾ cup shortening
- 2 – 6 tbsp cold water
- 1 tsp salt
- 1 egg white
Baking Temperature and Time: 425 degrees for 20 – 30 minutes, then 350 degrees for 25 – 60 minutes (the latter times will be more likely if you decide to skip the pre-cooking process).
Preparation:
- Mix together ingredients for the filling in a sauce pot. Bring the mixture close to boiling, and then let simmer until the rhubarb is soft. This precooking will help produce a sweeter pie with less a chance of having raw pieces in the pie.
- While the pie filling is simmering, go ahead and make the pie crust. Take one cup of flour and combine with shortening. Make sure there are no lumps and the ingredients are thoroughly mixed. Next, add 3 tablespoons of water, the salt, and another ½ cup of flour.
- At this stage, you will either have the makings of a flaky pie crust or a disaster. The dough should clump together easily, but not be so saturated with water that it feels like the beginnings of pasta dough. Add the remainder of the flour and see if you get something that crumbles easily. If you do, then go ahead and add the remaining water one tablespoon at a time. You will know the dough is ready for rolling out when you can pinch it without cracks causing the dough to fall apart. When you reach the last tablespoon of water, you may need to add it by halves in order to avoid making a dough that produces a tough pie crust.
- Divide the pie dough in half and roll out the bottom portion. Try to make the dough as even as possible, and not more than 1/8 inch thick. Arrange the dough into a pie pan. Stick a fork all along the edges and bottom of the pie crust so that heat will reach evenly through the crust when baking.
- Crack open an egg and separate out the white portion. Use a pastry brush or paper towel to spread some of the egg white around the crust. This will help ensure that the pie ingredients do not leach into the crust. Place the lower crust in the freezer for at least one hour.
- Next, go ahead and make the top covering for the pie. You can roll out the crust much as you did for the bottom, or cut it into strips and set them aside to make a lattice. Place the upper crust in the refrigerator if you will not be using within the next hour. Remove the crust from refrigeration in time for it to soften up enough for easy shaping.
- Once the rhubarb filling is ready, let it cool, and then place it in the pie shell.
- Next, place the top of the pie crust onto the pie. If you are going to make a lattice, use your favorite method for weaving the dough strips together. If you are using a full cover, do not forget to cut holes in the top for steam to escape.
- Take some milk and gently coat the top of the pie crust with it. Sprinkle white sugar over the milk to give the crust a sweeter taste. The milk will give the pie crust a better brown color than leaving it bare.
- Before placing the pie in the oven, cover the outer edges with aluminum foil.
- When you go to lower the temperature from 450 to 350, you can also remove the aluminum foil.
- The pie is done when you see the rhubarb bubbling and the pie crust is golden brown.
Wild Apple Pie
For the most part, you can find wild apple trees growing in many parts of the United States.
No matter whether you find them growing in the woods, back yards, or a long roadsides, they tend to produce tart apples that make an absolutely perfect pie. In the fall, around Thanksgiving you should be able to find some apples still in the tree, or suitable ones on the ground. Be careful to choose apples that are not rotted and show no signs of insect or worm infestation.
Ingredients:

Pie Filling
- 5- 10 apples depending on their size. If they are about the size of Granny Smith apples at the supermarket, you will only need about 5 apples for a 9” pie. Since wild apples are usually about half that size, you will more than likely need between 7 – 10 apples. Fortunately, wild apples tend to have a lot less water than supermarket apples, so don’t worry if the apples aren’t on the verge of heaping out of the shell.
- 1 tsp to 1 tbsp lemon juice. Taste a slice of apple to get a feel for its tartness. If the apples already have a tart flavor, lean more towards 1 tsp of lemon juice or none at all.
- 3 tbsp of brown sugar or 2 tablespoons of white sugar and 1 tablespoon of molasses
- 1 tsp cinnamon
- 3 tbsp flour or corn starch
- 3 – 4 pats of butter or shortening
- ½ cup raisins (optional)
Pie Crust
Use the same recipe as above for Rhubarb pie. As with the Rhubarb pie, you can also choose a lattice or a full top. Both pies require two crusts.
Baking Temperature and Time: 425 degrees for 30 minutes, then 350 degrees for 45 – 60 minutes.
Preparation:
- Prepare the pie crust and arrange the bottom part into a pie pan as you would for making rhubarb pie.
- Wash, peel, and core the apples. Cut the apples into quarters and then slice them into two or three chunks per quarter.
- Place the apples in a bowl with the sugar, cinnamon, flour, raisins, and lemon juice. Stir the apples until they are evenly coated with the remainder of the mixture. Apples, regardless of their origin usually do not require pre-boiling. This is one of the few fruits (and vegetables) that I don’t pre-boil before placement for baking!
- Take the apple mixture and put it into the pie crust.
- Place a few pats of butter on top of the apples. If you do not like the taste of margarine or butter in apple pie, then go ahead and add some shortening instead. Personally, I have always felt like this ingredient is a necessary evil. It is required for ensuring the filling is moist, however it does tend to disrupt the taste of the apples and sugar mix.
- Attach the top of the pie crust as you would for rhubarb pie and follow the same baking procedure. As with Rhubarb pie, you will know that the apple pie is cooked when the crust is golden brown and the pie filling is visibly bubbling.
If you decided not to add a sugar and milk coating to the upper pie crust, you can add icing instead. Simply combine confectioners sugar and milk to create a mixture that is about as thick as white glue. Wait until the pie is completely cool before adding the icing.
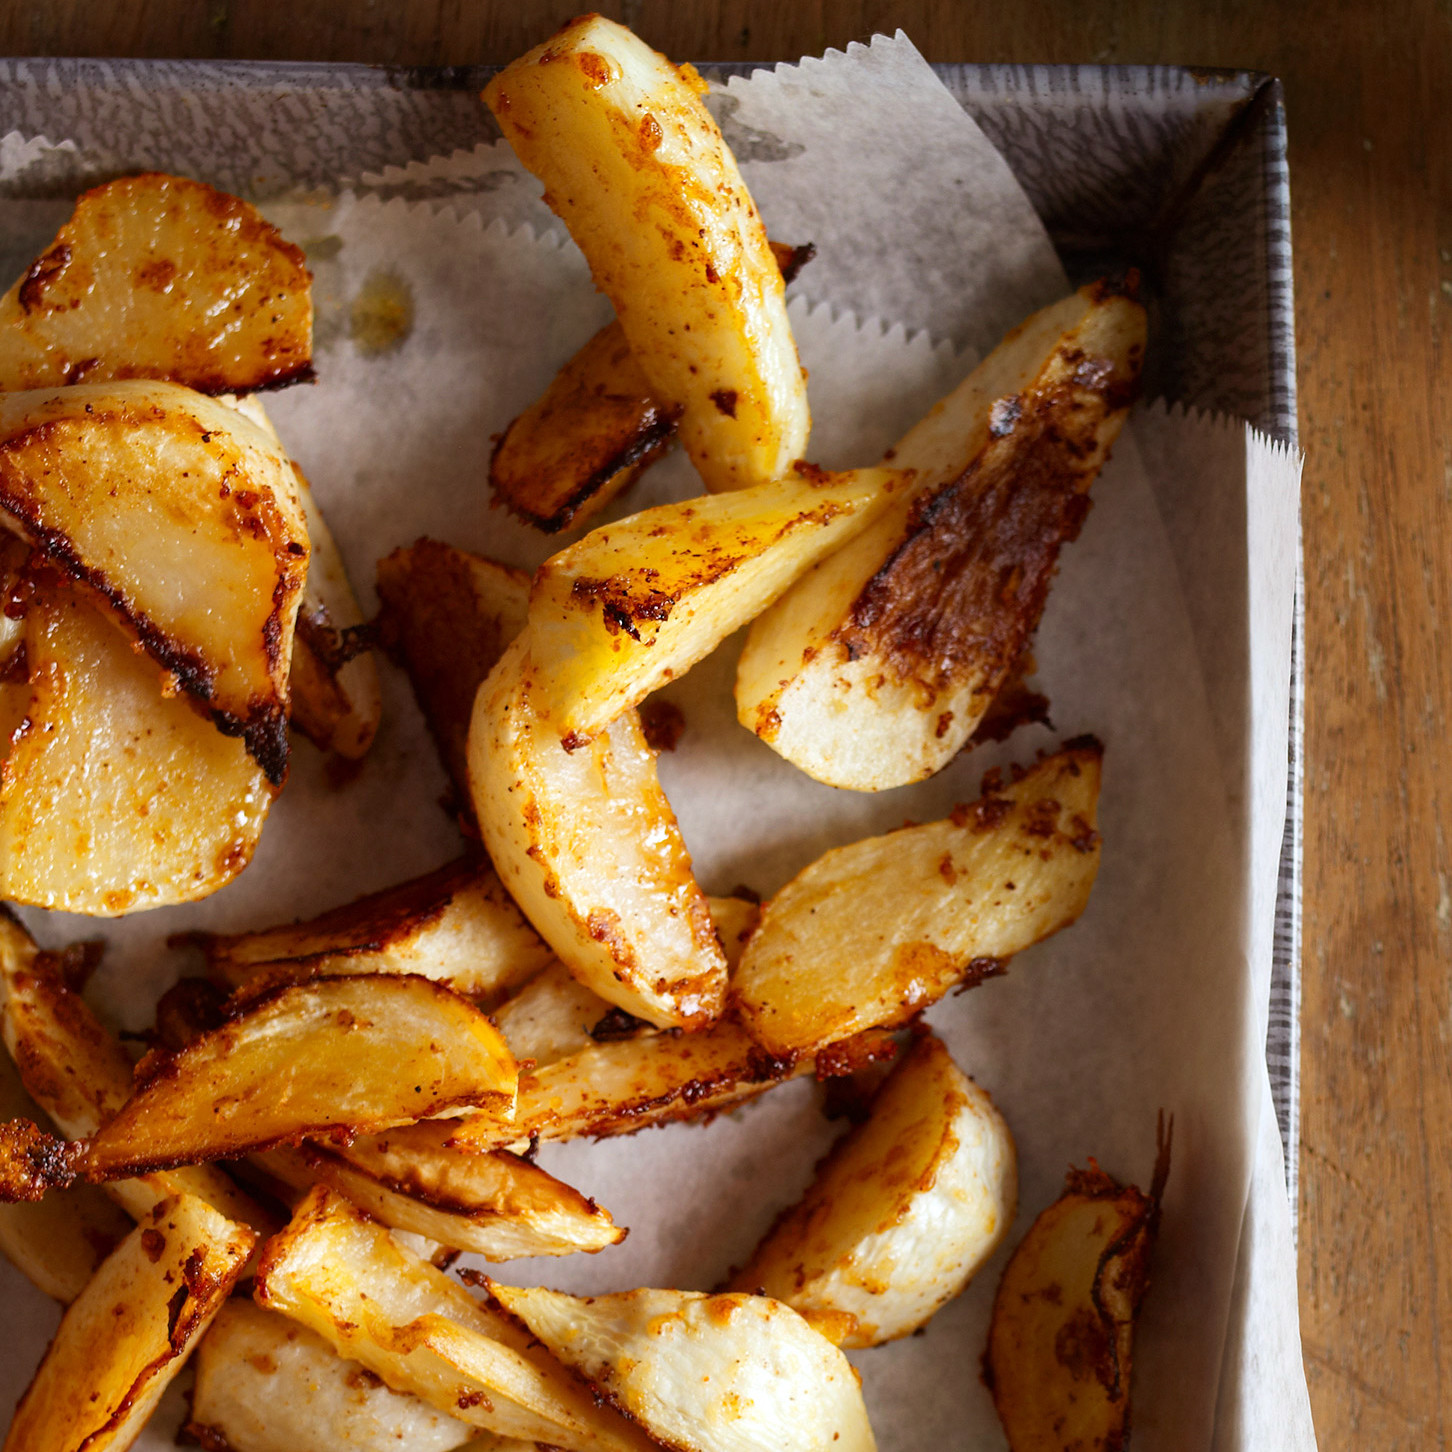
Roast Turnip
When it comes to inexpensive Thanksgiving foods, roast turnip is something that tastes good and will work with just about everything else you are planning to cook.
This is also something that you or neighbors may have grown during the summer. It is also readily available in the fall months at farm markets and from local farms. If you have a local farm nearby, you may also be able to pick a bushel of turnips and then use them at a later date. Turnips can also be grown indoors in 3 – 5 gallon sized containers. Most varieties will mature in about 60 days. Since they don’t mind cooler temperatures and spring type lighting conditions, you can grow them year round in containers. Depending on the variety, you can also let the roots grow a bit longer and harvest the leaves. Just remember, however, young turnips are sweeter and more tender than older ones.
Ingredients:
- 3 – 4 turnips washed, peeled and cubed
- 2 tbsp vegetable oil
- 1 tsp salt
- 1 tsp pepper
- 1 tsp garlic (optional)
- Oregano, thyme, or parsley if available and to taste.
Baking Temperature and Time: 400 degrees for 15 – 30 minutes.
Preparation:
- Start off by boiling the turnip cubes in water until they are about half cooked. This will save roasting time and also make it easier to avoid winding up with dried out turnips. Remember, even though some vegetables release more water than meat does when roasting, they are also more delicate in the sense they will dry out much faster. While many people don’t pre-boil vegetables before roasting, I almost always do so. Different people may feel otherwise on this matter.
- Place the turnips in a baking pan with seasoning and oil. If you did not pre-boil the turnips, then cover with aluminum foil. Remove the foil about halfway through the cooking process.
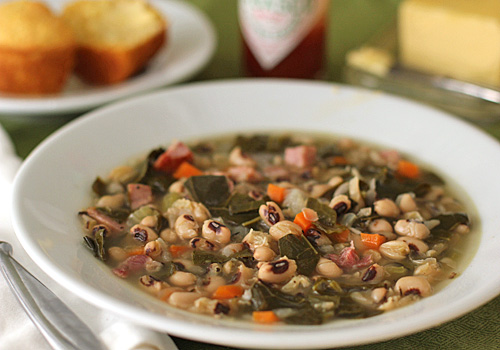
Black Eyed Peas and Collard Greens
If you are looking for a simple, delicious southern dish, nothing says “south” quite like black eyed peas and collard greens. Both plants are easy to grow in a home garden. Because collards grow to a large size, they are best grown outdoors. Depending on where you live, they can be planted in the late summer or early fall and harvested in the early winter.
Ingredients:
- 2 ½ cups of soup broth or stock. You can use anything you have onhand to make the broth, including mixed vegetable soup. It is best to prepare the soup a day or two before so that you have plenty of time to cook the rest of this recipe on Thanksgiving day.
- 1/4 small onion diced
- 2 ½ pounds of chopped collard leaves. Do not forget to remove the ribs
- 1 pound of pre-cooked black eyed peas. You can also use 15 ounce cans of black eyed peas, but be sure to drain off the liquid.
- 1 tbsp of white vinegar
- 1 tbsp red wine vinegar
- 1 tsp salt
- 1 tsp pepper
- 1 tsp garlic powder (optional)
Baking Temperature and Time: Boil then simmer for 7 to 10 minutes.
Preparation:
- Start off by bringing the soup stock (1 ½ cups) to a boil along with the diced onion, pepper, salt, and garlic. Add the collards in small bunches. Before adding the next bunch, the collards in the pot should just begin to wilt.
- Once all the collards are in the pot, reduce heat, cover the pot, and let cook until the collards are tender. This should occur in about 7 minutes.
- While the collards are cooking, place the black eyed peas in a sauce pan with the remaining cup of soup stock. Bring this mixture to a boil, and then let simmer for about 8 – 10 minutes. Stir in some salt and pepper, and then drain out the liquid from the black eyed peas. Pour the peas into the collard greens, and season lightly with the vinegar mixture.
Cauliflower Gratin
There is no such thing as a Thanksgiving meal that is complete without something that has the creamy, delicious taste of cheese.
While this recipe may be a bit more expensive depending on the cheeses that you choose, it is also a very tasty addition to any Thanksgiving meal. If you can get whole milk from sheep or goats, it may also be possible to adapt this recipe to use with cheeses from those sources. Just because these efforts cannot be completed in time for this Thanksgiving, that doesn’t mean you can’t consider them earlier on for next year or in the future. Insofar as the cauliflower, it is best grown at home and in indoor containers.
Old Days. Old Ways. But The Food Never Tasted Better.
As with the turnips, cauliflower also does well in cooler temperatures. While it will grow a bit slower indoors, you can get a good sized head of cauliflower under these conditions.
Ingredients:

- 1 large head of cauliflower florets. If you cannot get fresh cauliflower, frozen florets are about 1/3 cheaper and will work just as well. Use 1 ten ounce bag.
- 3 tbsp flour
- 4 tbsp margarine
- 2 cups of milk. Coconut milk will also work well for this recipe. If you go with coconut milk, you can also consume the coconut meat and have another inexpensive side for your Thanksgiving meal.
- 1 tsp black pepper
- 1 tsp salt
- ¼ teaspoon of nutmeg
- ¼ cup bread crumbs
- ¾ of grated swiss and cheddar combined, or Guryere cheese
- ½ cup parmesan cheese or feta cheese grated
Baking Temperature and Time: 375 degrees for 30 minutes.
Preparation:
- Start off by boiling the cauliflower florets until they are tender but firm. Drain out the water and set the cauliflower aside.
- Melt the margarine in a saucepan. Pour half the margarine out of the pan and set it aside for later use. Combine the remaining margarine in the pan with flour. Stir for about two minutes and then add the milk. Stir constantly until the mix comes to a boil. Do not stop stirring or it will devolve into a lumpy mess! The mixture should be thickened, but still fluid enough to pour similar to maple syrup or, at most, molasses.
- Remove this mixture from the heat and add in the parmesan cheese and ½ cup of the swiss/cheddar cheese.
- Pour this mixture into a baking dish (I recommend, and will always recommend Pyrex!)
- Next, pour in the cauliflower, and add the remainder of the cheese on top of that. Sprinkle the remaining margarine across the top of the cheese.
- Place in the oven and bake until the top appears brown.
Amish Bread
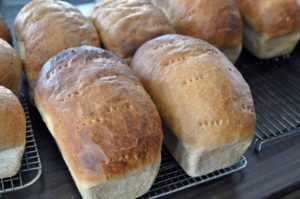
This is one of the simplest, most generous breads you can make.
A 5 pound bag of flour, a quart of vegetable oil, 4 pounds of sugar, and some yeast cost around 5.00 and will make about 2 rounds of this recipe. The recipe itself will yield about 12 rolls per 6 cups of flour or 4 – 5 8” bread loaves. Total preparation time is about 3 hours from ingredient gathering to final cooking.
Ingredients:
- 6 Cups Flour (preferably unbleached wheat)
- 2 cups of water
- 1 packet of yeast or 2 ¼ tablespoons of yeast from the jar
- ¼ to ½ cup of sugar
- 1 teaspoon salt (optional)
- 1/6 cup vegetable oil
- 1/6 cup of margarine melted or olive oil (depending on the flavor you are after. For sweeter breads, use the margarine. For something more robust, use olive oil. You can also use another 1/6 cup of vegetable oil if you don’t have margarine or some other suitable oil.
Baking Temperature and time: 350 degrees for 20 – 30 minutes or until golden brown

Best Form: Rolls.
Preparation:
- In a large bowl, dissolve sugar into hot water.
- Add yeast to the water when the water is cool enough to stick your finger in without feeling too hot or too cold.
- Let the yeast proof until you see foam on the surface of the water. Depending on the yeast that you purchase, it may proof in as little as 3 minutes or take up to 5 minutes. I always proof yeast regardless of whether it is required or not. There is no point to wasting 6 cups of flour plus oil and other ingredients on yeast that is sluggish or not sufficiently active to act as a leavening agent. If the yeast does not proof correctly, simply start over.
- Add one cup of flour and mix into the water, sugar, and yeast. Try to remove as many lumps as possible, but don’t be overly concerned about them.
- Add another cup of flour.
- Next add the oils and margarine. The margarine should be cool enough that you can stick your finger in it without feeling burning or other discomfort. Ideally, it should be just a little above room temperature. If the ingredients are too hot or too cold, it can kill the yeast or slow it down too much.
- Add another cup of flour and then the salt. Since salt is well known for killing micro organisms, I always prefer to have a good buffer of flour and oil before mixing it into the dough.
- Add the remaining three cups of flour one at a time. When you reach the last cup of flour, add just ½ in order to gage the moisture level of the dough. If it is too soft, go ahead and add the remaining half cup. You may also need to add an additional ¼ to ½ cup depending on the stickiness of the dough. The dough should not feel gloppy or stick excessively to your hands.
- Knead the dough until it is silky and smooth.
Once the dough is made, coat a large enough bowl with oil or cooled, melted margarine. Place the dough in the bowl, and then coat the top of the dough with oil or margarine. Put a clean towel over the dough and let it raise in a warm place for one hour.
After the first raising is complete, punch the dough down and arrange into rolls on a cookie sheet or into bread pans for loaves. You can also add sesame seeds or other bakeable toppings at this time. Cover again with a clean towel and let raise for another hour.
You can also put the dough in the refrigerator at this stage and leave it there for a maximum of 3 days. Just remember that the dough will not raise as well once it has been refrigerated. Not only will it take longer, but the point at which it takes on the appearance of over raising (the dough starts to fall in) will happen sooner.
Once the bread is raised for the second time, you can go ahead and bake it. Simply preheat the oven to 350 degrees and let it cook until the top is golden brown.
When the bread top is hard enough, you may also want to coat with milk or margarine for added flavor.
A Note About Game Recipes
Before cooking, you will still need to field dress the meat and prepare it for cooking.
Since game tends to be tougher, you will also need to “lard” the meat as well as marinate it overnight. Do not be overly concerned about how long these processes will take.
I have personally seen people take deer and other wild game the day before Thanksgiving and wind up with delicious, tender meat that easily rivaled any Butterball turkey purchased from the supermarket. The key to tender game is to prepare it correctly before cooking.
How to Lard Game Meat
If you aren’t sure how the fat from various game meats will taste, then you will be best served by using a known source of lard such as beef or pork. In a pinch, you can also use the fattiest bacon you can find. Depending on your sense of taste, you can also pre-marinate the lard in red wine from the night before. This will add a delicious taste to almost any meat at a fairly low cost. The basic steps for larding are as follows:
- Start off by removing as much fat as possible from the meat you are planning to cook.
- Take the lard you are planning to use and cut it into thin triangles about ½ to 1 inch long. Set these lard triangles in the freezer until they are hard.
- When you are ready to cook the meat, cut slits into it and insert one piece of lard every 1 – 2 inches. Be sure to insert the lard pointy end first so that it will get as far into the meat as possible.
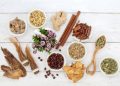
Marinading Game Meat
When it comes to families that have been hunting for generations, you are likely to find that the marinade recipes are jealously guarded. Nevertheless, if you do some research, you will find many marinades for different game. No matter whether you are roasting venison or preparing squirrel for stew, it is important to pick an appropriate marinade.
Aside from creating a delicious and memorable taste, spiced marinades using Rosemary and other herbs can help make the meat tender and may even help kill off various pathogens.
For each of the remaining 4 recipes, you can use any marinade that appeals to you.
Brunswick Stew
In a sense, Brunswick Stew is as much a part of traditional US pioneer culture roasted squash and apple pie.
 Depending on where you live and what is available, the ingredients for Brunswick stew can vary considerably. For example, if you have access to woods or other natural setting filled with wild game, you might want to see if you can get opossum and rabbit to go along with some duck or venison. Interestingly enough, even if you live in a city setting, you can more than likely get squirrels and pigeons to add to your stew.
Just remember not to take animals that have leg bands or other markers on them that identify them as being studied by some group or agency. You may also need to make some inquiries about how and when you can take pigeons and squirrels and whether or not you need a permit.
This particular recipe utilizes duck/poultry, squirrel, and rabbit. All should be easy enough to obtain during the fall months across most of the United States. If you live in a desert area, then you can always substitute snake or any other game that has edible meat.
Ingredients:
- 1 to 4 pounds of duck or some other form of poultry. If doves or pigeons are available, the breast meat will be about the best on the animal. The amount of poultry you need will depend on the number of people you are planning to feed.
- 2 pounds of squirrel meat
- 2 pounds of rabbit meat
- 1 to 1 ½ cups beans. You can use kidney beans, lima beans, white beans, black eyed peas, or even a 16 bean dry soup mix
- 4 whole, peeled plum tomatoes or a can of pre-cooked tomatoes
- 3 cups corn kernels
- 1 cup red wine
- 4 tbsp tomato ketchup
- 2 cups diced onion
- 2 cloves garlic
- 1 tbsp chili powder
- 1 tbsp cayenne pepper
- 1 tsp hot sauce
- 1 tsp salt
- 1 tsp black pepper
Baking Temperature and Time: boil to simmer for several hours. Makes about 8 servings.
Preparation:
- Start off by cubing the poultry and prepare it for cooking. Depending on the game type, you can skip the cubing step, remove the extra fat, and put the whole carcass into the pot. Cover the meat thoroughly with water. You may also want to add a cup of soup stock for added flavor. Bring the water to a boil, and then let the meat simmer until it is soft and tender. Depending on whether or not you marinaded it the night before and the type of meat used, this can take anywhere from 1 to several hours. Once the poultry is tender and falls apart easily, remove it from the water and chop finely.
- Next, take the rabbit and squirrel meat and place in a dutch oven. If the meat doesn’t have much fat on it, add about 1 tbsp of vegetable oil. Add 1 cup of onions, garlic, chili powder, cayenne pepper, salt, and other seasonings. Stirring the mix while the meat browns. The meat should be cooked approximately halfway before you add the poultry to the ingredients in the dutch oven.
- Make sure the beans are fully cooked, and then add them along with the tomato, ketchup, corn, wine, and hot sauce. Let this mixture simmer for about 1 ½ hours in the dutch oven.
- Finally, add the remaining onions, and garlic. It will take about another 30 minutes on simmer for the stew to be done cooking.
Poached Dove, Quail, or Pigeon in Red Wine
Ingredients:
- 8 doves, pigeons or quail
- 3 cups of soup stock or beef broth
- ½ cup of vegetable oil
- ½ cup red wine
- 2 tsp soy sauce
- 1 tsp hot sauce
- ½ tsp salt
Baking Temperature and Time: simmer for 1 – 2 hours.
Preparation:
- Start off by dressing the poultry and dividing the breasts. Do not remove the breast bone at this stage.
- Bring the soup stock to a boil, and then remove from heat.
- Drop the breasts into the soup stock and let sit for no more than 10 minutes.
- Take a frying pan and add a few tablespoons of vegetable oil. Brown the dove breasts as evenly as possible.
- Add the wine, oil, hot sauce, seasoning, and soy sauce to the frying pan. Simmer on low for 1 to 2 hours or until the meat falls off the bone. Do not allow the temperature to go above a simmer.
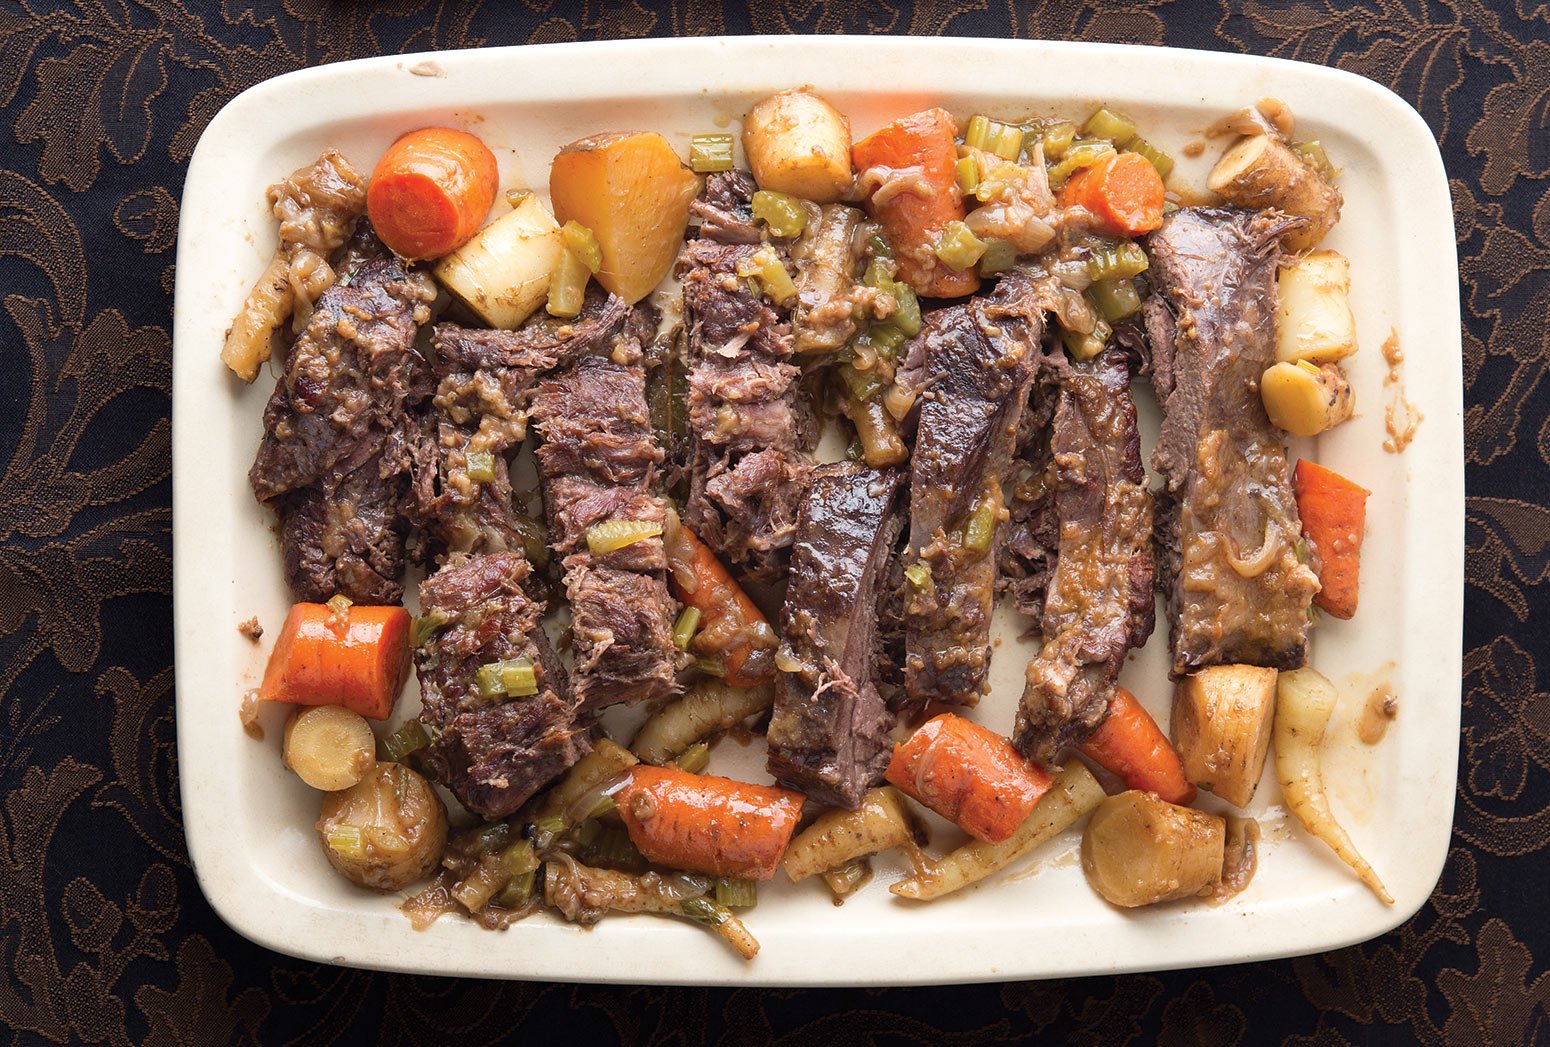
Roast Venison
As with game marinades, you will find that Roast Venison recipes are also jealously guarded. Here is a basic recipe that you can adapt for your needs and then pass the results along to future generations.
 Ingredients:
- 5 pounds of venison. Most people use the leg, however you can also use other parts of the animal.
- 3 garlic cloves
- 1 cup red wine
- Enough larding to insert every two inches into the meat
- Seasonings including rosemary, thyme, salt, and pepper.
- Vegetable oil (enough to coat the venison)
Baking Temperature and Time: 325 degrees. If you want the meat rare, cook for about 15 – 20 minutes per pound. For medium rare, bake for about 20 – 25 minutes, and 30 minutes for well done.
Preparation:
- Start off larding the meat. While you are inserting the lard, insert half a clove of garlic evenly around the meat.
- Gently coat the surface of the meat with vegetable oil. Sprinkle salt, pepper, and thyme, and rosemary onto the surface of the meat.
- Next, put a little bit of oil in the bottom of the baking pan. Add some more salt and seasoning into the oil.
- Place the venison into the pan and then pour the wine over the venison.
- Cover the pan with aluminum foil, and then remove halfway through cooking. This way, if the meat needs to cook longer to reach a 145 (minimum) – 165 degree internal temperature, you will not wind up with a burnt exterior.
- Do not forget to baste the venison about every 7 – 10 minutes while it is roasting.
BBQ Shellfish or Fish
If you happen to be in a coastal area or near a stream, lake, or river, then fish or shellfish may be easier to obtain. While there are many ways to prepare these foods, you may want to give BBQ a try on Thanksgiving. Not only will you be able to make the most of natural cooking resources, it is sure to take delicious and be enjoyed by anyone that loves just about anything that comes off a BBQ grill.
Ingredients:
- 2 pounds of shrimp or fish, or 4 – 6 lobster tails
- ½ cup vegetable oil (use margarine for salmon or other fish that would benefit from a buttery flavor)
- ½ cup lemon juice
- ¼ cup soy sauce or 1 tsp turmeric
- 2 tbsp chopped onion
- 1 clove of crushed garlic
- Pineapple, fruit, or other vegetables for kabobs and skewered meat.
Baking Temperature and Time: BBQ for 3 – 4 minutes or until done.
Preparation:
- Start off by placing the meat in a marinade of lemon juice, oil, soy sauce, onion, and garlic. Be sure to devein shrimp as well as cut fish into thin strips before placing them in the marinade. If you are planning on making kabobs, then cut the fish into cubes instead.
- Let the meat sit in the marinade for about 3 hours while under refrigeration. Stir the meat occasionally so that all surfaces have a chance to absorb the flavors.
- Remove the meat from the marinade and discard the solution.
- For shrimp, place on skewers and BBQ over hot coals until done. You can add chunks of pineapple or other fruits/ vegetables depending on what is available. If you are making BBQ fish, take the strips and drop them into a wire basket before placing on the hot coals. Depending on the meat source, it may be cooked in as little as 3 – 4 minutes per side.
When people think of prepping, they often think of consuming insects or other food that are either incredibly drab or only used as a last resort.
On the other side of the equation, the founding fathers of our nation and the native people to this land had an amazing number of delicious foods available from natural resources. If you know where to look and how to find these foods, you will find yourself wondering how anyone can stand drab supermarket foods, especially on a holiday like Thanksgiving.
As you look over this list, you may want to tuck at least some of the recipes away for next year and see how much they bring to your holiday.
In closing, my husband and I wish you all a Happy and Blessed Thanksgiving. We look forward to hearing about any recipes you may wish to share as well as your experiences with these and similar recipes.


Margarine ? hydrogenated margarine? why would anyone use or buy that? other than that the recipes sound wonderful. Cocunut oil olive oil ,palm oil ,lard or butter those are the choices.
Hi
I’m hungry now !!
I don’t have any maple trees nearby.
Could I use birch /Acetomel